Before your organisation can use EmpowerHR's staff absence calendar, you need to perform the following setup tasks:
Add screen to template 
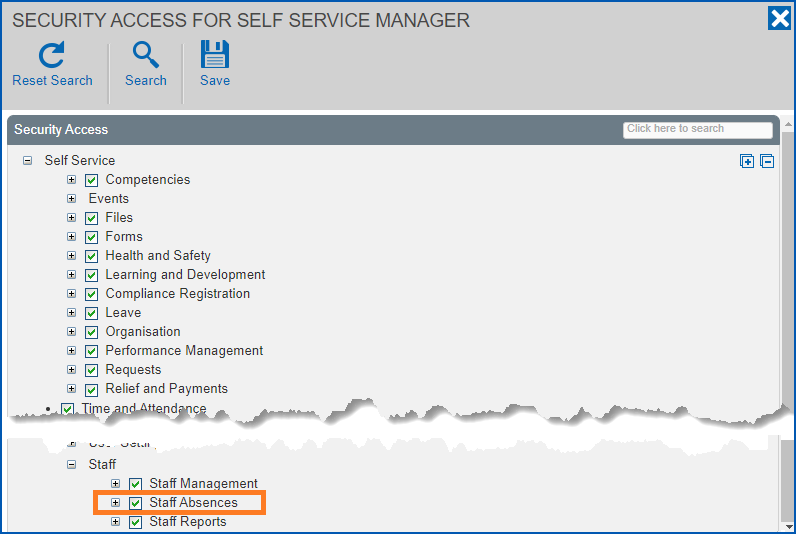
You need to add the following screen to the relevant template in self service:
- Staff Absences
If you're not sure how to do this, see create and update self service templates, and here's the Staff Absences screen's location in the security access settings:
Set installation setting
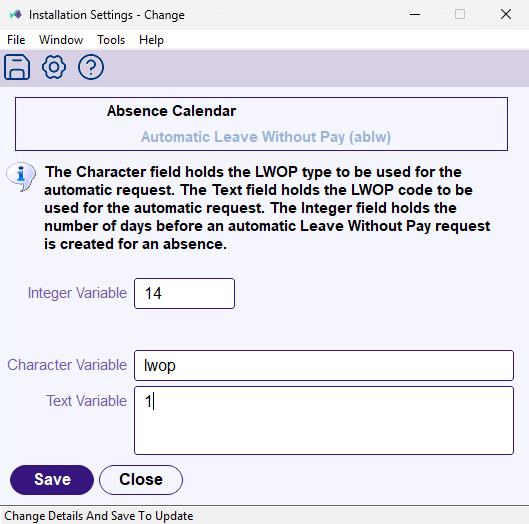
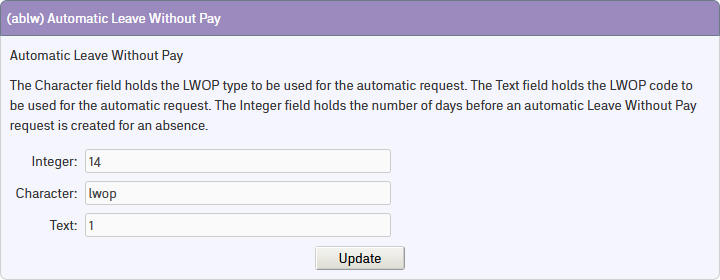
The installation setting called (ablw) automatic leave without pay is where you nominate how long before EmpowerHR creates a LWOP  request for an absence, and where you set the leave type and code to use for the request. You can set it in desktop or in self service.
LWOP = leave without pay
- In desktop , go to Administration > Agency Management > Installation Settings. Find ablw in the Type column, and then double-click the row to open the Installation Settings – Change window.
- In self service , go to Administration > Configuration > All Configuration. Expand Self Service > Absence Calendar, and then click (ablw) Automatic Leave Without Pay.
If you need help on how to find the ablw setting, see installation settings.
On the setting, update the fields using the following examples and table as a guide.

|
Installation setting in desktop |
|
|
Installation setting in self service |
| At this field... | Do this... |
|---|---|
Integer | Enter the number of days you want to nominate before EmpowerHR automatically creates and submits a LWOP request on the employee's behalf. |
| Character | Enter the leave type, LWOP. EmpowerHR uses this when creating and submitting a leave request. |
| Text | Enter the leave type code to use for the automatic request, for example, 1 |
Set installation option
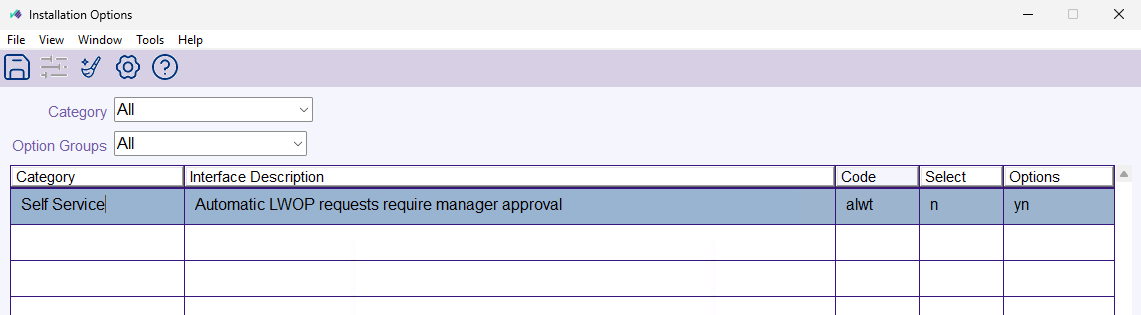
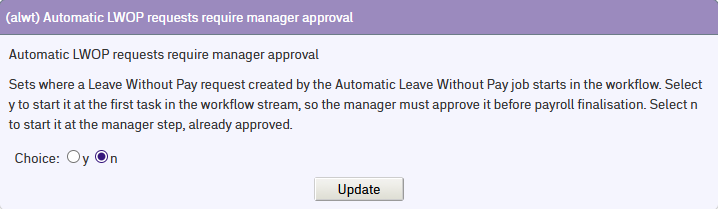
request created by the automatic leave without pay job goes to the employee's manager for approval first. You can set it in desktop or in self service.LWOP = leave without pay
- In desktop , go to Administration > Agency Management > Installation Options. Find alwt in the Code column.
- In self service , go to Administration > Configuration > All Configuration. Expand Self Service > Leave, and then click (alwt) Automatic LWOP requests require manager approval.
Select an option using the following examples and table as a guide.
|
|
Installation option in desktop |
|
|
Installation option in self service |
| Select... | To... |
|---|---|
y | Send the request to the employee's manager at the first step in the workflow. The manager can then approve it, or reject it and follow up the missing leave request. |
| n | Send the request to the next approver after the manager, as if the manager had raised it. This is the default. |
Set up absence leave reminders
So employees can receive an automatic reminder to submit a leave request, you need to set up the absence leave reminder (zalr).
To set up the absence leave reminder:
- Go to Administration > Auto Event Definition.
- At the Auto Event Definition summary screen, click New.
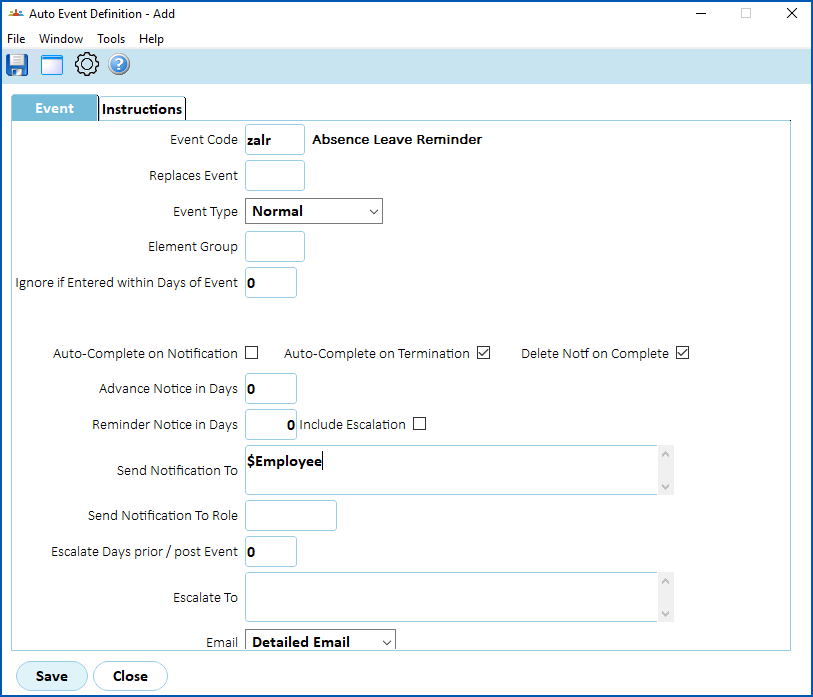
- At the Auto Event Definition detail screen, on the Event tab, complete the fields using the following table as a guide.
| At this field... | Do this... |
|---|---|
| Event Code | Enter zalr and then press Tab. EmpowerHR displays the event description, Absence Leave Reminder. |
| Event Type | Nothing. Keep the default selection of Normal. |
| Auto-Complete on Termination | Select this checkbox so that when an employee leaves your organisation and EmpowerHR's termination process is run, the system automatically completes the employee's uncompleted events. |
| Delete Notf on Complete | Select this checkbox to delete the notification once the event is complete (that is, the employee has created and submitted the leave request). |
Send Notification To | Enter the symbolic name: $Employee; This symbolic name recognises the email address held in the employee record. |
| Email | Select Detailed Email from the dropdown list. |
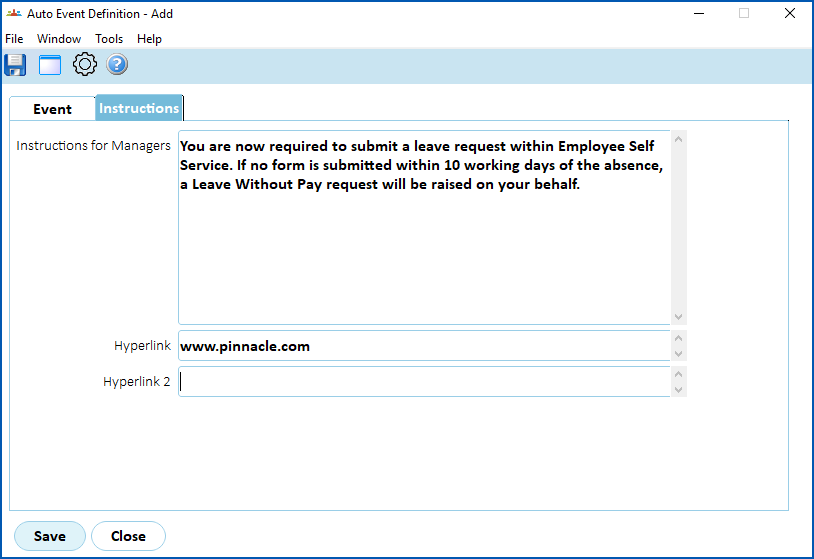
- Click the Instructions tab, and then enter:
- Instructions for Managers
- a Hyperlink to self service, if you wish
For example:
- Click Save.
|
Example of absence leave reminder | When the auto event processing job runs, EmpowerHR sends a reminder to any employee who is marked as absent and has not submitted a leave request. The wording shown in the second paragraph below is just an example. When setting up the reminder, you can enter the wording you prefer on the Instructions tab. 08/03/2024 A leave request for your absence on 08/03/2024 at Mountain Heights School has not yet been submitted, Eliza Chan (000090). You are now required to submit a leave request within Employee Self Service. If no form is submitted within 10 working days of the absence, a Leave Without Pay request will be raised on your behalf. |
Schedule background jobs
When you schedule the following background jobs, we recommend you schedule them to run each day and at a time that best suits your organisation.
- Auto event processing - schedules the absence reminder event
- Automatic leave without pay - creates the LWOP request after the nominated time period
|
|
The automatic leave without pay job:
For assistance or more information, let us know by logging an iHelp request. |
Schedule auto event processing job
|
|
If this background job is already scheduled (e.g. for other auto events), you can skip the following procedure. |
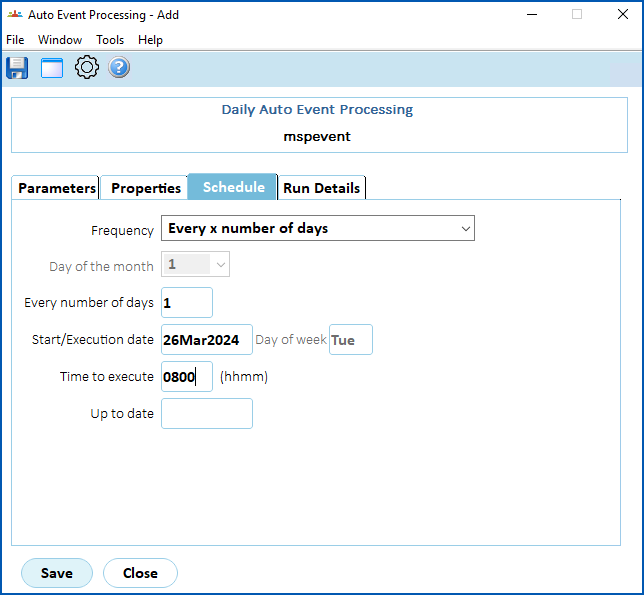
To schedule the daily auto event processing job:
- Go to Background Jobs > Daily Processing > Auto Event Processing.
- At the Auto Event Processing screen, click the Schedule tab.
- Complete the fields to suit your organisation's needs. Here's an example:
- Click Save.
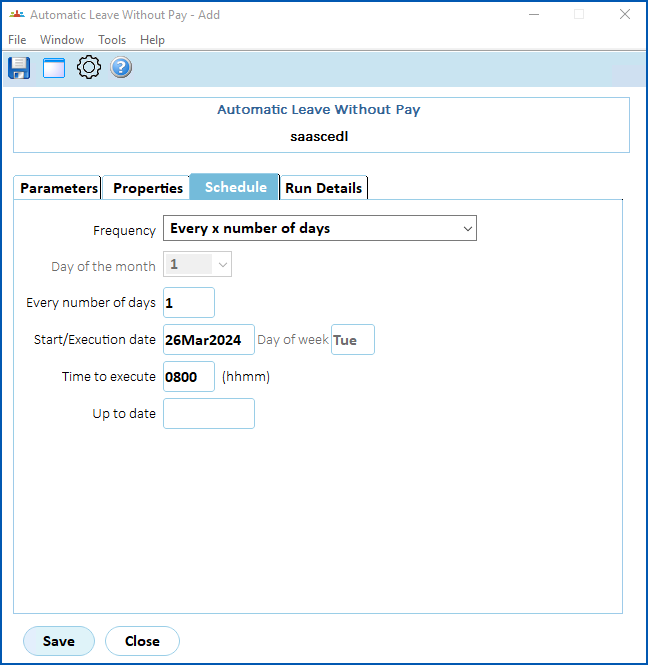
Schedule automatic leave without pay job
To schedule the automatic leave without pay job:
- Go to Background Jobs > Daily Processing > Automatic Leave Without Pay.
- At the Automatic Leave Without Pay screen, click the Schedule tab.
- Complete the fields to suit your organisation's needs. Here's an example:
- Click Save.
© 2023 Fusion5. All rights reserved.