Installation settings in the desktop
To set an installation setting in the desktop:
- Go to Administration > Agency Management > Installation Settings.
- At the Installation Settings summary screen, to narrow the list of options, apply one or more of the following filters:
- select a Category, for example, Empower Desktop, and/or
- select an Option Group, for example, Leave
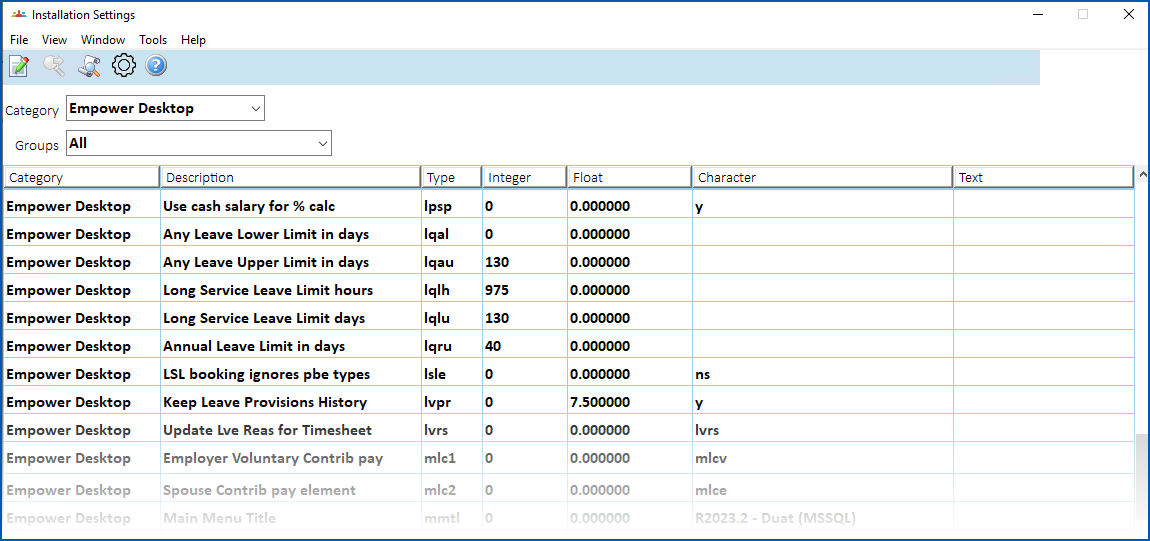
- Find the installation setting you want to work on. (See the following Tips for help.)
- Click Open.
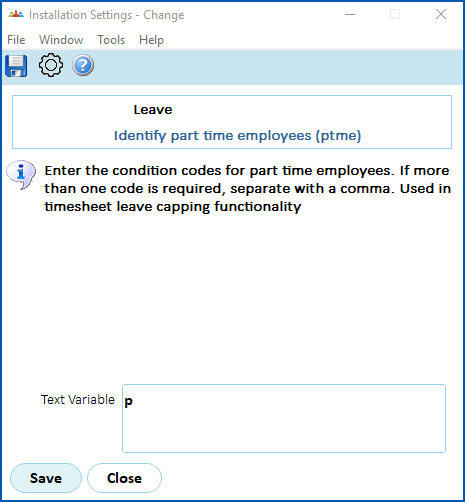
- At the Installation Settings detail screen, enter the required settings. In the following example, we've entered the part-time employment condition code (p) in the Text Variable field. (See the following Tips for help.)
- Click Save.
Tips
| Finding an installation setting |
Each installation setting has a four-character Type code. If you know the type code for the installation setting you want to set (for example, ptme), sorting the list by the type code makes it easier to find:
|
| Setting the installation setting | Each installation setting has its own distinct set of variables that you can enter. Some settings are a simple y (yes) / n (no) choice. Other settings require more entries. To guide you, the Installation Settings detail screen displays instructions on how to complete the fields for the particular installation setting. For example:
We also describe the settings in the relevant topics throughout this User Guide, providing the context for their use. |

Installation settings in self service
In self service, configuration items are equivalent to installation settings and options in desktop. When you change a setting in one environment, EmpowerHR automatically updates the equivalent setting in the other environment. In this topic, we explain how to set a configuration item in self service.
To set a configuration item (installation setting) in Self Service:
- Go to Administration > Configuration > All Configuration.
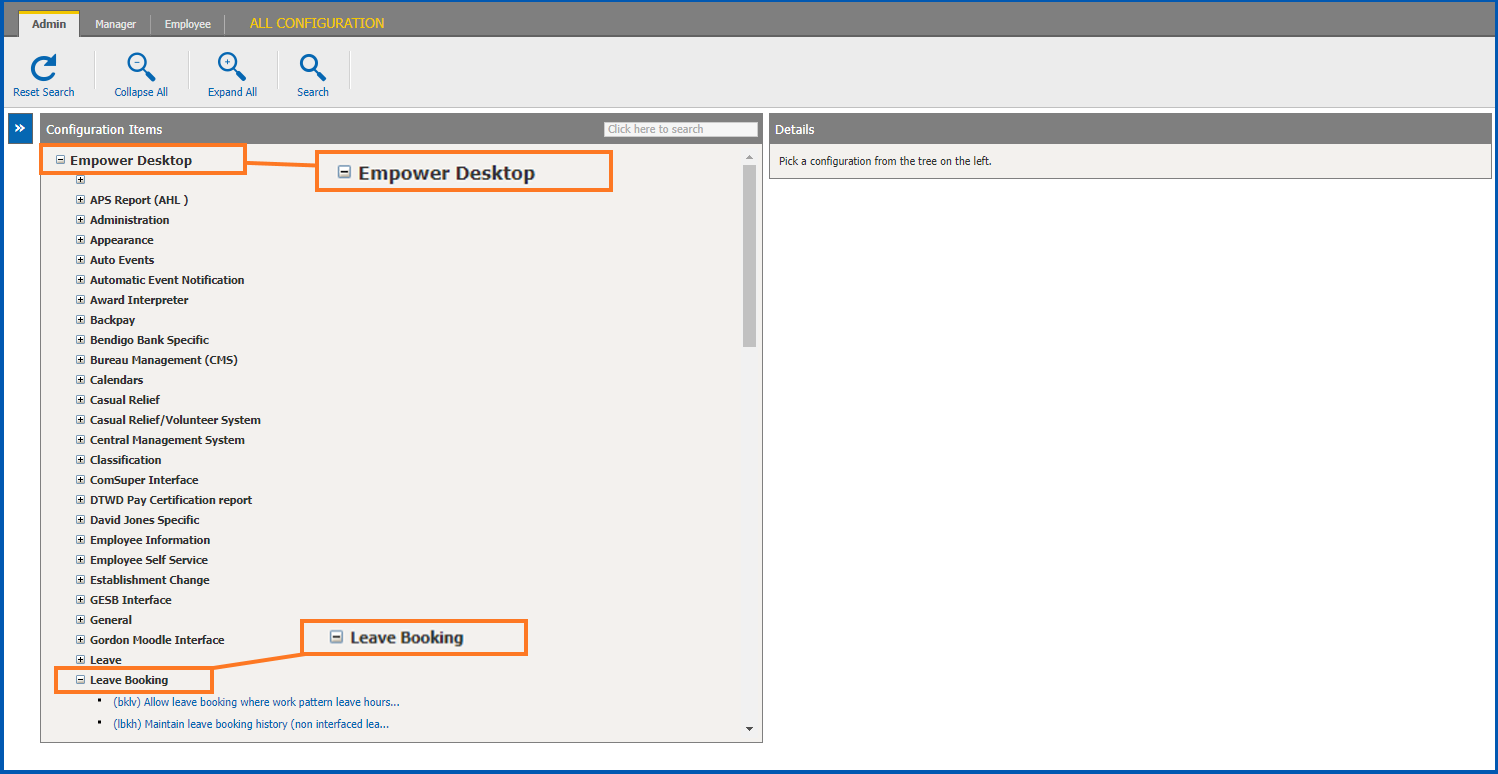
- At Configuration Items, find the installation setting you want to work on using either of the following methods:
- Expand the lists containing the installation setting. In the following example, we expanded the Empower Desktop list, and then the Leave Bookings list.
- Alternatively, search for the installation setting. (See the following Tips for help.)
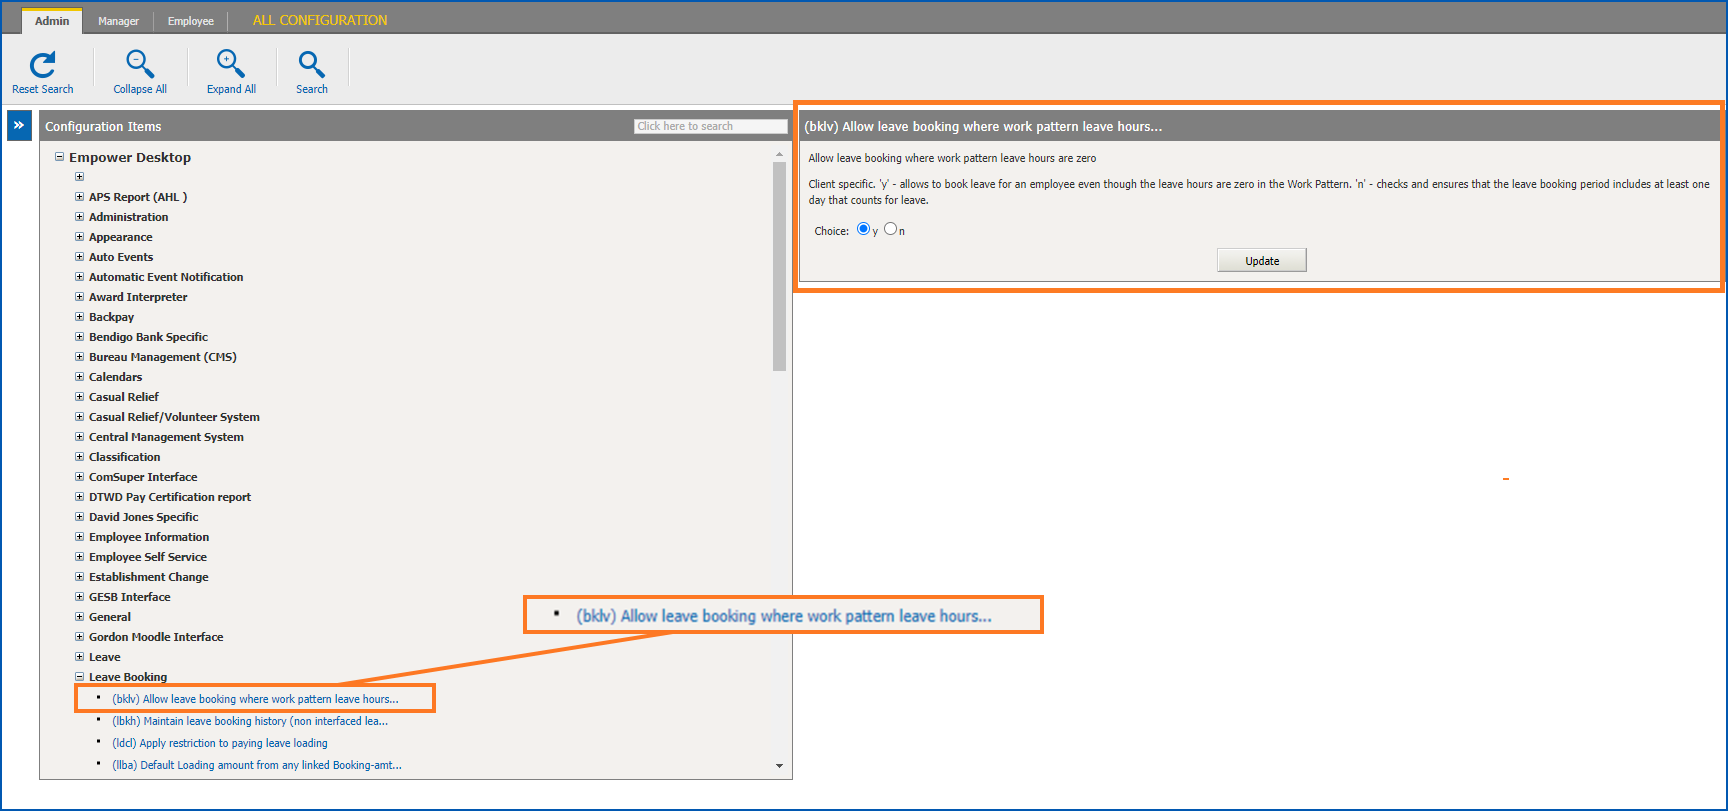
- Click the installation setting you want to work on. A description and instructions about what to do with the setting display on the right of the screen. In the following example, we selected the installation setting called (bklv) Allow leave bookings where work patter leave hours are zero. The available choices are y (yes) and n (no). (See the following Tips for help.)
- Click Update.
Tips
| Finding an installation setting |
You can search for an installation setting. Make sure you have the right Configuration Items list expanded first so, if you search by the installation setting's code, you'll find the correct item (there are some installation settings that have the same code, for example, lrlr). Choose either of the following ways to search:
The installation settings that meet your search criteria are highlighted. In this example, we searched for the setting code, bklv, resulting in EmpowerHR finding and highlighting one setting.
|
| Setting the installation setting | Each installation setting has its own distinct set of choices to select from. Some settings are a simple y (yes) / n (no) choice, some offer several choices, while others have a field for you to make a valid entry. To guide you, the Configuration Items screen displays descriptions of the available choices for the particular installation setting. For example, the description for this setting explains the three available choices:
We also refer to the settings in the relevant topics throughout this User Guide, providing the context for their use. |


© 2023 Fusion5. All rights reserved.