Set an installation option in Desktop
To set an installation option in Desktop:
- Go to Administration > Agency Management > Installation Options.
- At the Installation Options summary screen, to narrow the list of options, apply one or more of the following filters:
- select a Category, for example, Empower Desktop, and/or
- select an Option Group, for example, Leave
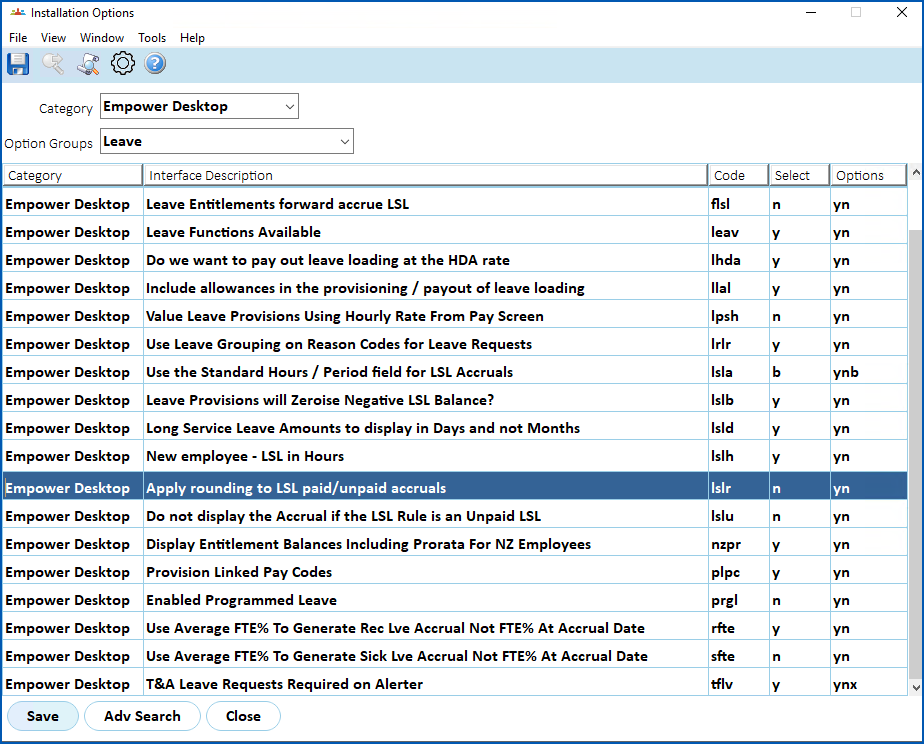
- Find the option you want to set. (See the following Tips for help.)
- In the Select column, enter your selection. You'll see the available selections in the Options column. (See the following Tips for help.)
- Click Save.
Set an installation option in Self Service
You can set the same options in Self Service. Both platforms change the same option.
- Go to Administration > Configuration > All Configuration.
- Select an option group, for example, Self Service > Leave.
- Select the option. Its description and settings appear on the right.
- At Choice, select the setting.
- Click Update.
Tips
| Finding an installation option |
Each installation option has a four-character code, for example, lrlr. In Desktop, click the Code column heading to sort the list alphabetically. Click it again to reverse the order. In Self Service, type the code in the search box above the Configuration Items list. |
| Setting the installation option | In Desktop, enter a valid setting in the Select column. The Options column shows the settings to choose from. In Self Service, select a setting at Choice, then click Update. We also describe the settings in the relevant topics throughout this User Guide, providing the context for their use. |
© 2023 Fusion5. All rights reserved.