Relief and payments workflow
The rpas (relief, payments and absence) workflow automates the request approval process. (For more information about workflows in general, see design workflow.)
To complete the setup of the rpas workflow, you need to define the:
- workflow tasks to enable different workflow streams for the payment categories. See define workflow tasks to learn how.
- workflow elements for each payment category (Element 1, or Element 2 if the workflow uses an extra approval step for the executive classification). See the following instructions.

|
If you want to view the executive classifications, see the installation setting called rps4. |
Define workflow elements
To define a workflow element:
- Go to Administration > Workflow > Workflow Elements.
- At the Workflow Elements summary screen, click Find Now to see a list of existing elements.
- Click New.
- At the Workflow Elements detail screen, in the Workflow ID field, enter rpas.
- Press Tab. The Payment Category field displays.
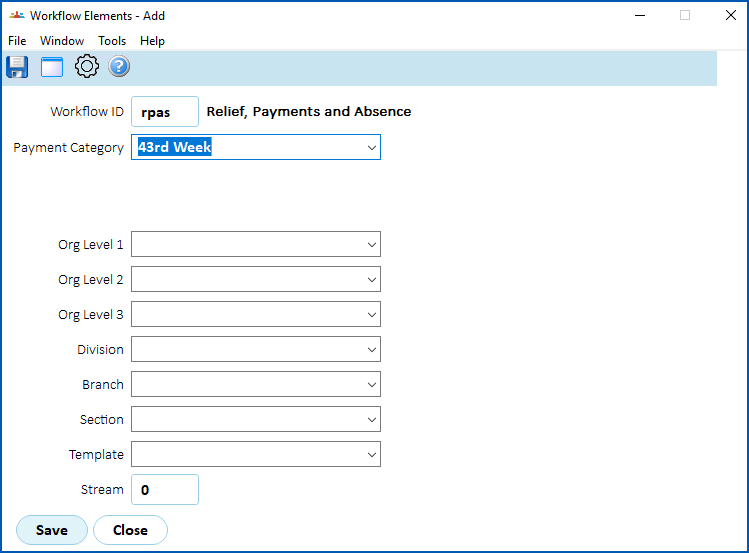
- Select an option from the Payment Category dropdown list.
- Complete the fields using the following table as a guide.
| At this field... | Do this... |
|---|---|
Org Level 1 Org Level 2 Org Level 3 Division Branch Section | You can restrict the workflow to organisational levels of your company by making selections from the dropdown lists in any of these six organisational fields, or by making a selection from the Template dropdown list. |
Template | |
Stream | If the workflow has multiple streams, enter the stream number, for example enter 1. Otherwise, leave the default of 0. |
- Click Save.
- Repeat this procedure, starting with step 3, until you've created all the workflow elements you need.
© 2023 Fusion5. All rights reserved.