About expiry notification periods
The following table shows the common types of expiry notifications and how often they’re sent. They can vary depending on how you:
- set up role codes (and assigned people to them) when you set up the workflow (see design workflow for instructions)
- set expiry notifications - this topic shows you how
Type of expiry notification | Which registration types do the notifications apply to? | How many days before the expiry date are notifications sent? |
|---|---|---|
Staff members: receive an alert in ESS ESS = Employee Self Service |
| 90 days 42 days 7 days 3 days |
Principal/manager: receives an alert/notification in MSS MSS = Manager Self Service |
| 42 days 7 days 3 days |
Child Protection Manager: receives an email about registration expiry |
| 42 days 7 days 3 days |
An alert or notification is sent to: Principal, Manager or Delegate and Child Protection Manager if a registration expires, or is suspended, or is revoked |
|
Set expiry notifications (auto events)
Here's what's needed for expiry notifications to work:
- Event codes need to be set up. EmpowerHR does this for you by automatically adding the event codes when you upgrade the system and you can view these any time.
- You need to set up auto events and auto event definitions.
You can then set the events to run through Auto Event Processing on, for example, a daily basis as a recurring job - in the same way as other types of events run.
View event codes
When you upgrade EmpowerHR, the system automatically adds an event code for each notification.
If you want to view the event codes:
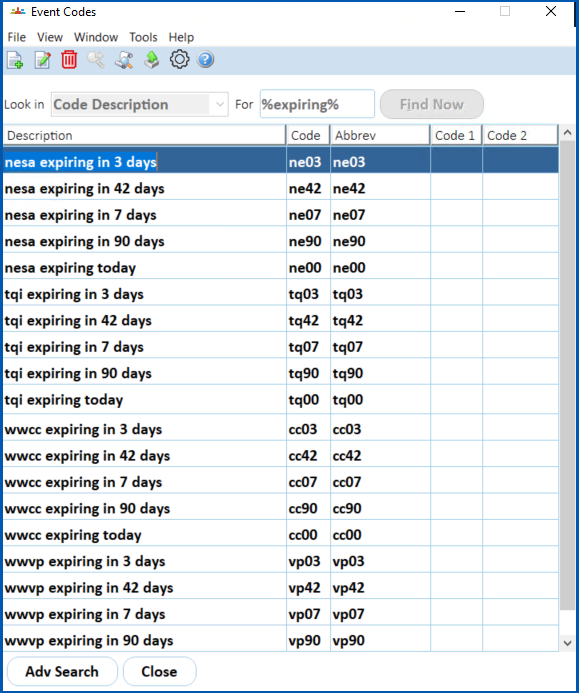
- Go to Control Tables > Events > Event Codes.
- Search for the codes. In the following example, we searched for all Code Descriptions containing %expiring%
In this example, EmpowerHR searches for all code descriptions containing the word expiring with any number of characters before and after it because % (wildcards) are included in the search criteria.
Set up auto events
To set up auto events:
- Go to Administration > Automatic Event Management > Auto Events.
- At the Auto Events summary screen, click Find Now to see a list of existing auto events codes.
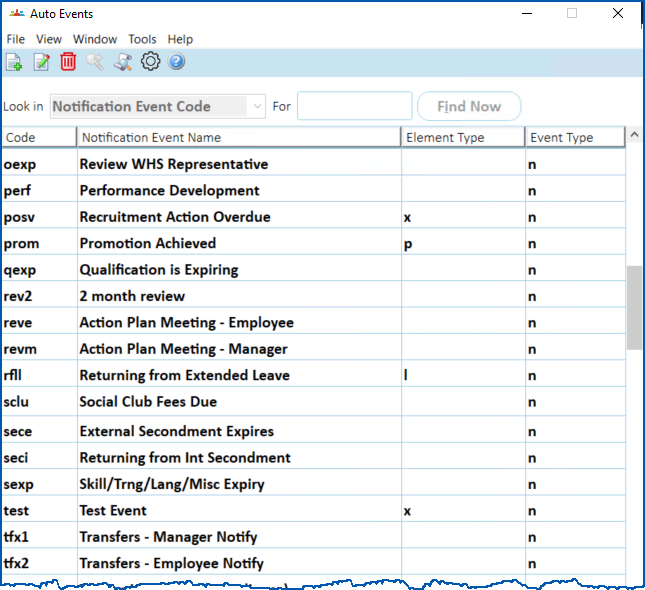
- Click New to create a new auto event.
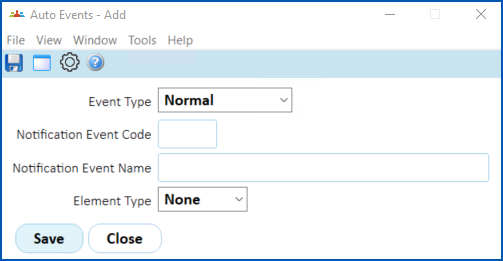
- At the Auto Events detail screen, complete the fields using the following table as a guide.
| At this field... | Do this... |
|---|---|
Event Type | Nothing. Keep the default selection of Normal. |
Notification Event Code | Click Window to list the available codes based on the Event Type you selected. Find and double-click the notification event code to add it to the field. |
Notification Event Name | Enter a name for the notification event. |
Element Type | Nothing. Keep the default selection of None. |
- Click Save.
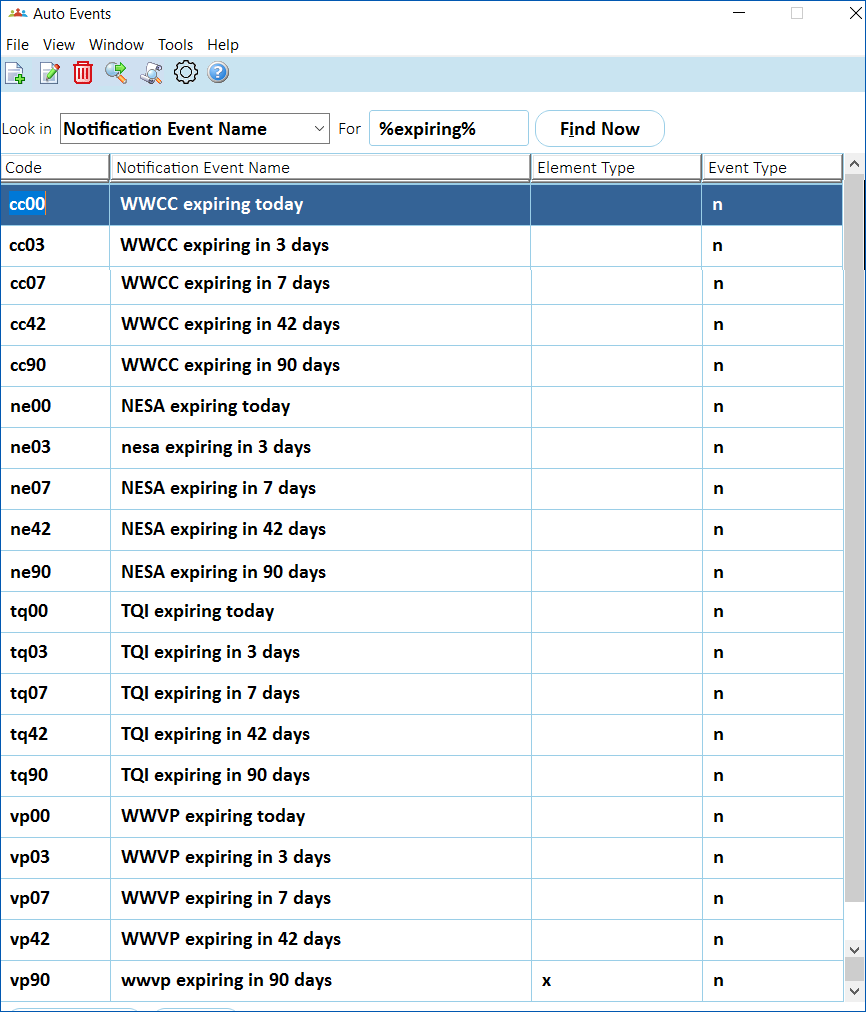
- Repeat this procedure, starting at step 3, until you've added all the auto event codes you need. Here’s an example:
Set up auto event definitions
Once the auto event codes are set up, you define how you want each event to behave.
To set up an auto event definition:
- Go to Administration > Automatic Event Management > Auto Event Definition.
- At the Auto Event Definition summary screen, click Find Now to see a list of existing auto event definitions.
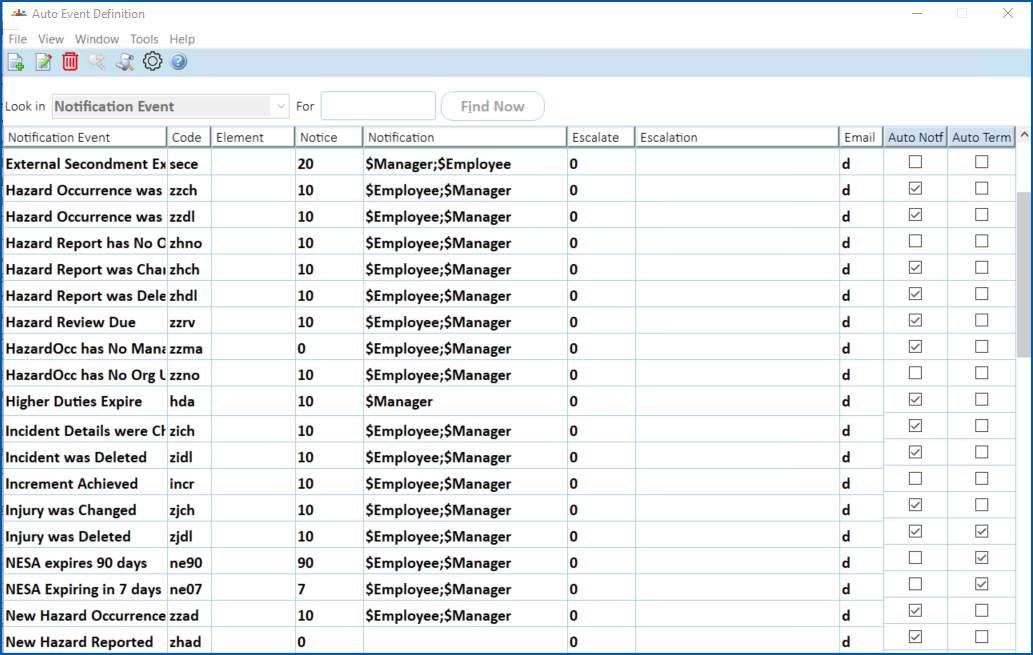
- Click New to create a new auto event definition.
- At the Auto Event Definition detail screen, complete the fields using the following table as a guide.
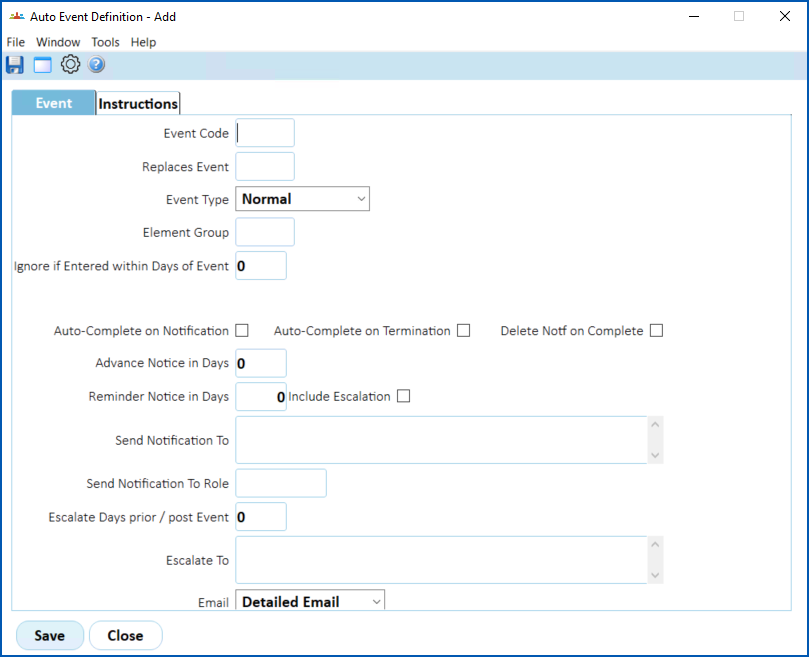
| At this field... | Do this... |
|---|---|
Event Code | Click Window to list the available event codes, find and double-click the code to add it the field. |
Replaces Event | Click Window to list the available event codes, find and double-click the code to add it the field. You use this field for the next interval at which a new notification type will come into effect. For instance, when the 42 day window lapses, the 90 day notifications should retire and 42 day notifications should start. Therefore, for 90 day notifications, you'd select the 42 day event in the Replaces Event field. |
Event Type | Nothing. EmpowerHR populates this field based on the Event Code you selected. |
| Ignore if Entered within Days of Event | Enter the same number of days as the number of the auto event's reminder days. |
Auto-Complete on Notification | Select this checkbox if you want recipients to receive a notification as a one-off, and no more. Otherwise, leave this checkbox unselected if you want notifications to continue until completion. |
Auto-Complete on Termination | Select this checkbox if you want to stop notifications when the employee terminates (and the event will be auto completed at the current termination process date). Otherwise, leave this checkbox unselected. |
Delete Notif on Complete | Select this checkbox if you want to remove the event from Self Service once it has been completed. Otherwise, leave this checkbox unselected. |
Advance Notice in Days | Enter the number of days before you want to start sending notices. Otherwise, leave this field blank. |
Reminder Notice in Days | If you want to send additional reminder notices, enter the number of days. For example, enter 7 to send weekly reminders for a 42 day notification event. Otherwise, leave this field blank. |
| Include Escalation | Select this checkbox if the number of Reminder Notice in Days includes escalation. |
| Send Notification To | Enter email symbolic  names you want notices to go to. For example, $Employee;$SectMgr Symbolic names are variables characterised by a leading $ (dollar sign). Eligible symbolic names include $Manager (the employee's Reports To manager), $SectMgr, $DivnMgr, etc. Using symbolic names instead of actual individual email addresses makes it easier to maintain who notifications are sent to - particularly with personnel movements. |
| Send Notification to Role | Click Window to list the available role codes, find and double-click the code to add it the field. |
| Escalate Days prior/post Event | Enter the number of days before the event is escalated. |
| Escalate To | Enter email symbolic names you want to escalate a request to. For example, $Manager |
| Email | Select an email option from the dropdown list. |
- Click the Instructions tab.
- At Instructions for Managers, enter the text (instructions) you want to attach to the event.
- Click Save.
- Repeat this procedure, starting at step 3, until you've added all the auto event definitions you need.
Case studies: using notification options
Auto-Complete on Notification | Jared’s WWVP registration is due to expire on 31 December. Three months before 31 December, an event is triggered and Jared receives an email notification. The event then automatically closes and Jared receives no more emails. Otherwise, he’d continue to receive emails until he renewed his registration. However, if the event is about registration which is due in 2 weeks, it makes sense for Jared to keep getting reminders until he actually renews it. |
Auto-Complete on Termination | Ruby receives notifications about those of her staff whose teacher registrations are expiring. If a staff member is terminated, there’s no reason for her to receive a notification about that individual. |
Delete Notf on Complete | Ellie receives a notification to renew her registration. She then submits a renewal request and, once approved, the event is completed and removed from Ellie’s Self Service page. |
Escalate Days prior/post Event
| If Boris receives a notification to renew his teacher’s registration (an event) but takes no action, then the event can be escalated to HR before the expiry date. This means HR receives an email saying Boris hasn’t yet renewed his teacher's registration. Note: An event is different to workflow. An event is escalated, whereas a workflow task times out and is usually redirected. |

© 2023 Fusion5. All rights reserved.