Change leave balance disclaimer
You can change the Disclaimer that displays on the self service Leave Balance screen. You can use this field to explain the meaning of the balances shown.
To change the leave balance disclaimer:
- Go to Administration > Configuration > All Configuration.
- At Configuration Items, expand Self Service Properties, and then expand Workflow.
- Click Leave.
- At the .leave.balance.disclaimer property, enter the message you want to display.
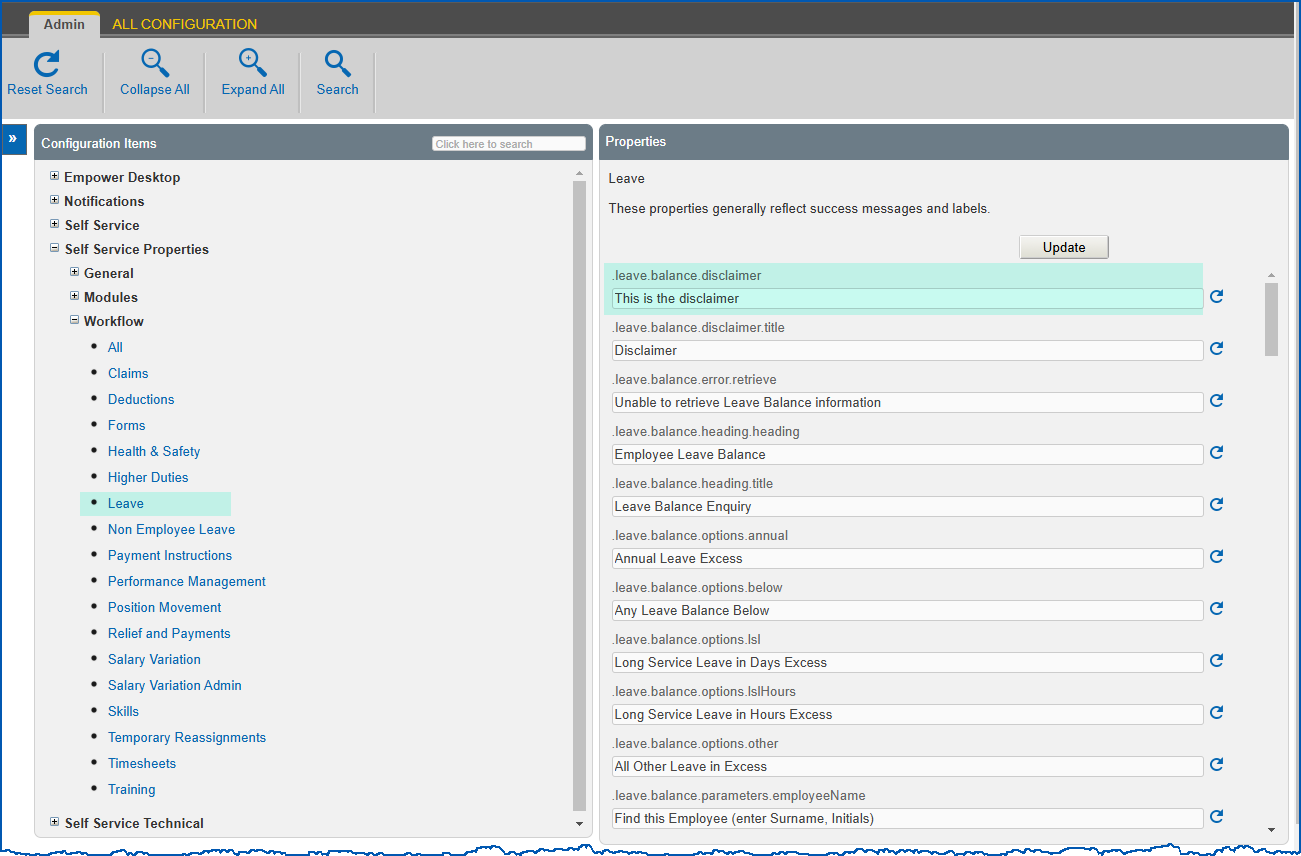
- Click Update.
Configure leave balance enquiry
Options
You can set the options that EmpowerHR highlights on the Leave Balance enquiry screen. Managers access the Leave Balance enquiry screen via Staff Management in MSS.

To configure the leave balance enquiry highlighted options:
- Go to Administration > Configuration > All Configuration.
- At Configuration Items, expand Empower Desktop.
- Find each of the settings shown in the following table, change the Integer field and then click Update for each setting.
 |
The settings are located in the Leave and Leave Exceptions groups,. |
| For this option... | Update the Integer field in this installation setting... |
| Annual Leave Excess | (lqru) Recreation leave limit in days |
| Long Service Leave Excess | (lqlu) Long service leave limit days |
| The long service leave balance in Self Service can optionally include any pro-rata accruals. | (flsl) Leave entitlements forward accrue – LSL |
| All Other Leave in Excess | (lqau) Any leave upper limit in days |
| Any Leave Balance Below | (lqal) Any leave lower limit in days |
| Leave Element for those Annual Leave codes to calculate End of Year and As At balances | (leoy) Leave element for end of year balances |
Tabs
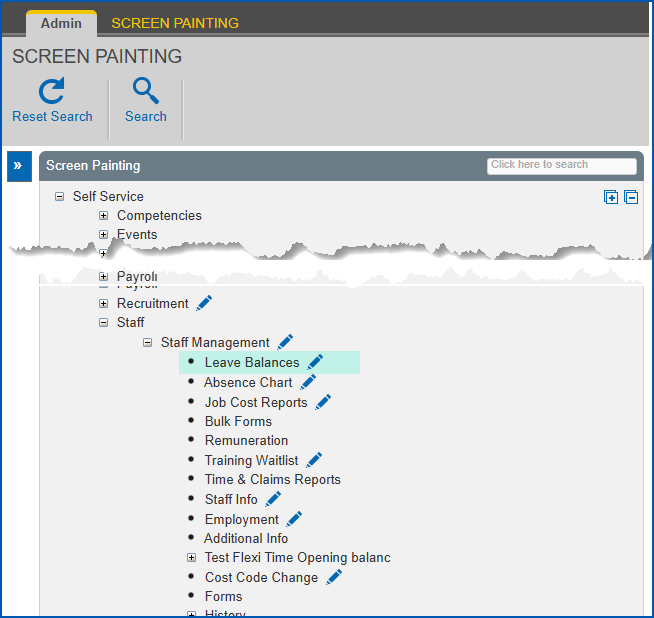
You can hide any of the tabs on the Leave Balance enquiry screen using screen painting.

See self service screen painting for how to do this. Take note that at Screen Painting, the tabs you want to hide are located in Leave Balances - as shown in the following example.
Optional columns on the long service leave tab
You can display two columns called Next New Date and Clear by Date on the Long Service Leave tab of the Leave Balance enquiry screen.
The columns help managers easily identify employees who have a long service leave balance greater than the excess on a specified Clear By Date.
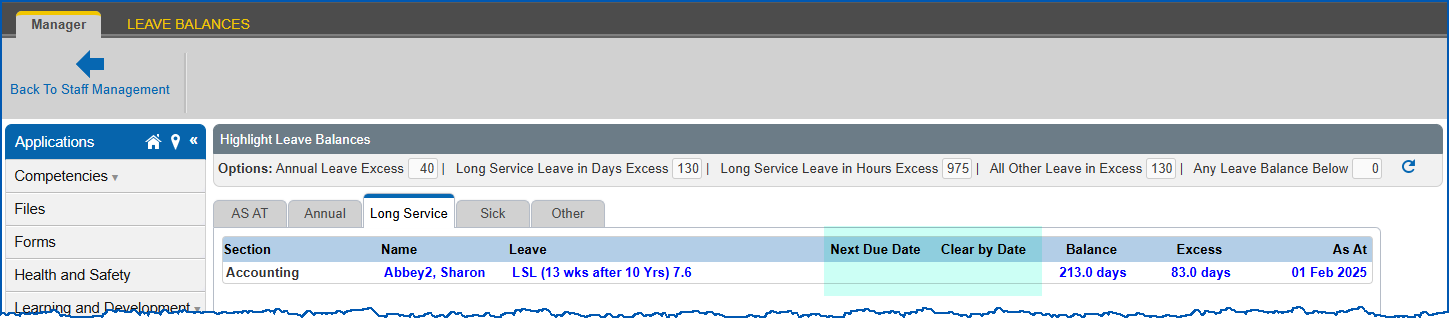
To display the Next New Date and Clear by Date columns on the Long Service Leave tab:
- Go to Administration > Configuration > All Configuration.
- At Configuration Items, expand Self Service, and then expand Leave.
- Click (llcd) Calculate clear by date.
- Enter a value greater than 0 (zero) in the Integer field.
|
This setting stores the number of years EmpowerHR subtracts from the Next Due Date in order to determine the Clear by Date. For example, if llcd is set to 2 and the employee's Next Dur Date is 01/02/2024, the employee's Clear by Date will be 01/02/2022. If the Clear by Date is before today's date and the balance is greater than 0 (zero), the balance shows in the Excess column of the Long Service Leave tab. |
- Click Update.
Display sick/personal leave certificate balances
You can display sick/personal leave certificate balances in the Leave Balance screen.
To display sick/personal leave certificate balances:
- Go to Administration > Configuration > All Configuration.
- At Configuration Items, expand Self Service, and then expand Leave.
- Click (jdnc) Sick leave certificate balance.
| By default, the Character field is blank so no sick/personal leave balances display. |
- Enter an option in the Character field. The options are:
- s = sick without certificate
- c = carers
- p = paramedical
- a combination, for example, scp = sick without certificate, carers, and paramedical
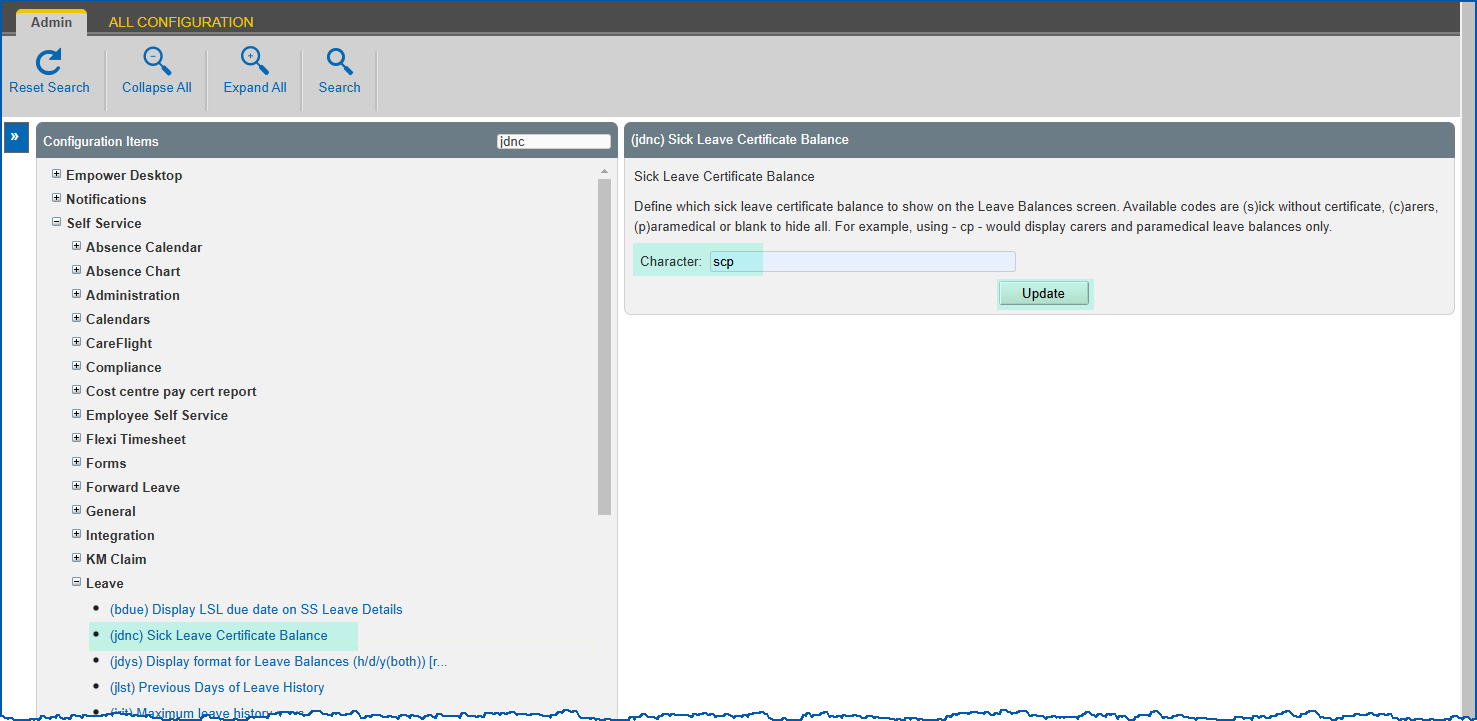
- Click Update.
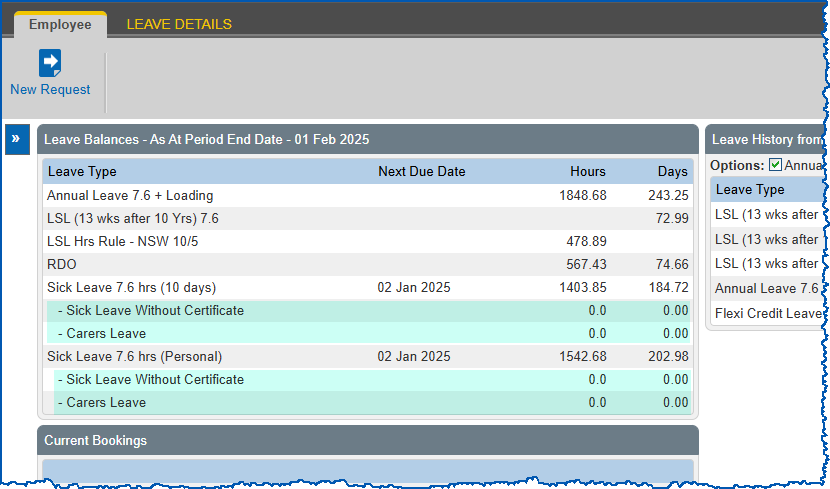
- At Leave Balances on the employee's Leave Details screen, EmpowerHR displays the certificate breakdown for each option you nominated. Here's an example:
Display next accrual dates in leave details
The installation setting called (next) Next accrual display element allows you to display next accrual dates in leave details in self service.
The default value in the Character field (that is, the leave element) is next.
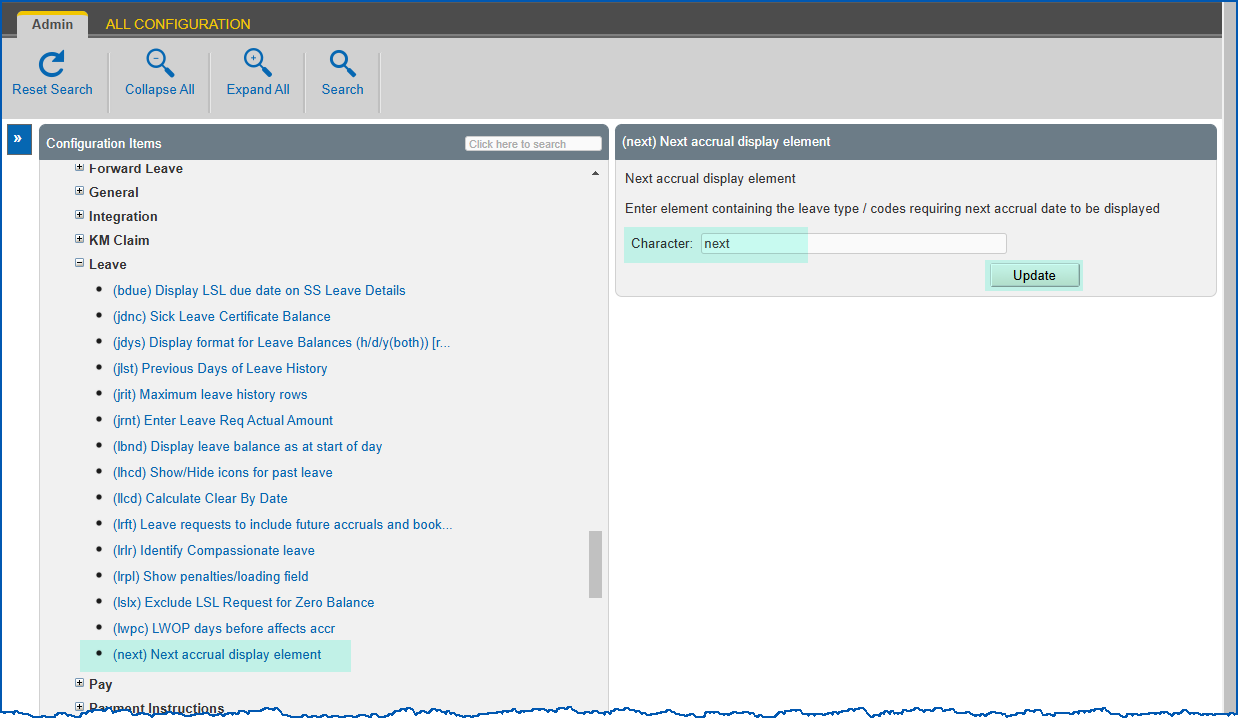
You need to set up a leave element in desktop and call it next. Add to the element all the leave types you want to display. See leave element codes for instructions.
Display LSL due date in leave details
To display the long service leave due date in leave details in self service:
- Go to Administration > Configuration > All Configuration.
- At Configuration Items, expand Self Service, and then expand Leave.
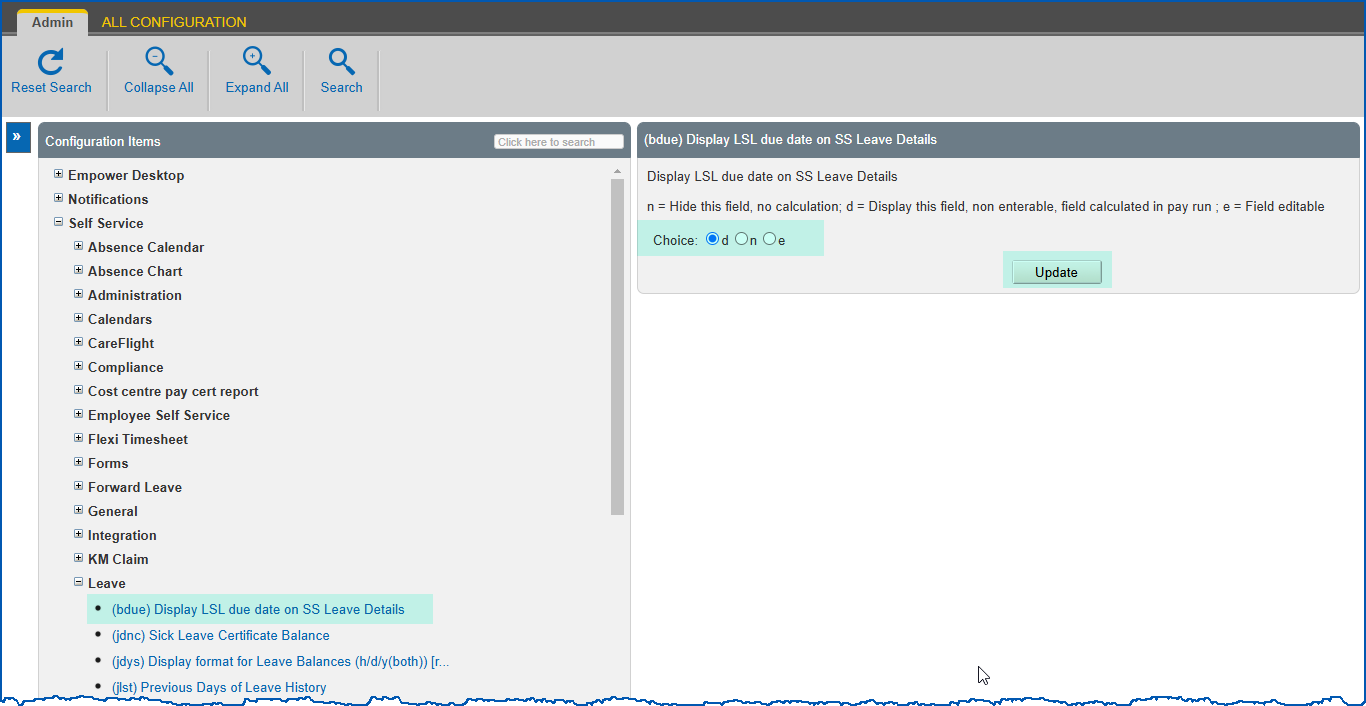
- Click (bdue) Display LSL due date on SS leave details.
- In the Choice field, click one of the following options:
- d = display this field, non-enterable, or
- e = field editable, or
- n = hide this field, no calculation
- Click Update.
Display certificates supplied indicator in leave details
EmpowerHR can indicate in an employee's Leave History in their leave details when they have supplied certificates.
To indicate certificates have been supplied:
- Go to Administration > Configuration > All Configuration.
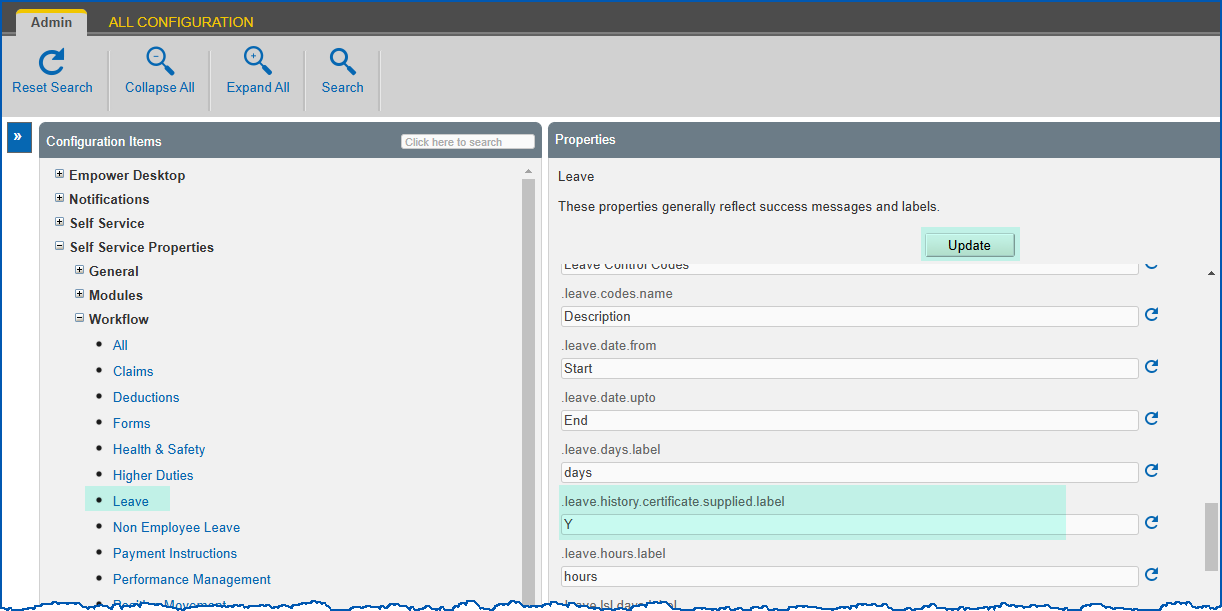
- At Configuration Items, expand Self Service Properties, and then expand Workflow.
- Click Leave.
- At the .leave.history,certificate.supplied.label property, enter y.
- Click Update.
Integrate leave calendar
Integrating a leave calendar lets employees receive a calendar event and notification email when their leave request is approved. An iCalendar file is attached to the notification email and contains the date/time details for the booked leave period.
|
|
The iCalendar format is compatible with most popular calendar applications including Microsoft Outlook, Apple Calendar, Google Calendar. |
To enable this feature:
- Go to Administration > Configuration > All Configuration.
- At Configuration Items, expand Empower Desktop, and then expand Auto Events.
- Click (outl) Calendar event creation.
- In the Character field, enter l (= Leave Bookings).
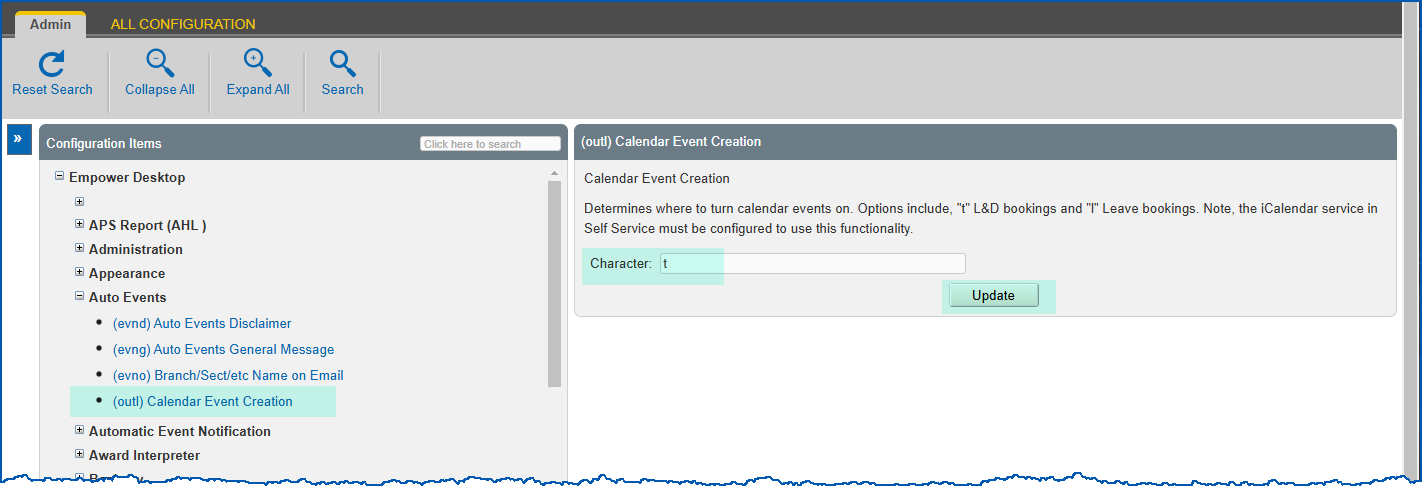
- Click Update.
|
|
When leave requests are processed via the desktop Alerter, to integrate bookings into the calendar, EmpowerHR needs to access the calendar web service. See self service web services setup in the EHR Technical User Guide If you don't have access to the EHR Technical User Guide, you can log an iHelp request and we will provide login credentials to you. |

© 2023 Fusion5. All rights reserved.