How to access an additional reference screen depends on whether or not you flagged the screen to appear as a User Defined Menu when you first created it.
See create additional reference screens for instructions about flagging the screen's location.
How to access reference screens that are not on user defined menus
A screen that is not flagged to appear on a user defined menu appears in the following locations:
- Task > Employees > Employee Information > Additional Employee Data
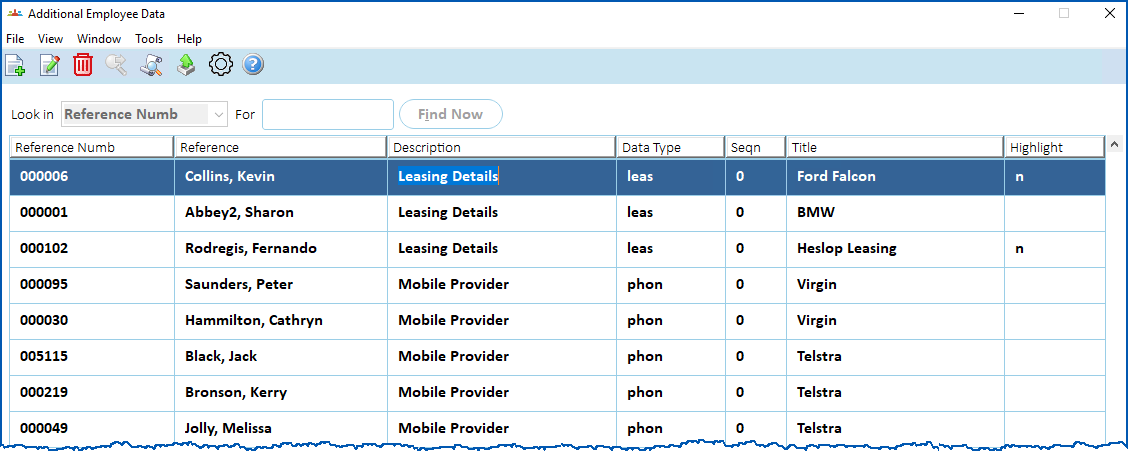
Here's an example of car leasing details attached to the employee record. They are also attached to other relevant records. 
- Tasks > Payroll > Payroll Control > Additional Payroll Data
- Tasks > Establishment > Jobs > Jobs Reference Data
- Tasks > Establishment > Positions > Positions Reference Data
- Administration > Agency Management > Additional Agency Data
 |
To access these screens, you must have security access (permissions) set on your account template. |
How to access reference screens that are on user defined menus
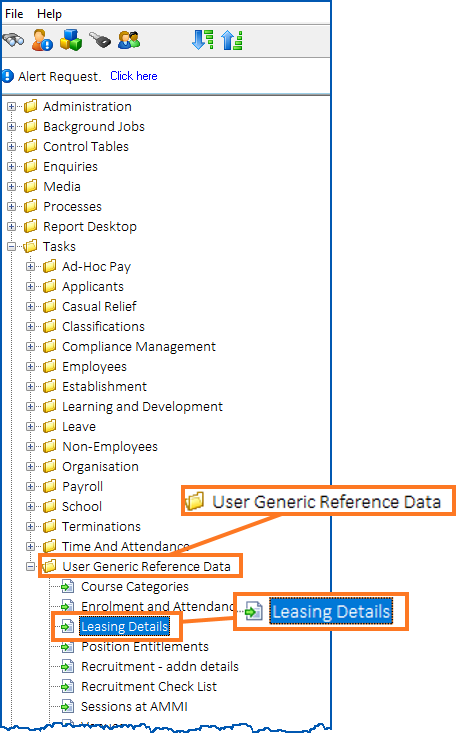
A screen that is flagged to appear on a user defined menu appears in the following location. The menu name assigned to it when it was created will be displayed.
Tasks > User Generic Reference Data > (menu name)
In this example, the menu name assigned to the reference screen created is Leasing Details.
How to record data in a reference screen
In the following example, we show how to record car leasing data against an employee. Data entry is the same whether the reference screen you need to access is via a user defined menu or via other additional data menus.
To record data in an additional reference screen:
- Go to the location of the reference screen.
- Click Find Now to display a list of existing records.
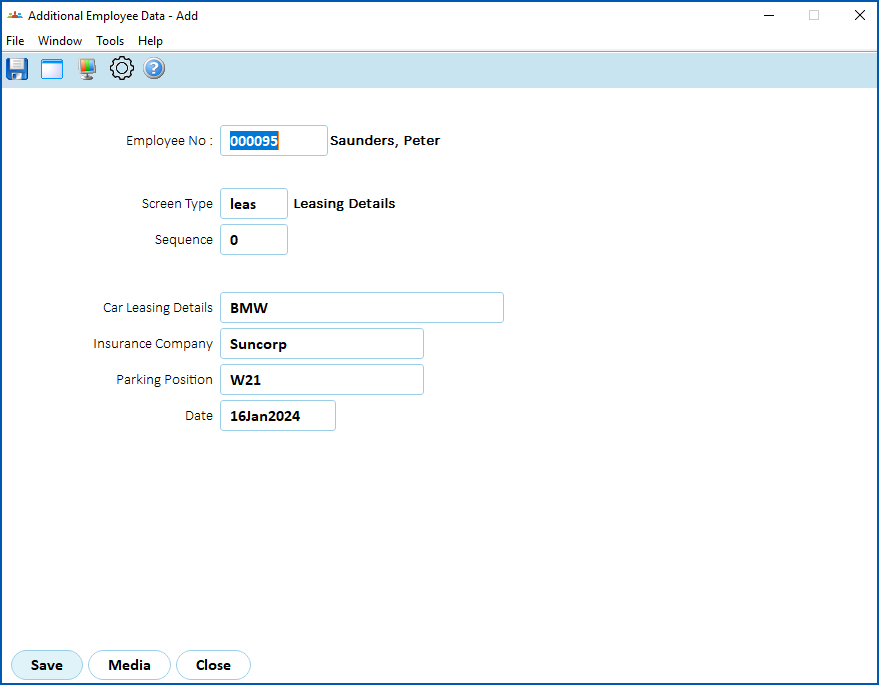
- Click New. The data entry fields displayed depend on the design of the additional reference screen. In the following example, in the:
- Employee No field, enter the employee number, and then press Tab
- Screen Type field, click Window, find and double-click a code to add to the Screen Type (reference screen) field. Press Tab.
- The fields for the reference screen (Screen Type) you selected are displayed. In the following example, the fields are for entering data about car leasing.
- Complete the fields, and then click Save.
© 2023 Fusion5. All rights reserved.