To create an additional reference screen, you:
- design the screen
- create the data type code
- define the screen
Design the screen
Grab a pencil and paper and map out the information you want the screen to capture.
For example, say you want to record car leasing details. You might design the screen to capture:
- employee name or position number
- make of the car
- model of the car
- registration number
- leasing company name
- parking space number
- date leased
What do I need to consider when designing the screen?
 | Do you want all users to be able to access the new screen? Or else, do you want to locate the new screen as a user defined menu item in its own right? |
|---|---|
| Will you allow the screen to be accessed via Self Service? |
| Will the data be available to the ad hoc report writer? |
| You can have up to 12 fields on the screen. Use the following table as a guide. |
| Field | Guideline |
|---|---|
| 1st | This is the Reference field and can be either an employee, a position, a payroll, or left blank. |
| 2nd | Must be the sequence field. This field is used to build history records. |
| 3rd to 10th | Optional. These fields can be date, number, or text. You can also add simple error checking to any of these fields. |
| 11th and 12th | Optional. These fields must be text (up to 250 characters per field). |
Create the data type code
When you're clear about the screen design, create the data type code.
To create the data type code:
- Go to Administration > Screen Management > Data Type Validation Input.
- At the Data Type Validation Input summary screen, click Find Now to display a list of existing display screens.
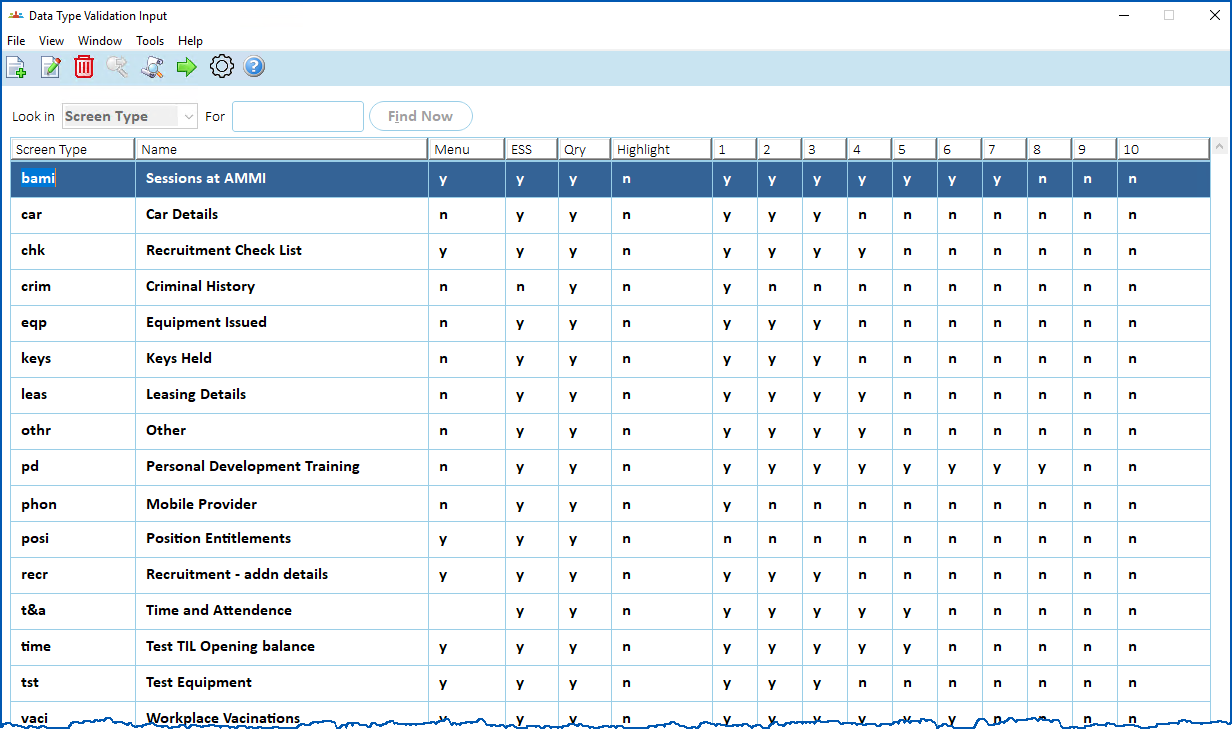
- Click New.
- At the Data Type Validation Input - Add window, in the:
- Screen Type field, enter a name (4 characters)
- Description field, enter a description of the type of screen you are creating
- Abbreviation field, enter an abbreviation of the screen description
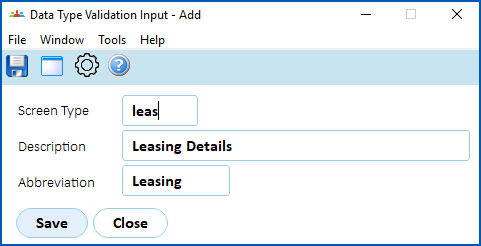
- Click Save.
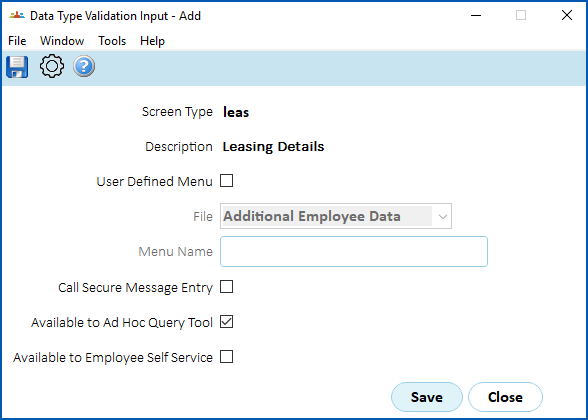
- At the Data Type Validation Input - Add screen, to make the screen available:
- from the Task > Employee > Employee Information > Additional Employee Data screen, leave the User Defined Menu checkbox un-selected. Go to step 7.
- as a separate menu item, click the User Defined Menu checkbox to select it, and then select an option from the File dropdown list. This creates a menu entry dedicated to the type of reference data you selected in the File field. Go to step 7.
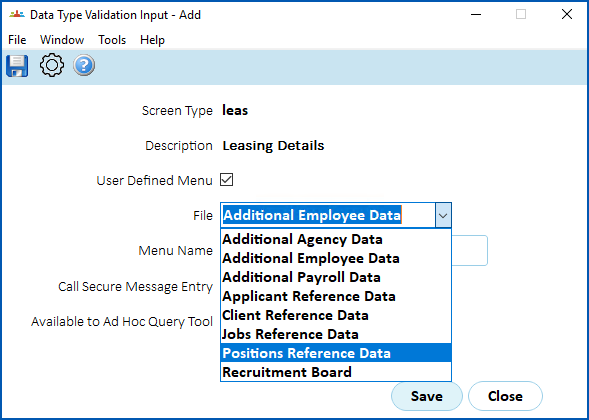
 | Users may only access the screen via the menu located at: Tasks > User Generic Reference Data, and provided they have been given access via the account template assigned to them (or their operator code). Typically, you'd design the screen in this way when the type of data is sensitive and needs to be kept secure. |
- To make the information available via the ad hoc report writer, make sure the Available to Ad Hoc Query Tool checkbox is selected.
- Click Save. The next Data Type Validation Input - Add screen displays, ready for you to define the additional screen. See the following instructions for how to do this.
Define the additional reference screen
To define (format and determine validation for) each field on the additional reference screen:
- At the Data Type Validation Input - Add screen, make your entries using the following table as a guide.
| At this field... | Do this... |
|---|---|
| Prompt | Enter the name you want to give the field (up to 30 characters). |
| Format | Select the field format from the dropdown list. |
Length | Complete the Length field. If, in the Format field, you selected:
|
Validation | Click Window, find and double-click a code to add it to the Validation field. The available validation options depend on the format and length of the field. Here are just some examples of the validation options displayed in the lookup window. If:
|
- Click Save. The screen then clears, ready for you to define the next field.
- Repeat this procedure until you have defined the format (and validation, where required) for all fields on the additional reference screen.
- Click Close when you're finished.
© 2023 Fusion5. All rights reserved.