Screen paint demographics fields in the desktop 
Using EmpowerHR's screen painting feature in the desktop, you can choose to do any of the following to suit your organisation's needs:
- switch on (make visible) the fields you require, and switch off (make invisible) fields you don't need
- switch off (make invisible) all fields so EmpowerHR no longer shows the Demographics tab
- change individual field titles and display settings
- configure any of the available user-defined fields to capture even more demographics information

|
User-defined fields display at the bottom right of the Demographics tab, under Additional. |
To screen paint demographics fields for the desktop:
- Go to Tasks > Employees > Employee Information > Employee Information.
- At the Employee Information summary screen, find an employee record, select it, and then click Personal.
- At Personal & Address Information, go to the Demographics tab.
- Click Screen Painting.
- The Painting Personal & Address Information summary screen lists the fields on all tabs of the Personal & Address Information screen.
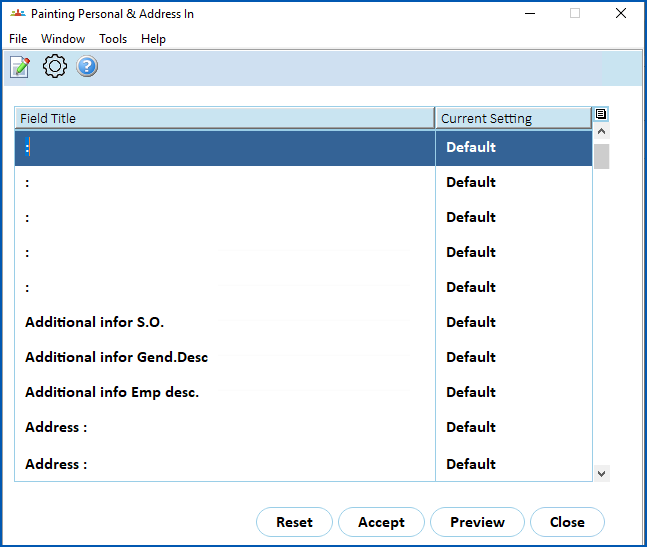
- Scroll down, find and select the field you want to paint, and then click Open. Here's a list of Demographics tab fields to help you...
| Demographics | Disability | ||
|---|---|---|---|
|
| ||
| Qualifications | Additional | ||
|
|
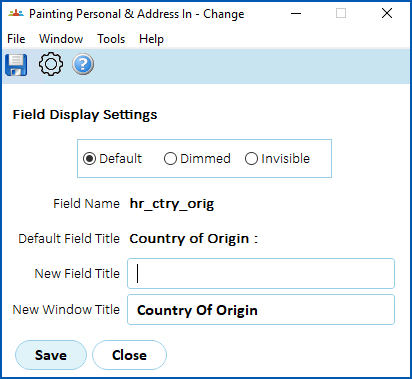
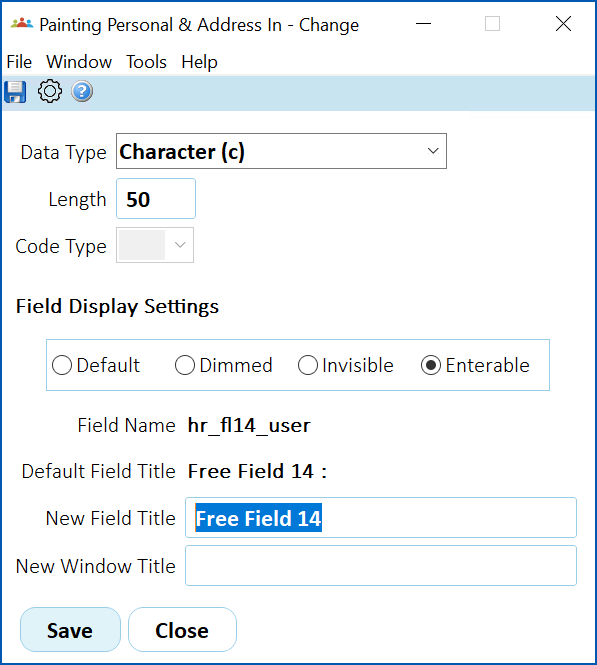
- At the Painting Personal and Address Information details screen, paint the field using the following table as a guide.
|
|
These examples show a user-defined field (Free Field 14), and system-defined Demographics field (Country of Origin). |
| At this field... | Do this.... | ||
|---|---|---|---|
| User-defined fields only | |||
| Data Type | Select the type of data you want the field to handle. For example, Data (d) or Character (c). | ||
| Length | Enter the length of the field. | ||
| Code Type | If you choose Selector List (s) for the Data Type, then select a code from the Code Type dropdown list.
| ||
| All fields | |
|---|---|
| Default / Dimmed / Invisible / Enterable | Click one of the following:
|
| New Field Title | Enter/change the name for the field, as required. |
| New Window Title | N/A |
- Click Save.
- At the Painting Personal & Address Information screen, click one of the following:
- Reset - to discard your changes
- Preview - to preview your changes before clicking Accept
- Accept - to apply your changes
- After you click Accept, you must close and then re-open the employee record for the changes to appear in the Demographics tab.
Screen painting demographics fields in self service
Using EmpowerHR's screen painting feature, you can change field titles and field visibility for the Demographics tab in self service.
| Purchased Leave and Deferred Salary Leave are fields used by some EmpowerHR clients. You may find these two fields are excluded from your system configuration. |
To screen paint demographics fields for self service:
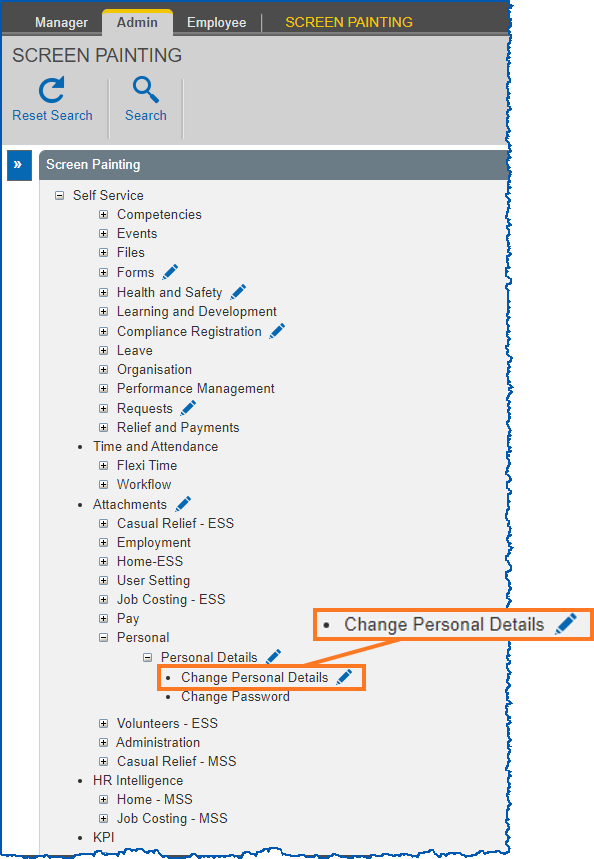
- In Admin, go to Administration > Screen Management > Screen Painting.
- At Screen Painting, expand the Self Service list of screens, locate Change Personal Details, and then click Change.
- At Screen Painting - Personal Details, scroll down and locate the group of Demographics fields.
|
You'll find the Gender field is listed under Demographics and also under General. The reason is, if you choose to hide the Demographics tab, the Gender field is still enterable on the Gender tab. |
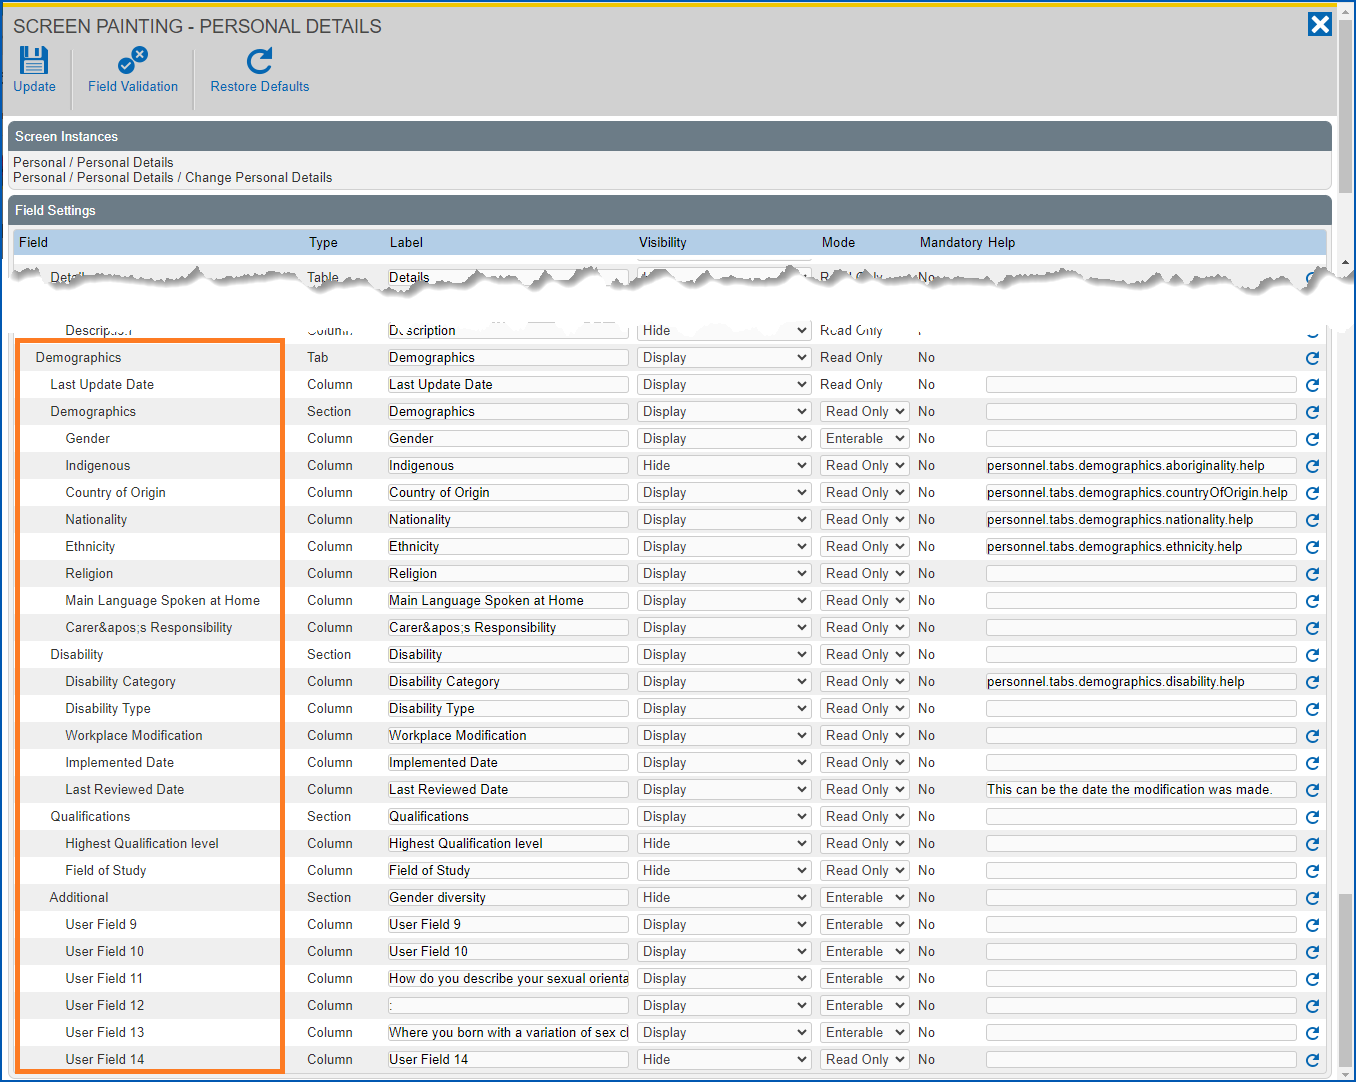
- Make the changes you want to the field properties, using the following table as a guide.
| In this column... | Do this... |
|---|---|
Type | Nothing. This column shows the type of field, for example, Table, Section, Tab, etc. You can't change the Type. |
Label | Enter a new title (label) for the field, if required. |
Visibility | If the field's visibility is set to Display, and you want to hide the field, select Hide. |
Mode | Select an option from the dropdown list. With many fields, if you choose:
|
Mandatory | Nothing. The default setting is No (optional). You can't change this setting to Yes (mandatory). |
Help | N/A |
|
To restore:
|
- Click Update to save your changes. EmpowerHR displays the following message.
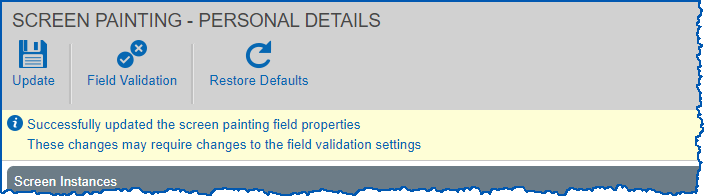
- According to the field properties you changed, if you:
- need to update the validation settings, then go to to step 7
- don't need to update the validation settings, then close the Screen Painting - Personal Details screen. No further action is required.
- Click Field Validation.
- At the Personal Details - Field Severity screen, find the field you want to set the validation severity for.
- Select one of the following options from the Severity dropdown list to determine whether EmpowerHR issues an error or warning when a user enters a value that does not pass validation rules:
- Warning
- Error
- Ignore
- Click Update.
© 2023 Fusion5. All rights reserved.