Self service vs desktop
Self Service offers a convenient way for employees to submit their leave requests and automatically move them through workflow for assessment and approval.
But, if for any reason, Self Service is not the right option for your organisation, the EmpowerHR desktop is available for making and managing leave bookings.

|
Family and domestic violence leave is a standalone leave entitlement which needs to be handled differently to other types of leave bookings. See family and domestic violence leave options for suggested ways to use EmpowerHR for this type of leave. |
|
|
Do you need to import leave data from a time and attendance system? See time capture systems for instructions. |
Book leave via desktop
To book leave for an employee via the EmpowerHR desktop:
- Go to Tasks > Leave > Leave Bookings > Employee Leave Bookings.
- At the Employee Leave Bookings summary screen, find the employee you want for the leave booking.
- Select a row and then click Next Level.
- At the Employee Leave Bookings detail screen, make your selections and entries in the leave booking fields.
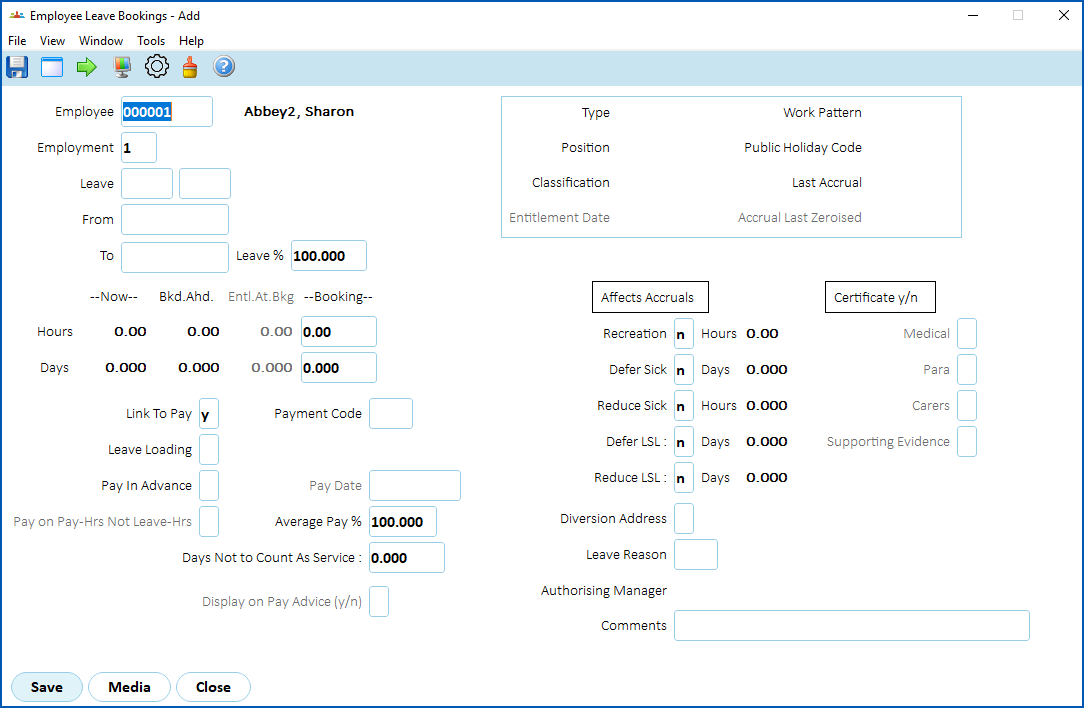
- Click Save.
Re-book leave via desktop
You can use the re-book feature to change the leave type and other details in a leave booking.
|
Why use this method when you can manually reverse the original booking and then make new bookings for the change in circumstances? The re-book feature provides an alternative method which creates default data, cutting down on your data entry. |
Case study: re-booking leave Jonas wants to re-book annual leave. The original booking was for four days (010823-040823). Now he needs to make two of those days sick leave (010823-020823). We can use the re-book function to make the changes. |
|---|
To re-book leave:
- Go to Tasks > Leave > Leave Bookings > Leave Re-Bookings.
- At the Leave Re-Bookings summary screen:
- at the Employee field, enter the code of the employee whose leave you want to re-book
- tab to the Leave field and enter the leave type for the re-booking e.g. sl (sick leave), or click Window, find and double-click the leave type to add it to the field.
- tab to the From field and enter the start date for the re-booking e.g. 010823 for the start of the sick leave
- tab to the To field and enter the end date for the re-booking e.g. 020823 for the end of the sick leave
- Press Tab. EmpowerHR displays the original booking, and the proposed bookings for the change in circumstances.
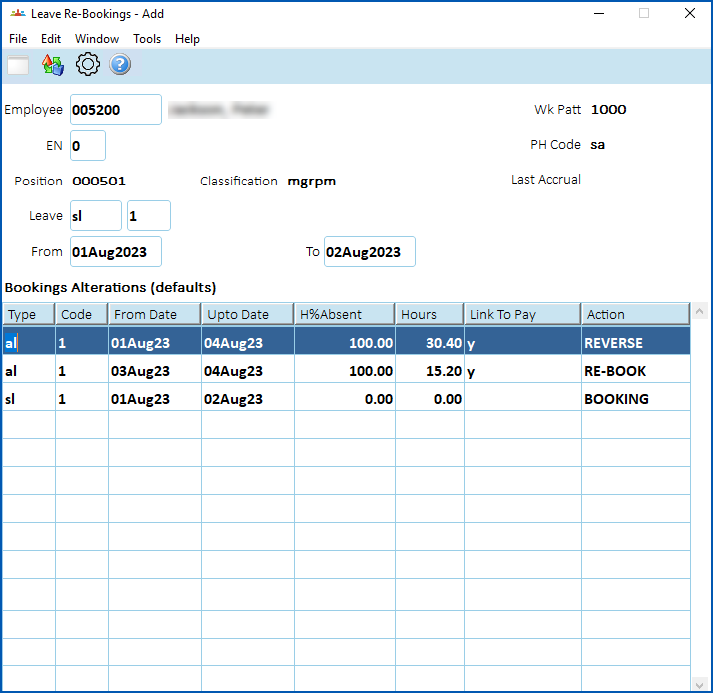
- Click Process.
- EmpowerHR displays the following screen with the current open pay date as the default.
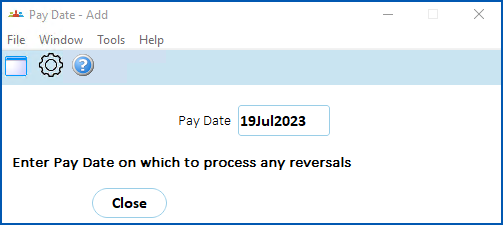
- Enter the pay date for reversal of the original leave booking, or click Window, find and double-click the date to add it to the field.
- Press Tab.
- EmpowerHR asks if the pay date is OK.
- Click OK.
- EmpowerHR reverses the original leave, and displays the Employee Leave Bookings detail screen for the re-booking, for example, the remainder of the original annual leave booking 030823 to 040823 (two days).
- Press Tab to move to each field on the screen to validate the fields, making any changes if you need to.
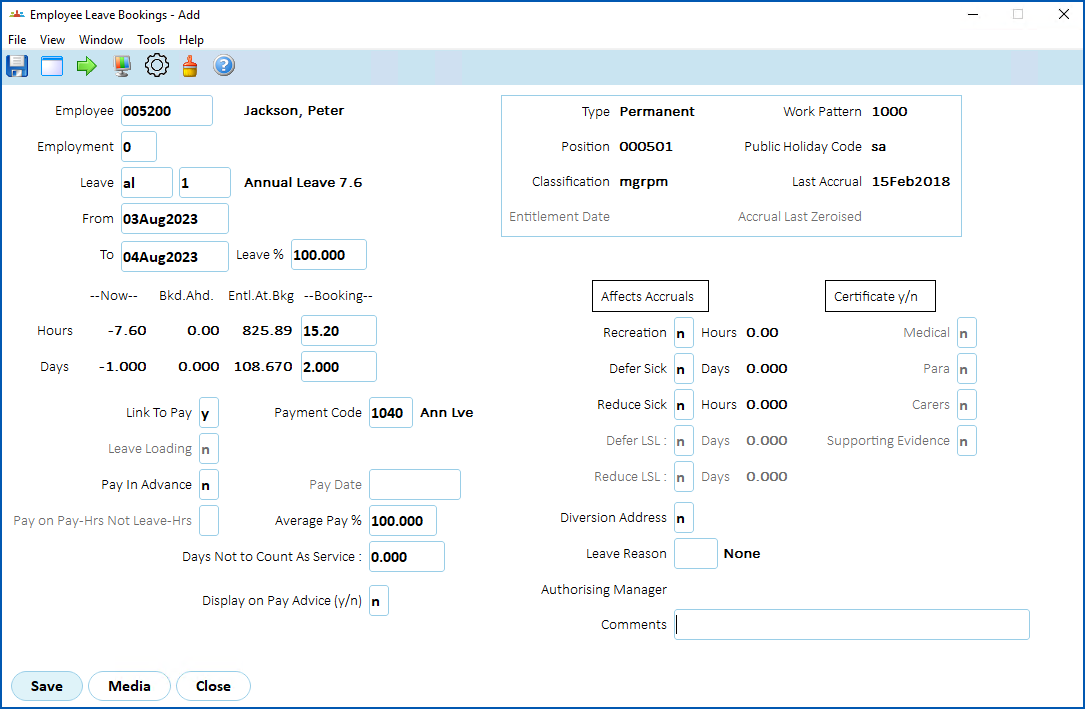
- Click Save. EmpowerHR displays the Employee Leave Bookings detail screen for the new booking, for example, two days' sick leave 010823 to 020823.
- Press Tab to move to each field on the screen to validate the fields, making any changes if you need to.
- Click Save.
Book leave via self service
You can book leave by creating and submitting a leave request using EmpowerHR Self Service.
In Self Service's Leave Details screen, you can:
- create new leave requests
- change or delete leave requests for (unpaid) bookings
- change or delete any leave requests that are pending approval
Once you choose to submit a leave request, the request and approval workflow applies.
We cover more about self service in:
To book leave via Self Service: 
- Go to Leave Details.
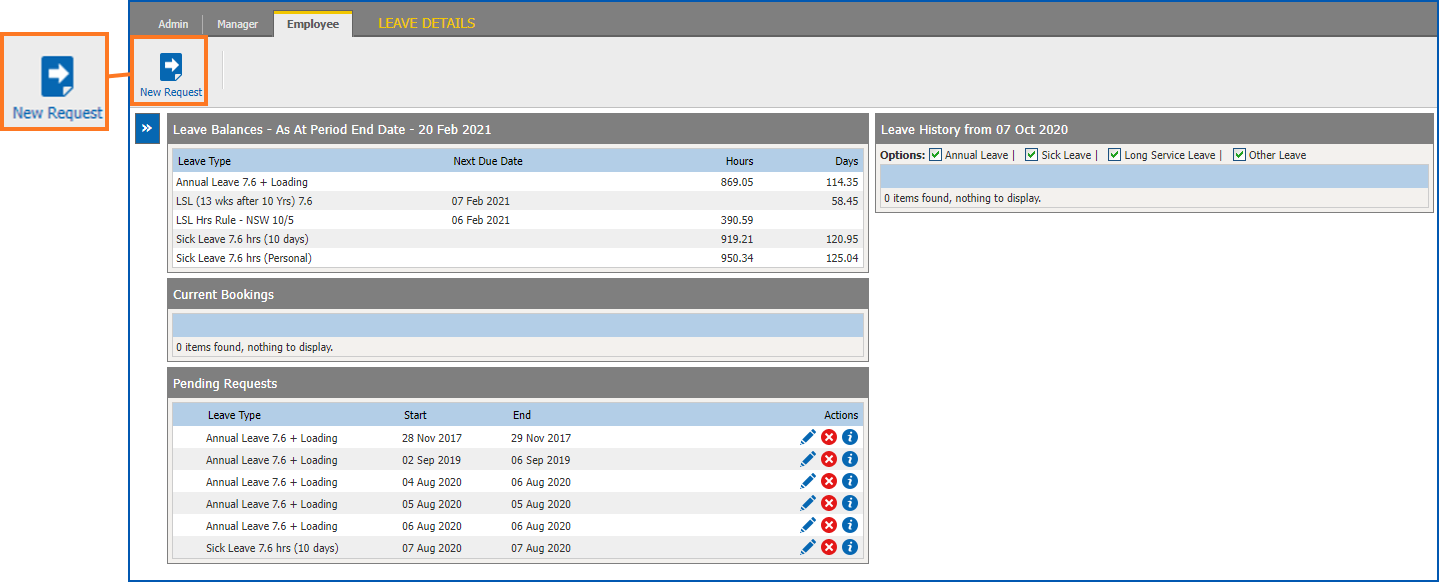
- At the Leave Details catalogue screen, click New Request.
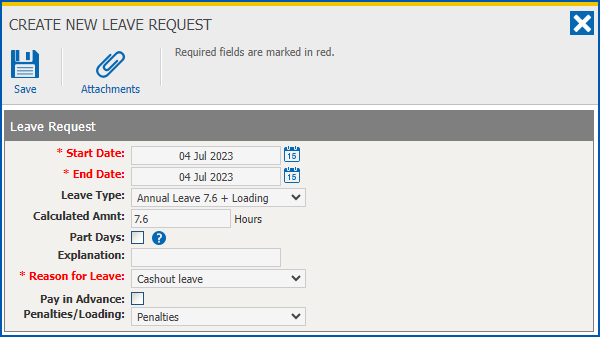
- At the Create New Leave Request detail screen, make your selections and entries in the leave request fields.
- If you:
- need to attach a document, for example, a medical certificate, go to step 5.
- don't need to attach a document, go to step 8.
- Click Attachments.
- At the Attachments screen, drag and drop your file onto the Drop files here... pane.
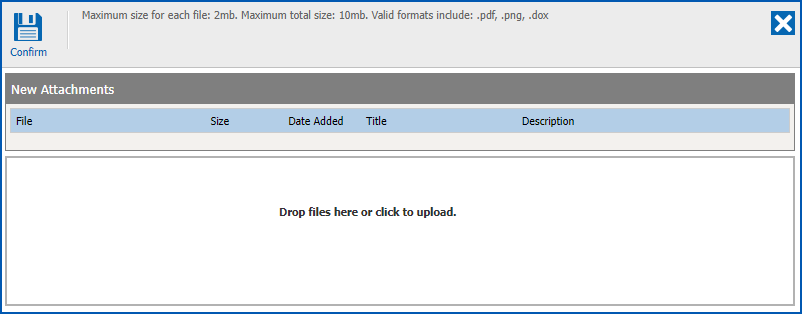
- Once you've added all your attachments, click Confirm to save your attachments and return to the Create New Leave Request detail screen.
- Click Save when you're done. The Workflow Addressee window displays.
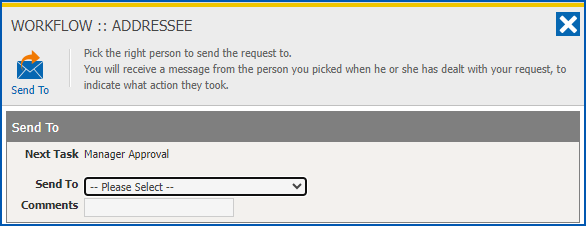
- At Send To, select the person to send the request to from the dropdown list.
- At Comments, type a message if you wish.
- Click Send To to submit your leave request for approval.
| What's on your Leave Request screen? | Decisions your organisation has made when setting up leave in EmpowerHR determine what is available on the Leave Request screen. For example:
|
© 2023 Fusion5. All rights reserved.