Once you've selected the hours change option and entered your proposed start date, the weekly schedule appears with a row of daily hours for each week in your work pattern. This is where you map out how you'd like to spread your proposed hours across the pay cycle.
How the schedule is laid out
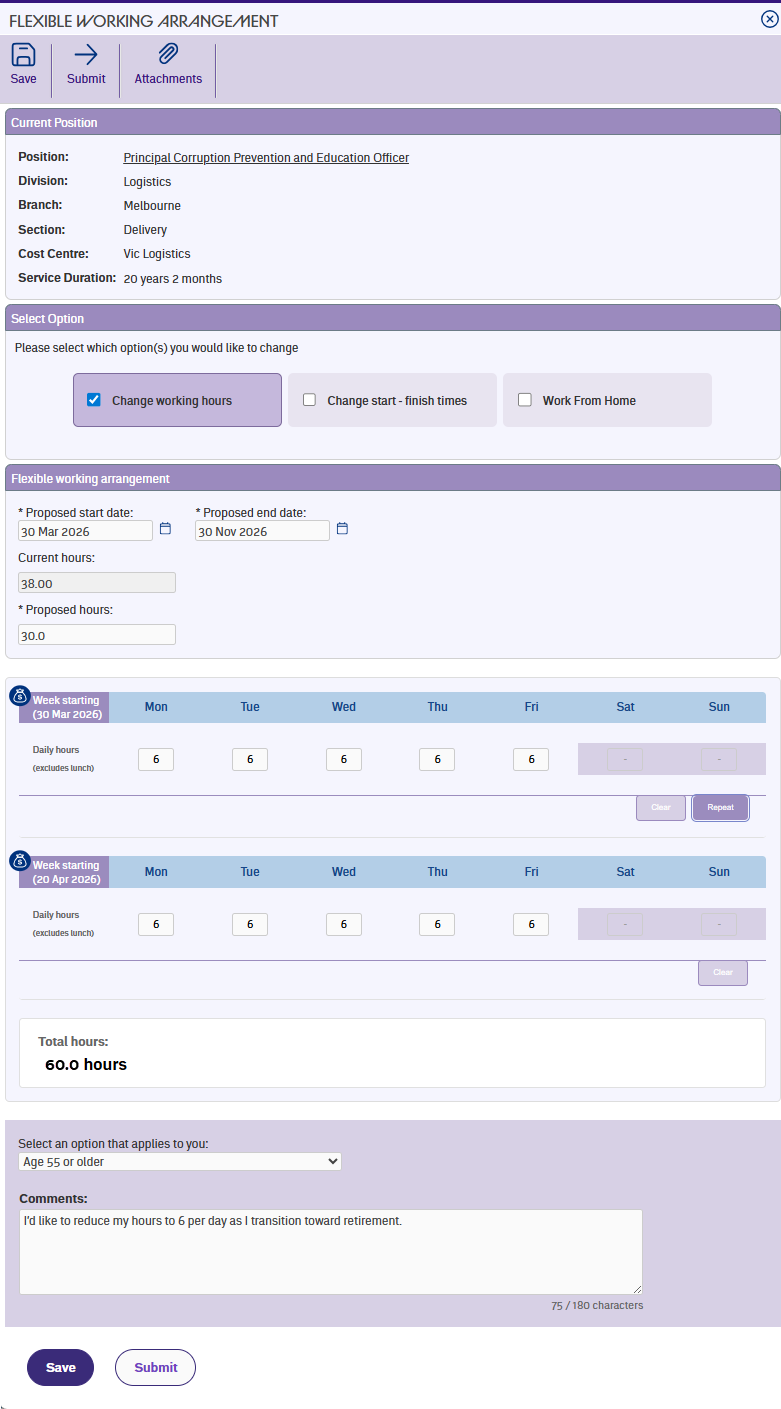
The schedule displays one or more weeks depending on your work pattern length. If you're on a fortnightly pay cycle, you'll see two weeks. Each week runs from the day of your proposed start date, with Saturday and Sunday dimmed out since those days aren't available for entry.
A pay week indicator appears next to any week that includes a pay day, so you can see where you are in the cycle.
Entering your daily hours
Enter the number of hours you'd like to work each day as a decimal (for example, 7.5 for seven and a half hours). Leave non-work days at zero.
At the bottom of the schedule, a Total hours row adds up everything you've entered across the full work pattern.
Depending on your organisation's configuration, you may also see a Total target hours row. This shows your proposed total hours from the previous step, and it only appears when your pay cycle length matches your work pattern length. When total hours and total target hours match, they display in green. If they don't match, the target displays in red – you'll need to adjust your daily hours before you can submit.
Repeat and clear
If your weeks follow the same pattern, use the Repeat button on the first week to copy its hours into the next week. This only copies hours for days that match between weeks, so it won't overwrite anything unexpected. The Clear button wipes all hours for that week if you want to start over.
Next topic |
|---|
© 2023 Fusion5. All rights reserved.