When you create a new employment for an employee, think about the employee's existing regular transactions and regular allowances.
How do regular allowances and transactions apply to a new employment?
EmpowerHR links:
- transactions to the employee rather than their employment
- allowances to employment
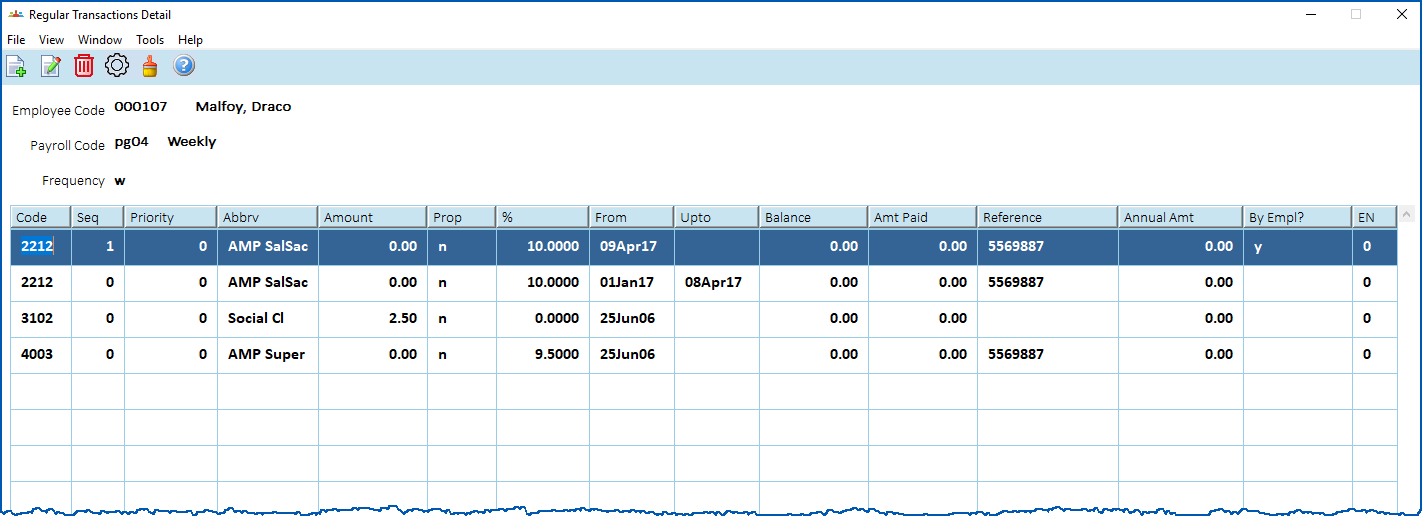
Here's an example of regular transaction and allowance details for our employee, Draco Malfoy...
regular transactions (example) | Draco has the following regular transactions:
| ||
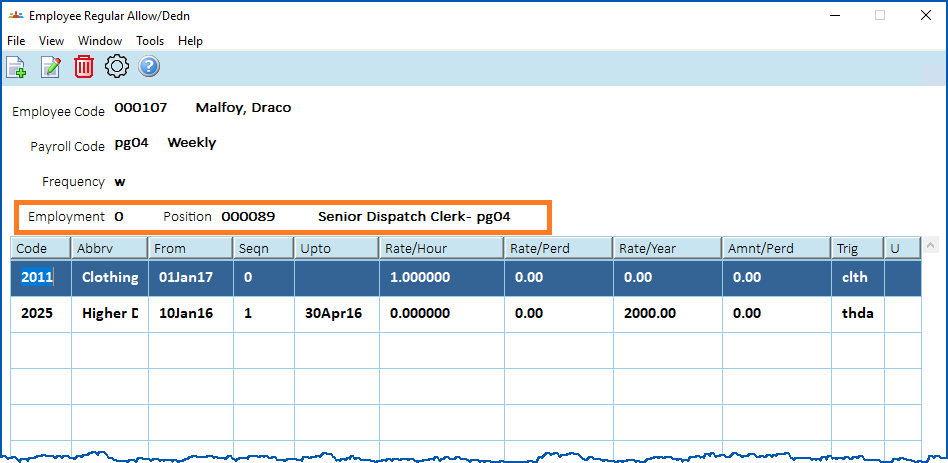
regular allowances (example) | Draco's employment as Senior Dispatch Clerk (EN 0) has the following regular allowance:
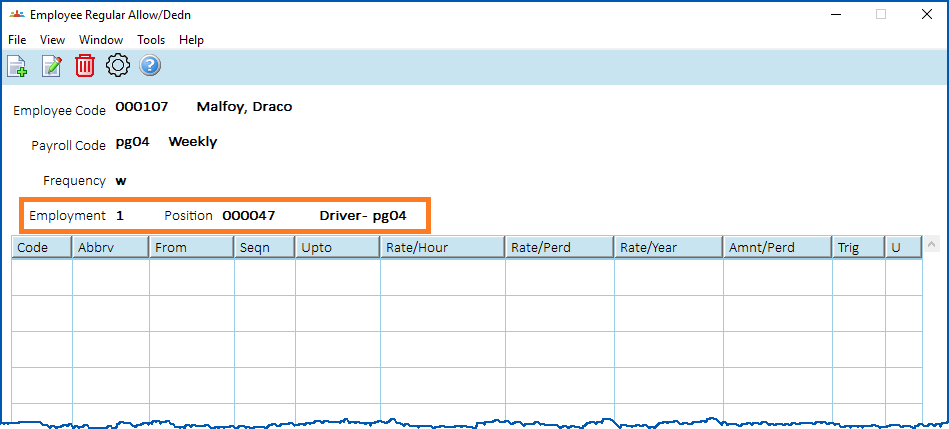
His new employment as Driver (EN 1) has no regular allowances:
| ||
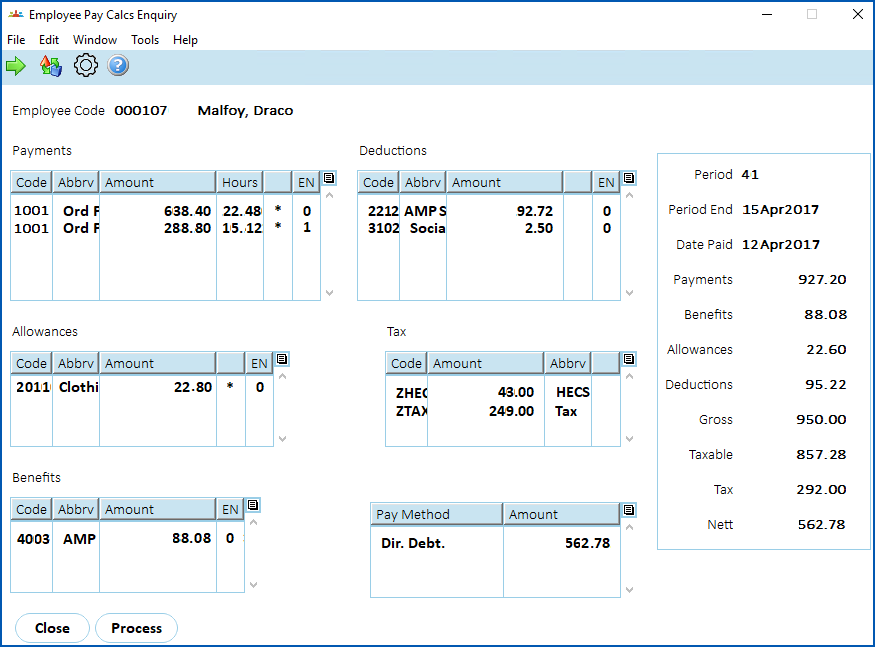
pay calculation (example) | A pay calculation shows the following outcomes. Regular transactions apply to all employments, so the:
Regular allowances apply to the employment, so the:
|
Add a regular allowance
If you need to add a regular allowance to an employee's new employment: 
- Go to Tasks > Employees > Employee Information > Employee Information.
- At the Employee Information summary screen, find the employee, and then select the new employment record.
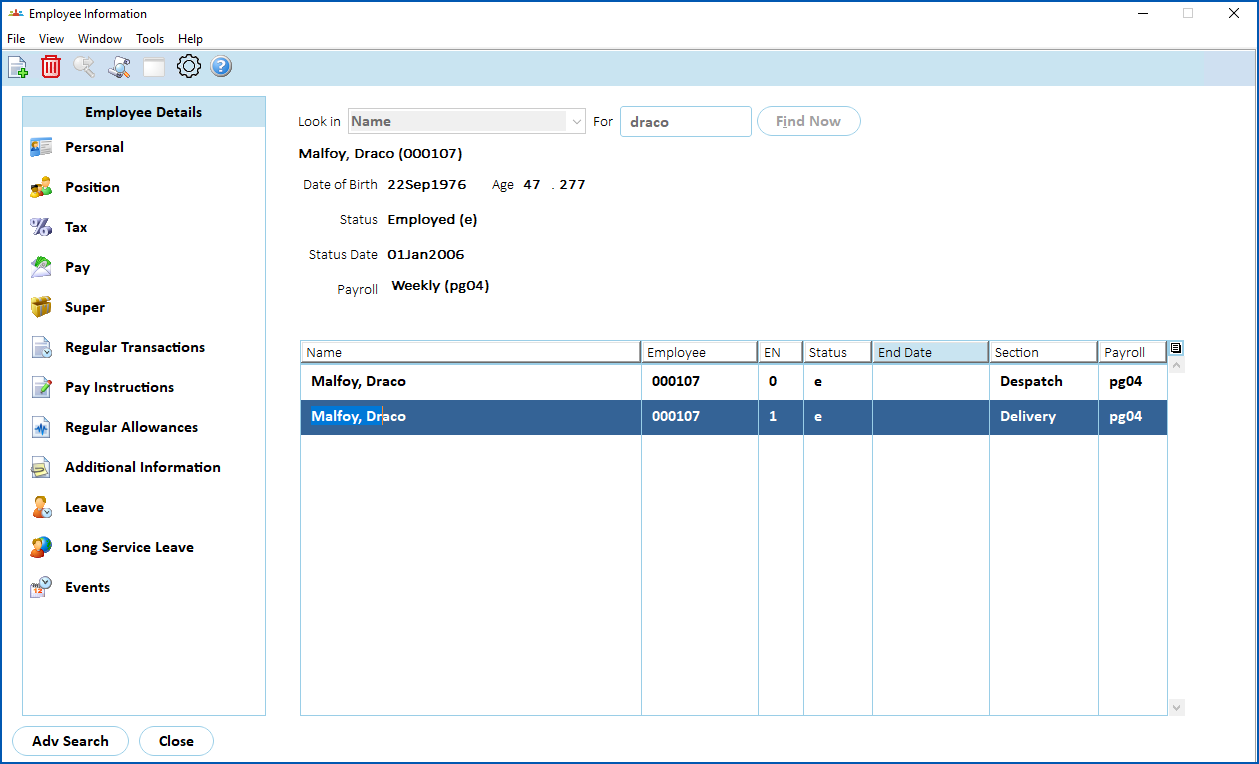
- Click Regular Allowances.
- At the Employee Regular Allow/Dedn summary screen, click New.
- The Employee Regular Allow/Dedn - Add screen displays.
- Complete the fields. See regular allowance/deduction fields if you need help completing the fields.
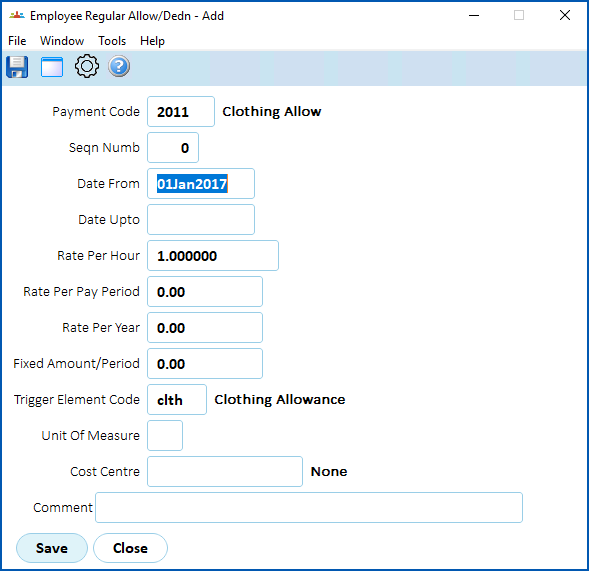
- Click Save.
Add a regular transaction
EmpowerHR automatically applies regular transactions (deductions, benefits, etc) to the employee, so you don't need to do anything if you want to pay the regular transactions based on all employment.
If, however, you want to link the existing transactions to only a particular employment, you must close them, and then add new transactions by employment.
Close (or delete) an existing regular transaction

|
If you don't need to maintain the regular transaction history, you can delete the transaction record instead of closing it. |
To close or delete an existing regular transaction:
- Go to Tasks > Employees > Employee Information > Employee Information.
- At the Employee Information summary screen, find the employee.
- Click Regular Transactions.
- At the Regular Transactions Detail summary screen, select the transaction you want to close/delete.
- To:
- close the transaction, click Open. The Regular Transactions Detail - Change screen displays. Go to step 6.
- delete the transaction, click Delete. The Regular Transactions Details (delete) screen displays. Click Save. When EmpowerHR asks if you are sure, click OK. The record is deleted and no further action is required.
- At the Regular Transactions Detail - Change screen, at the Date Upto field, click Window to display a list of pay period end dates to choose from, find and double-click a date to add it to the field.
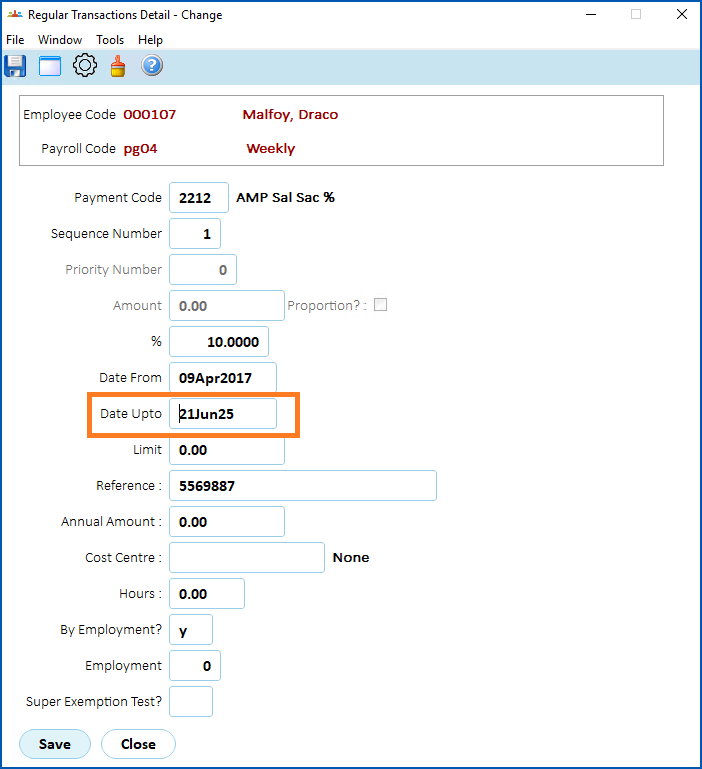
- Click Save. At the Regular Transactions Detail summary screen, the Upto column now shows the date you selected for the transaction to end.
Add a regular transaction
To add a regular transaction:
- Go to Tasks > Employees > Employee Information > Employee Information.
- At the Employee Information summary screen, find the employee.
- Click Regular Transactions.
- At the Regular Transactions Detail summary screen, click New.
- The Regular Transactions Detail - Add screen displays.
- Complete the fields, making sure the transaction applies only to a specific employment by entering:
- y in the By Employment field
- the employment number in the Employment field
See regular allowance/deduction fields if you need help completing any of the fields.
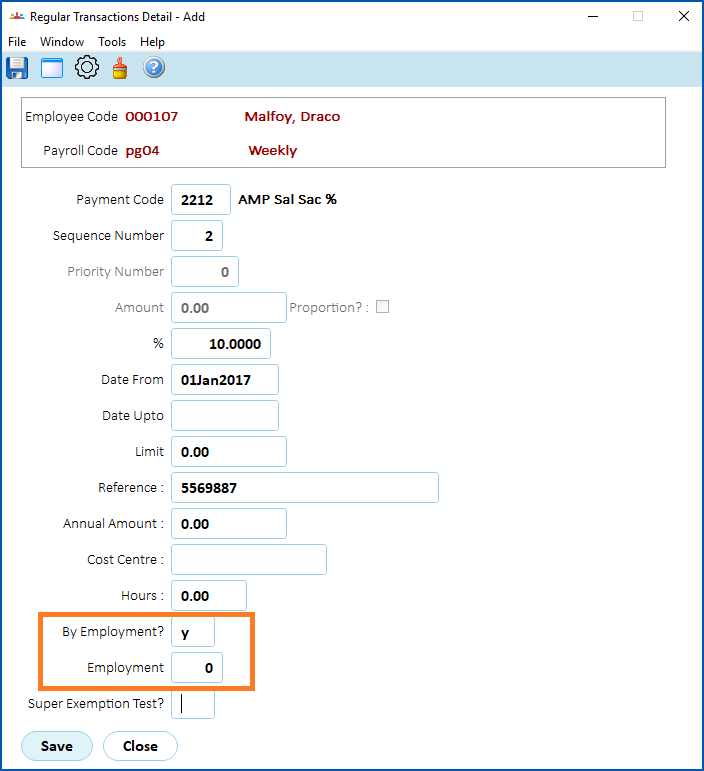
- Click Save.
© 2023 Fusion5. All rights reserved.