Set up employment type (sort code 1 on section code)
The sort code 1 on a section code defines the employment type.
Set up sort code 1 codes
Set up the Sort Codes 1 control table by creating sort code 1 codes, for example:
- s - School
- c - College
- t - TasTAFE
- l - LINC
- cp - Corporate
When creating each code, set the:
- Flag field to y (yes) for EmpowerHR to identify the cost code from the official relief reason.
- Sort Code 1 field to y (yes) for EmpowerHR to perform an employee consecutive day check for relief. This check looks at the maximum number of days a relief employee can work in the same school before being placed on a fixed term contract.
See sort code 1 to learn how to set them up.
Add sort code 1 value to each section code
Once you've set up the Sort Codes 1 control table, you need to add a sort code 1 value to each section code.
Adding a value is easy. You just enter the relevant sort code 1, for example, s (school), in the Sort Code 1 field. See section codes to learn how to do this.
Set up employment group and employee category (sort codes 2 and 3)
Sort code 2 on the classification determines the employment group type, while sort code 3 determines the employee category.
Set up classification sort code 2 codes
Set up the Classification Sort Codes 2 control table by creating codes for the employment group types, for example:
- efa - Education Facility Attendant
- ntea - Non-teaching
- tea - Teaching
- ah - Allied Health
When creating the codes, set the:
- Flag - enter e for the code, efa. This is used to determine if split shift is available.
- Flag - enter t for the code for teachers requiring a TRB
 check.
TRB = Teachers Registration Board
- Sort Code 1 - enter t to indicate the teacher employment group type (used for reporting purposes).
To learn how to set them up, see classification sort code 2.
Set up classification sort code 3 codes
Set up the Classification Sort Codes 3 control table by creating codes for employee categories.
The employee category rules rely on employee categories, so use the following list to know which categories are required. You only need to complete the Code and Description fields - for instructions, see classification sort code 3.
| Code | Description |
|---|---|
| efa | Education Facility Attendant |
| busa | Bus Attendant |
| busd | Bus Driver |
| cana | Canteen Assistant |
| cans | Canteen Supervisor |
| labt | Lab Tech |
| libr | Librarian |
| libt | Library Technician |
| soct | Social Trainer |
| tcha | Teacher Assistant |
| tuto | Adult Tutor |
| inmu | Instrument Musician |
| sco | School Psychologist |
| teac | Teacher |
| nurs | Nurse |
| socw | Social Worker |
| sppa | Speech Pathologist |
| tssa | TSSA Employees |
| tasc | TASC Employees |
Add classification sort code 2 and 3 values to classifications
Once you've set up the Classification Sort Code 2 and Sort Code 3 control tables, you need to add the values to classifications.
To add the sort code values to a classification:
- Go to Tasks > Classification > Class Input.
- The Class Input summary screen displays.
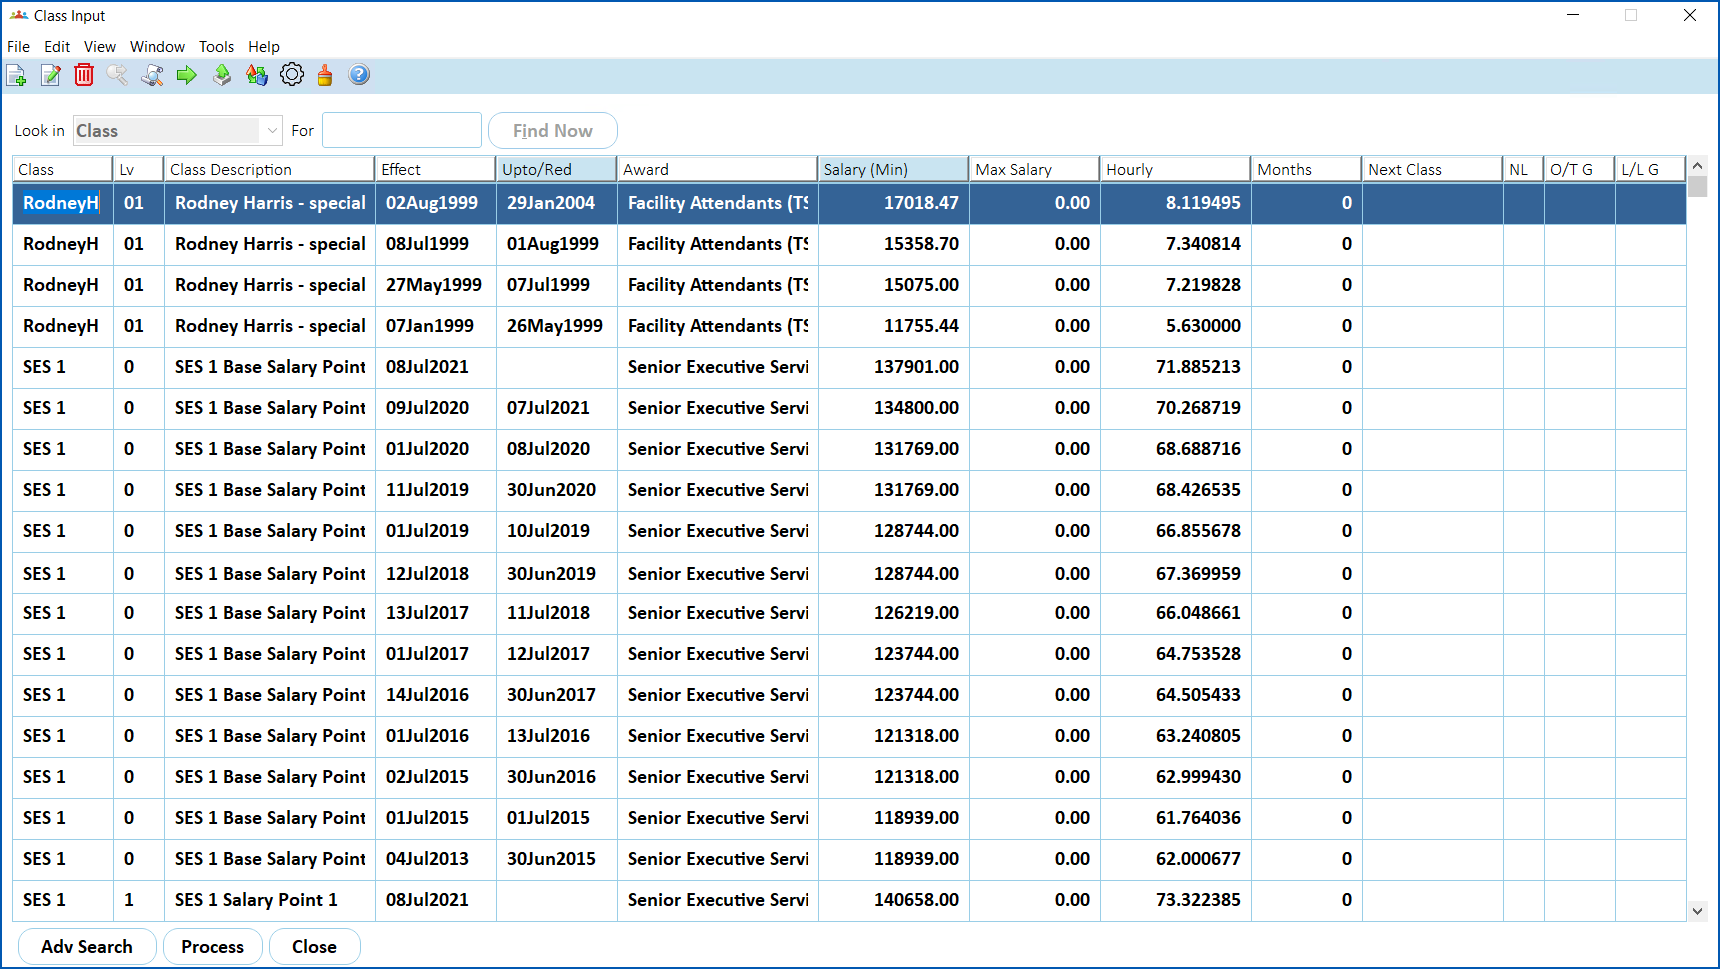
- Select the classification you want to add the values to, and then click Open.
- The Class Input detail screen displays.
- In each of the following fields, click Window, find and double-click the code to add it to the field:
- Classification Sort Code2
- Classification Sort Code3
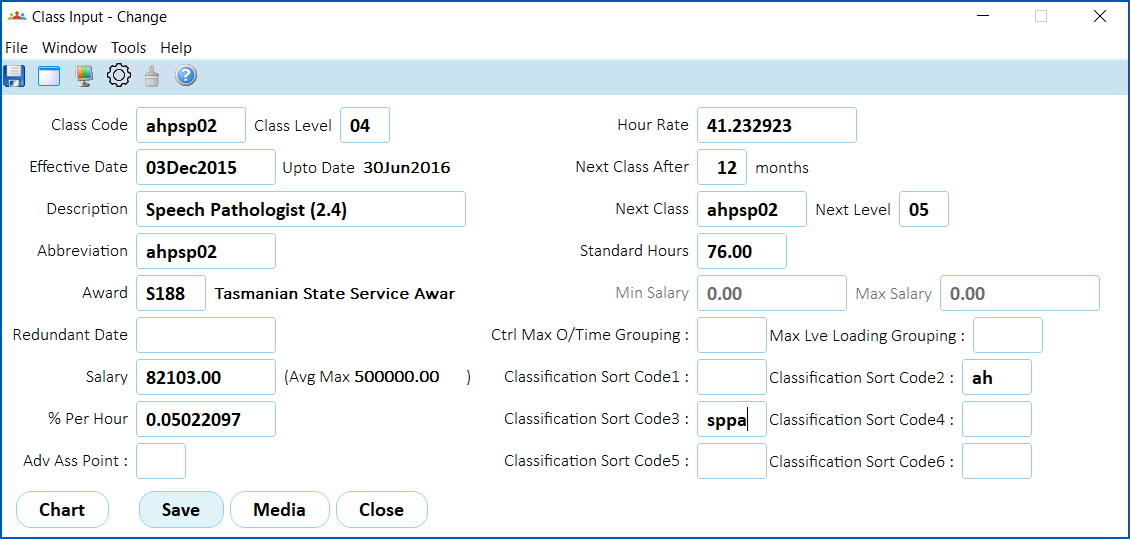
- Click Save.
© 2023 Fusion5. All rights reserved.