There are three ways to manage salary sacrifice:
- Make a pre-tax deduction from the employee to a provider. The provider manages the sacrifice arrangements for a fee included in the all-up deduction.
- Create all relevant payment codes for the sacrifice payments, and then allocate them to the employee via regular transactions.
- Manage the entire process through EmpowerHR's dedicated salary sacrifice screen. The system automatically calculates the remaining cash payments after sacrifice, and then calculates the percentage superannuation based on that cash value (or another entered value).
In this topic, we explain how to set up and apply the third method.
 |
To use salary sacrifice in EmpowerHR, the employee must be on a salaried classification. |
Set up salary sacrifice 
Set up payment codes
EmpowerHR's salary sacrifice screen uses a range of payment codes to describe the benefits included, and the relevant reductions and FBT  .
FBT = Fringe Benefits Tax
If you need assistance in setting up the payment codes, contact your Fusion5 EmpowerHR consultant by logging an iHelp request.
Set up package constants
For each payroll code that allows the use of salary sacrifice, you need to define the package constants.
To define the package constants:
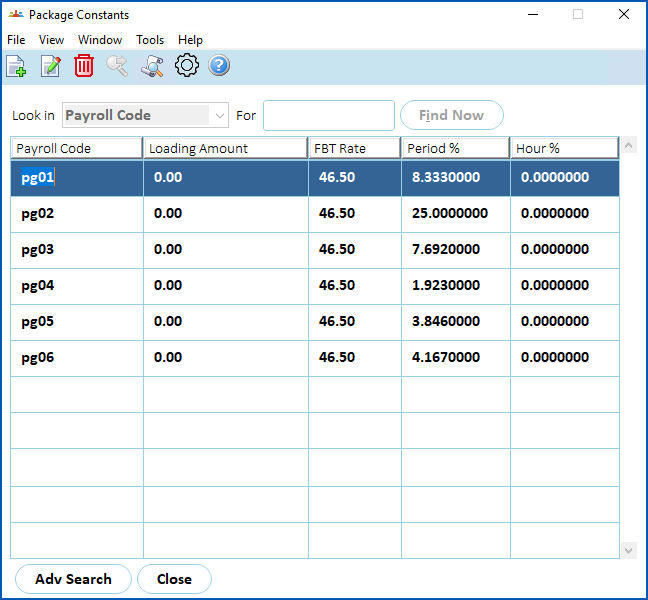
- Go to Control Tables > Payroll > Package Constants.
- At the Package Constants summary screen, click New.
- The Package Constants detail screen displays.
- Enter the details. Here's an example.
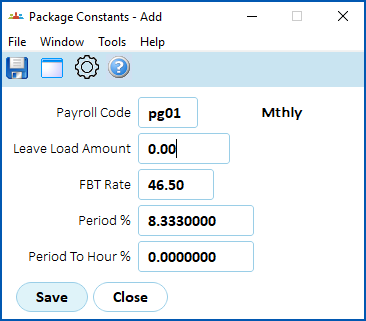
- Click Save.
- Repeat this procedure, starting at step 2, until you've added all the required payroll codes.
Set up trigger pay element
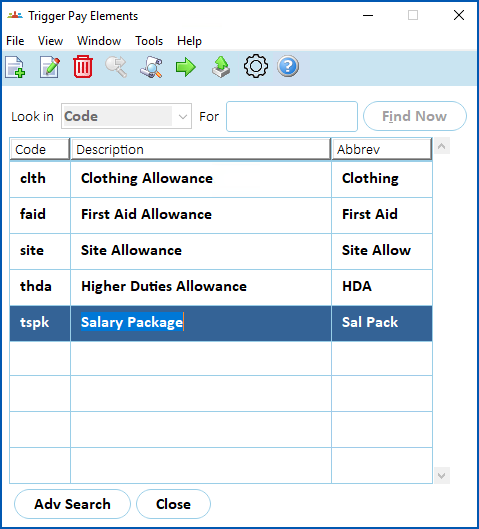
Sacrificed salary benefits appear as allowances on the employee's Regular Allowances screen, and use the trigger called salary package (tspk).
Use the following steps to set up the trigger and add all the payments that will trigger the benefits (for example, normal time, leave, additional hours, etc).
To set up the trigger pay element, tspk:
- Go to Control Tables > Payment > Trigger Pay Elements.
- At the Trigger Pay Elements summary screen, click New.
- The Trigger Pay Elements detail screen displays.
- In:
- Pay Element Code, enter tspk
- Description, enter Salary Package
- Abbreviation, enter an abbreviation (for example, Sal Pack)
- Click Save. EmpowerHR adds the trigger to the Trigger Pay Elements summary screen.
- Click Next Level.
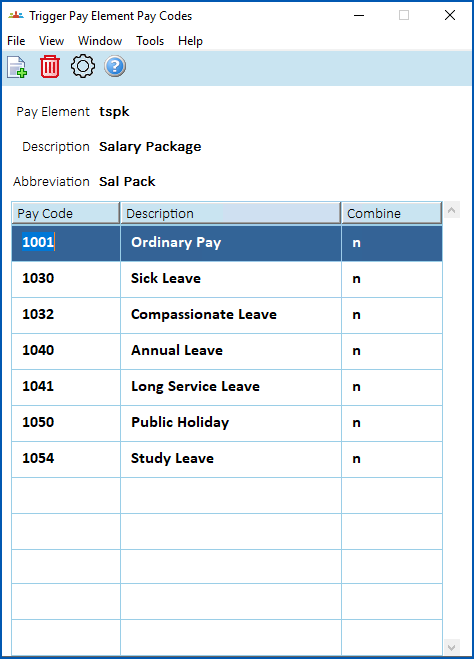
- The Trigger Pay Element Pay Codes summary screen displays.
- Click New.
- The Trigger Pay Element Pay Codes detail screen displays.
- In:
- Pay Code, enter the pay code if you know it, or click Window, find and double-click the code to add it to the field
- Combine with Trigger, enter y (yes) to combine the payment with the trigger payment code, or n (no) to list separately
- Click Save.
- Repeat this procedure, starting at step 2, until you've added all the required payment codes to the trigger pay element.
Assign salary sacrifice to an employee
To assign a salary sacrifice to an employee, EmpowerHR requires you to add a position movement (salary change) to the employee from the date the salary sacrifice is due to commence, even though there are no actual changes to the position.
All types of position movements have associated transaction rules. The transaction rules must be correctly set up for the movement reason code to allow access to the Salary Package? field, Base Salary and Hrly Rate fields.
To assign salary sacrifice to an employee (via a position movement salary change):
- Go to Tasks > Employees > Position Movement > Salary Change.
- At the Salary Change summary screen, in Employee Code:
- enter the code if you know it, or
- click Window, find and double-click the code to add it to the field
- EmpowerHR displays the employee's salary record.
- Click New.
- The Add Remuneration Key screen displays. At:
- Movement Code, select a code from the dropdown list, and then press Tab. In the example, we use incr (salary increment), however, your organisation defines the movement codes for you to use.
- New Movement/Change Date, enter the date the change is to occur, and then press Tab.
- EmpowerHR displays the current position number in the Old Position Number field. Do not change this field.
- Click OK. The Remuneration Change History screen displays.
- In the Salary Package? field, enter y (yes), and then press Tab several times until the Remuneration Change/History - Add screen displays.
- Make your entries using the following table as a guide.
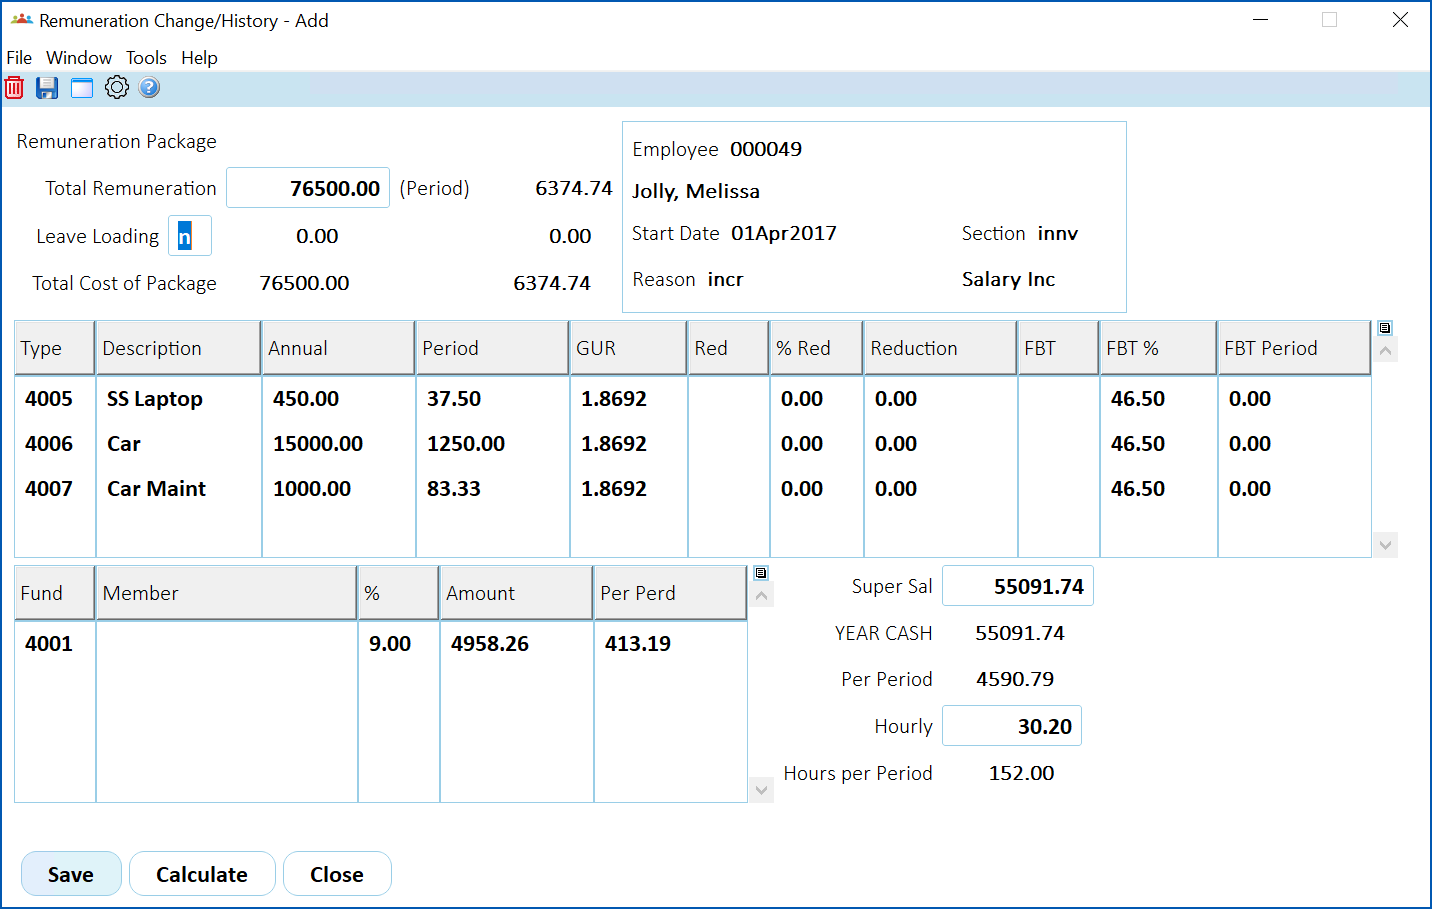
| Field | Description | ||
Total Remuneration | The total salary package value (that is, the salary before sacrifice is applied). | ||
Leave Loading | Whether leave loading is included in the package (as an extra). If you set this field to y (yes), EmpowerHR draws the figure from the package constants control table. | ||
Type | This is the payment code for the benefit. You can enter more than one benefit on other rows. | ||
| Description | This defaults from the payment code entered in Type. | ||
Annual | Enter the annual benefit amount. | ||
Period | EmpowerHR calculates the amount per pay period from the annual amount and the package constants. | ||
Red | This is the payment code for the reducing amount. This is usually attributed to benefits like novated car leases. | ||
% Red | Enter the % reduction per annum. | ||
Reduction | EmpowerHR calculates the Reduction amount per pay period from the Period amount and the % Red entered. | ||
FBT | This is the payment code for the FBT component of the benefit (if any). | ||
FBT % | This amount defaults from the package constants. You can change this amount if the applicable rate is different. | ||
FBT Period | EmpowerHR calculates the FBT amount per pay period from the Period amount and the FBT% entered. | ||
Fund | This is the payment code for the type X superannuation fund. You can enter more than one fund. | ||
Member | This is the employee’s membership number in the fund.
| ||
% | Enter the %age (percentage) benefit. | ||
Amount | EmpowerHR calculates the amount per annum from the %age (percentage) and the monies remaining after the benefits are applied. This occurs when you click Calculate, before saving the screen. See about the formula for an explanation. | ||
Per Perd | EmpowerHR calculates the amount per pay period from the annual amount and the package constants. | ||
Super Sal | This is the superannuation salary to apply for the superannuation amounts. When you click Calculate, EmpowerHR automatically calculates this, with the superannuation Amount and Per Perd figures. However, you can manually enter a different figure, and the superannuation amounts automatically change accordingly. | ||
YEAR CASH | This is the remaining monies to pay to the employee as a part of normal pay. This field is display only, and also appears in the Base Salary field on the employee’s Pay screen. | ||
Per Period | This is the YEAR CASH as a per period amount. This field is display only. | ||
Hourly | This is the YEAR CASH as an hourly rate. This field is display only, and also appears in the Hrly Rate field on the employee’s Pay screen. | ||
Hours per Period | This is from the employee’s hours. |
- When you've completed the fields, click Calculate to calculate the superannuation figures.
- Click Save.
- Once saved, EmpowerHR creates the allowance records on the employee's Regular Allowance screen, ready to trigger in the pay calculation process.
| About the formula |
EmpowerHR uses the following formula to calculate the Superannuation Salary and Superannuation Amounts: Super Salary = a/(100% + Superannuation %) Where a = total cost of package – ([Table 1 elements – annual reduction] + annual FBT) |
© 2023 Fusion5. All rights reserved.