You can create two types of menu items in EmpowerHR:
- control table menu items that use control tables to validate additional employee data
- user report menu items
Create control table menu items
To create a control table menu item:
- Go to Administration > Add Menu Items > Control Tables.
- The Control Tables screen displays.
- If:
- there are no existing menu items, select the Control Tables folder, click Start A Lower Level, and then click New.
- there are existing menus items, select the item that's above or below where you want to locate the new item, click Add Before Selected Item or Add After Selected Item, and then click New.
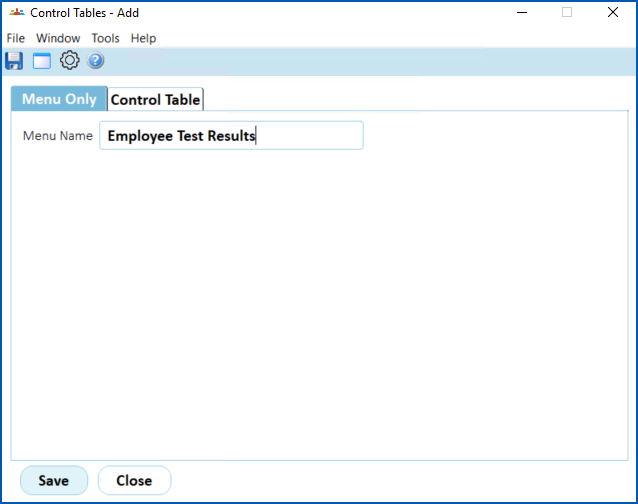
- At Control Tables - Add (on the Menu Only tab), type a name in the Menu Name field, and then click Save. This creates a folder item.
- The Control Tables screen displays, with the new item (folder) listed.
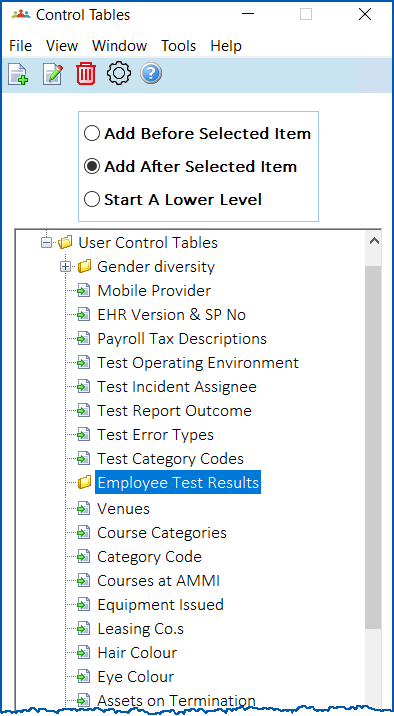
- Select the new item (folder), click Start A Lower Level, and then click New.
- At the Control Tables - Add screen, enter:
- a four-character code in the Control Table Code Type field, starting with the letter x
- a name in the Control Table Name field
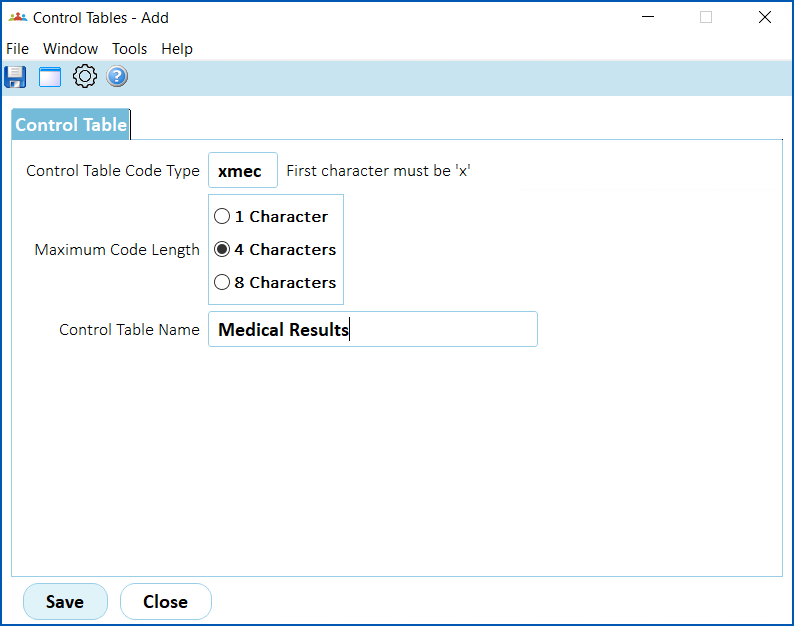
- Click Save.
- The Control Tables screen displays, with the new item nested within the folder you created.
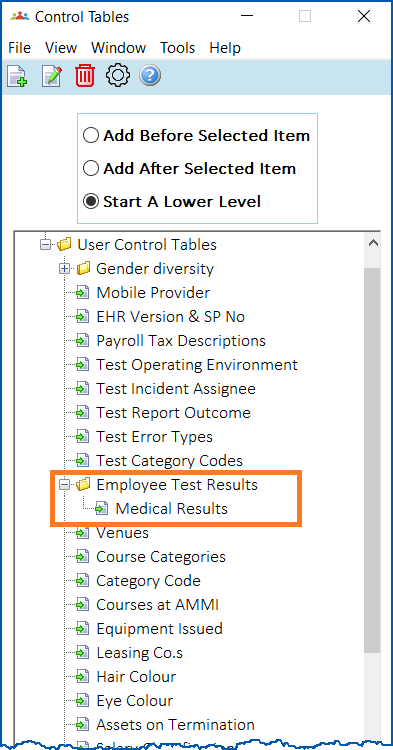
- After you've created the menu item, to allow users to access it, update the account template. For instructions, see create and update account templates.
- Users can then access the menu item at Control Tables > User Control Tables.
Create user report menu items
To create a user report menu item:
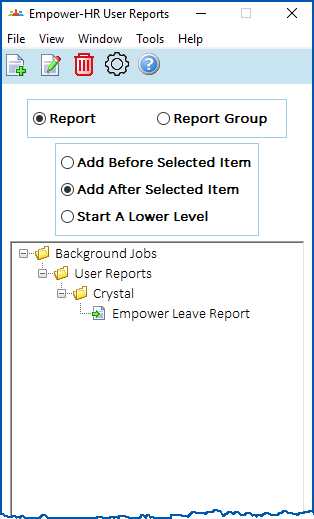
- Go to Administration > Add Menu Items > Empower-HR User Reports.
- The Empower-HR User Reports screen displays.
- Select the item that's above or below where you want to locate the new item, click Add Before Selected Item or Add After Selected Item, and then click New.
- At Empower-HR User Reports - Add screen (on the Menu Only tab), type a name in the Menu Name field, and then click Save. This creates a folder item.
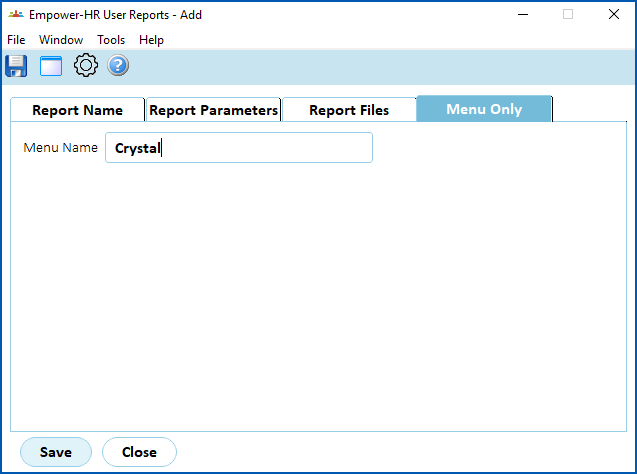
- The Empower-HR User Reports screen displays, with the new item (folder) listed.
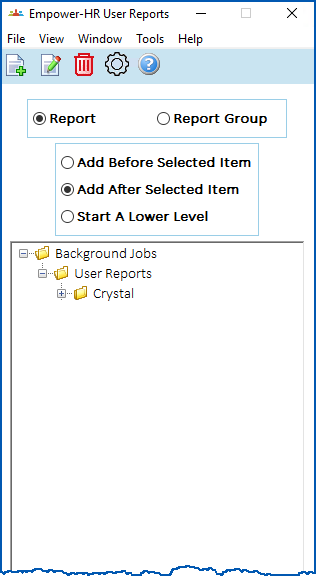
- Select the new item (folder), select Start A Lower Level, and then click New.
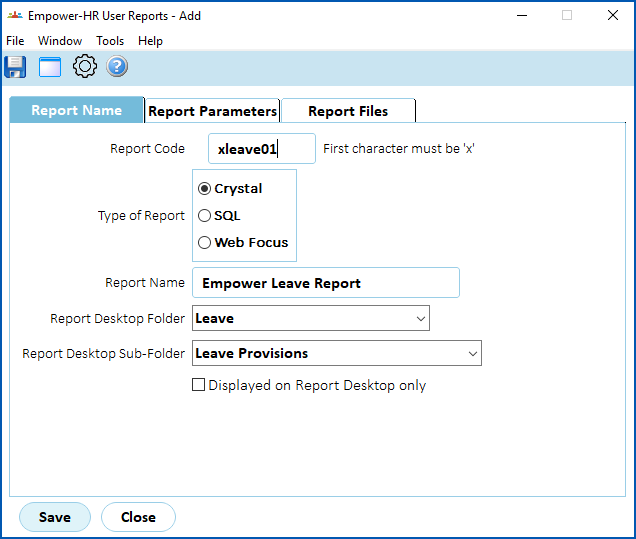
- At the Empower-HR User Reports - Add screen, on the Report Name tab:
- enter a code in the Report Code field
- click the Type of Report
- enter a name in the Report Name field
- specify where you want to locate the report on the Report Desktop screen by selecting a folder from the Report Desktop Folder dropdown list, and then a sub-folder from the Report Desktop Sub-Folder dropdown list
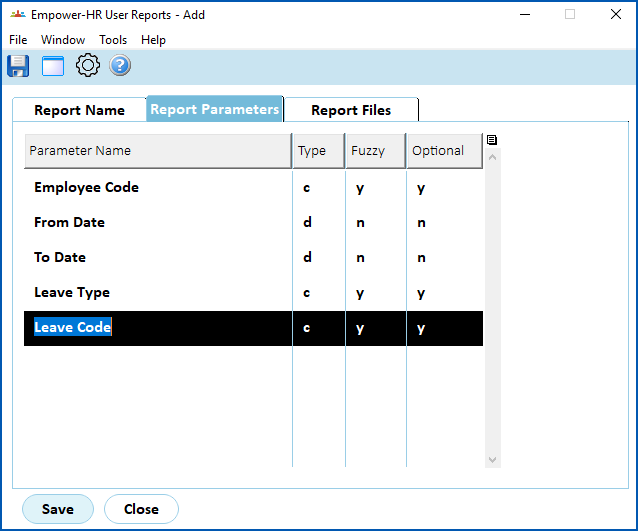
- Go to the Report Parameters tab.
- Specify the Type of parameters. The options are:
- c = character
- d = date
- f = decimal number
- i = integer
- You can also make a parameter optional/mandatory, and allow/disallow the use of fuzzy characters, with the following settings:
- Optional - y (yes) or n (no)
- Fuzzy
 - y (yes) or n (no)
Fuzzy means to use a special character in searches and reports. In EmpowerHR, the special character is the % (percentage sign) which you can use to stand for unknown characters, widening the results of a search/report. (You may also know the term as wildcard).
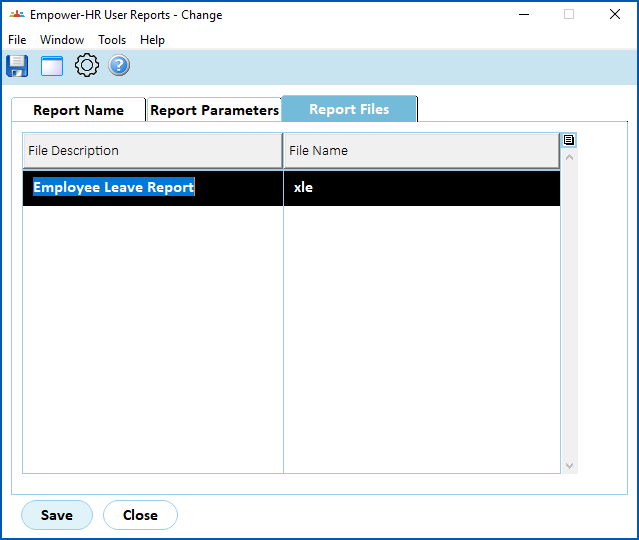
- Go to the Report Files tab.
- Enter a row for each file the report produces.
- Click Save.
- The Control Tables screen displays, with the new item nested within the folder you created.
- Users can access the menu item at Report Desktop > Report Desktop.
© 2023 Fusion5. All rights reserved.