Manually adjust or transfer employee leave balances
You can manually adjust an employee’s leave balance. This is useful for transferring an employee's leave balance from one leave rule to another, or transferring leave balances between an individual's multiple employments.
To manually adjust or transfer an employee's leave balances: 
Go to Tasks > Leave > Leave Bookings > Leave Transfers/Cancellations.
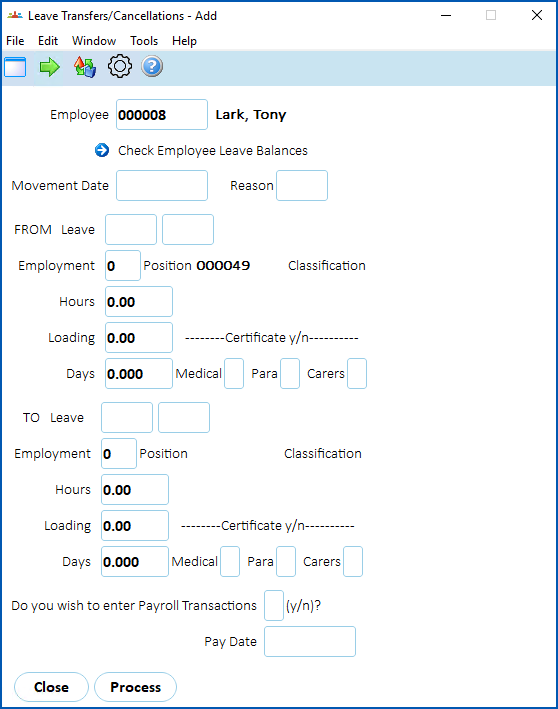
At the Leave Transfers/Cancellations detail screen, enter the employee number if you know it, or click Window, find and double-click the employee number to add it to the field.
- If you:
- want to view the employee's history, click Check Employee Leave Balances. Then click Close when you're done. Go to step 4.
- don't want to view the employee's history, go to step 4.
- At the Leave Transfers/Cancellations detail screen:
enter the FROM Leave type and the amount of hours to transfer
enter the TO Leave type and the amount of hours to transfer
if you want to access the Pay Data Entry screen, enter y (yes) for Do you wish to enter Payroll Transactions field. The Pay Data Entry screen displays so you can enter transactions relating to the leave transfer, for example, to pay out a leave entitlement.
Click Process.
Manually take on an employee's leave balance
Being able to manually take on accruals is useful in a number of situations. For example:
- you may need to load an employee's opening balance after attaching the employee to a leave rule
where a system-generated accrual has not accounted for a variation in hours
where an employee has a carry-over from prior service

|
You can only do:
|
To manually take on an employee's leave balances:
Go to Tasks > Leave > Leave Take-on > Leave History Take-on.
At the Leave History/Take-on summary screen, enter the leave type in the For field (or leave the field blank to find all leave types), and then click Find Now.
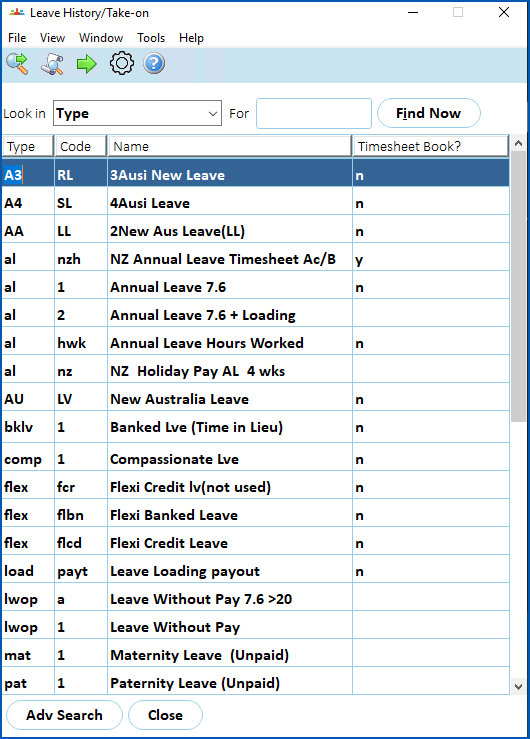
- Select a leave type and then click Next Level. The Leave History/Take-on details screen displays.
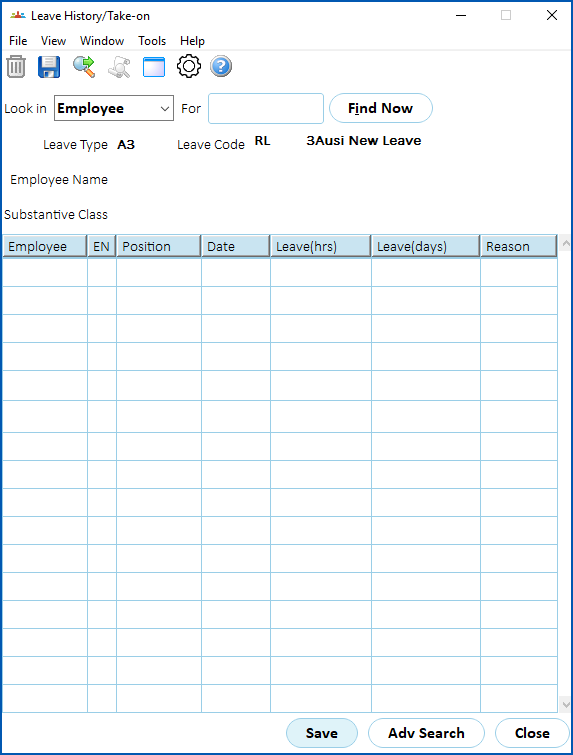
- At the Leave History/Take-on details screen, click Find Now to display any previous take-ons.
At:
Employee, enter the employee code
EN, enter the employment number
The Position Number and Last Accrual Date automatically display default data. You can change the default Last Accrual Date if you want.
At either Leave(hrs) or Leave(days), enter the amount to be subtracted. Whichever of the two fields you enter an amount, the other field automatically updates.
At Reason, type a reason for the manual accrual.
- Click Save.
Reduce leave balances (in bulk) for a group of employees
You can reduce employee leave entitlements as a group if the need ever arises.

|
As the name implies, bulk processing is a powerful way to change many records. We recommend you have sound experience in using EmpowerHR before performing a bulk process. |
To reduce employee leave entitlements in bulk:
Go to Tasks > Leave > Leave Bookings > Bulk Reduce Leave Entitlements.
At the Bulk Reduce Leave Entitlements screen, enter the number of days, or the number of hours for the reduction.
- Click Adv Search and find the records you want to apply the reduction to. For example, all employees attached to al 1
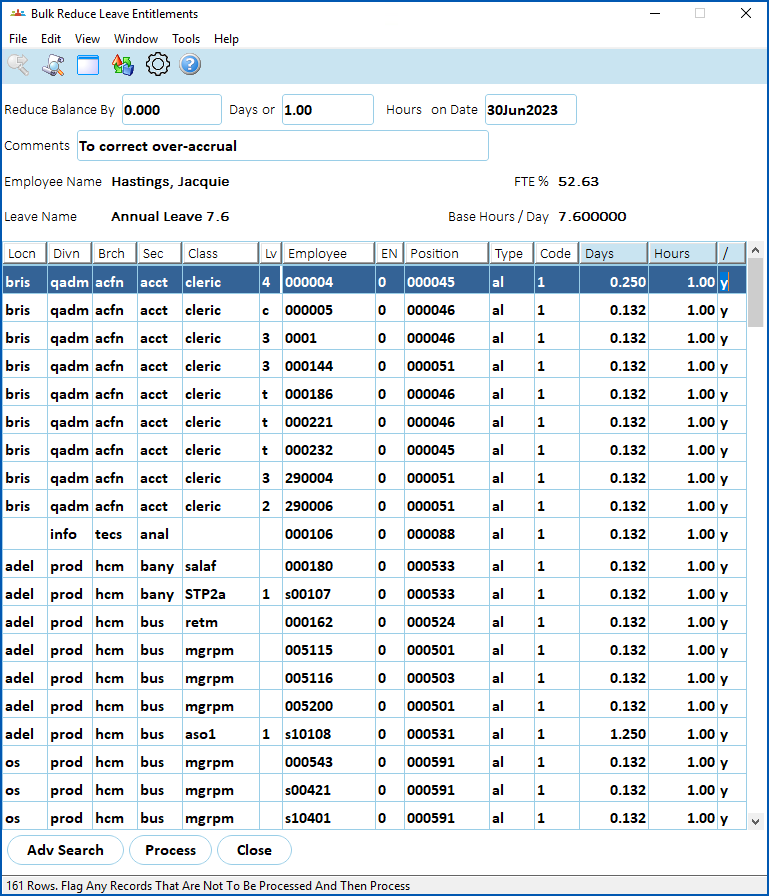
- In the Comments field, type a reason for the reduction.
- In the / (reduce leave?) column, change y (yes) to n (no) for any employee you want to omit from the bulk reduction.
- Click Process to apply the entitlement reduction.
© 2023 Fusion5. All rights reserved.