You can control whether EmpowerHR issues error or warning messages when users enter values in fields that do not pass validation rules.
You can set the severity level to:
- y = Yes. The field must be completed with valid data otherwise an error displays and stops the user from going further.
- w = Warning. A warning message displays but the user can still go ahead.
- n = No severity. No error or warning is provided and the user is allowed to leave the field blank.

|
Fields may have a combination of these validation routines. |
To set the severity level for a particular field, you need to first identify the frame (form)  name of the screen where the field is located.
A frame (form) is a holder for a group of fields and displays data to the user. A frame can be used for any number of screens.
Identify frame name
To identify the frame name:
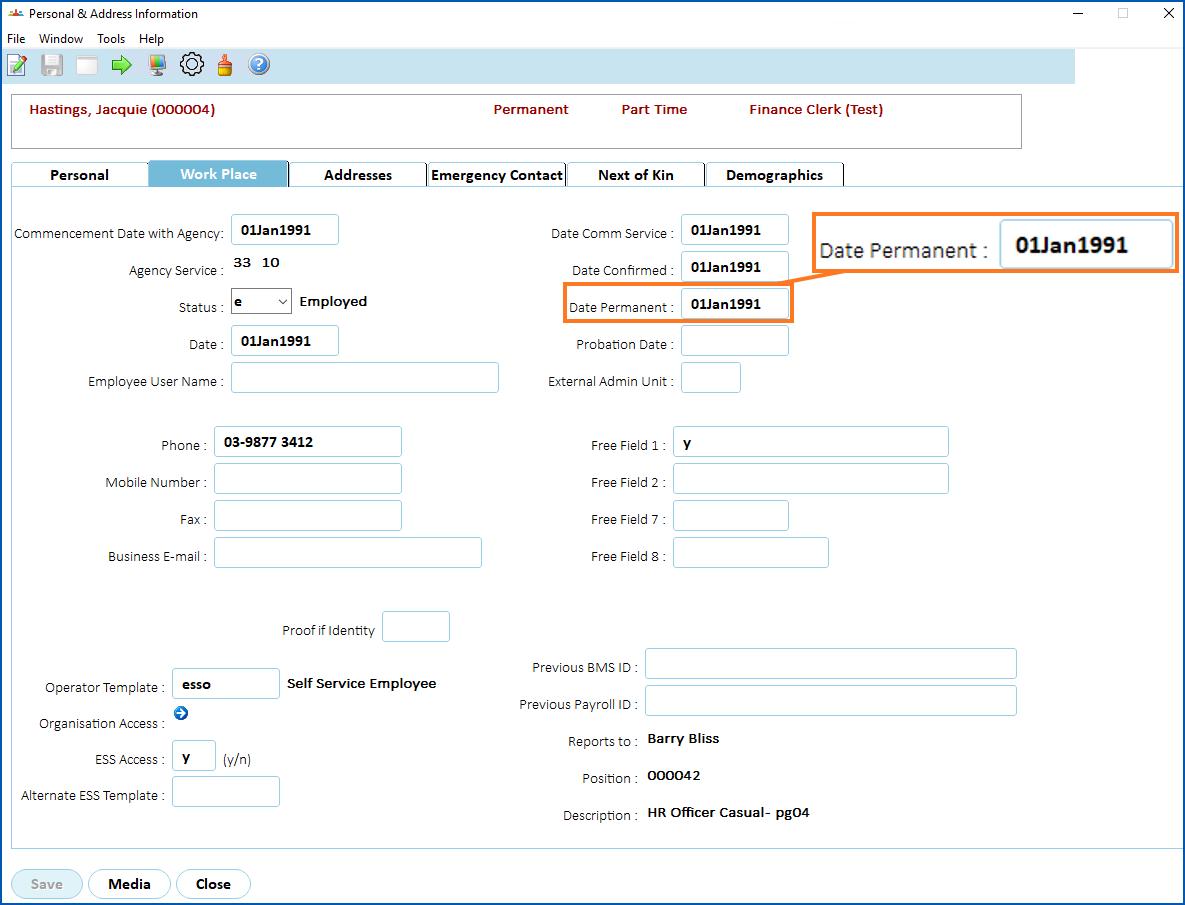
- Go to the screen where the field is located. In the following example, we want to change the severity level of the Date Permanent field. This field is located on the Employee Information - Personal & Address Information screen (Work Place tab).
- Click Utilities. The Utilities window displays.
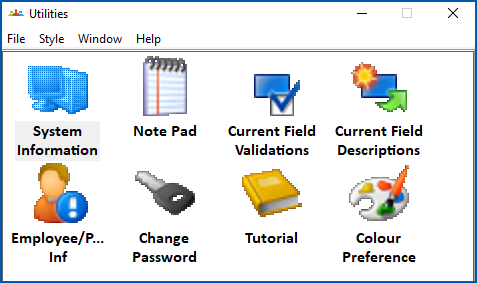
- Double-click System Information.
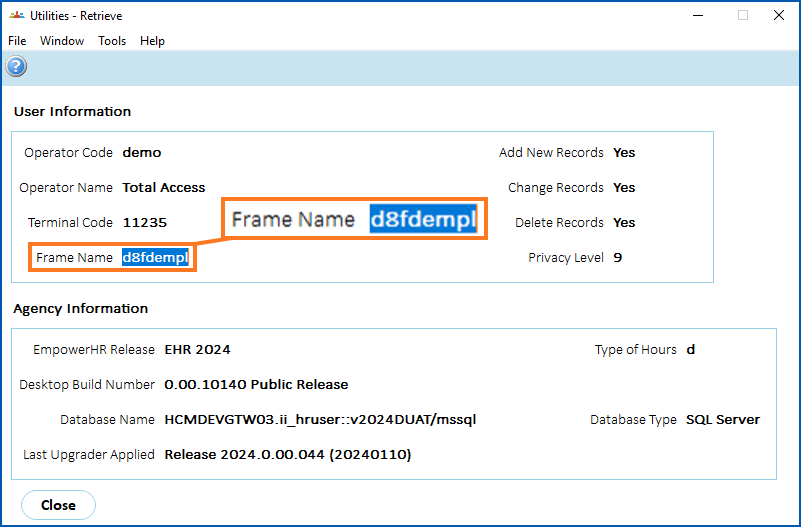
- At the System Information screen, select and copy the name displayed in the Frame Name field. In this example, the frame name is d8fdempl.
- Now you've identified the frame name, use the following instructions to set the validation severity on the field.
Set field error validation severity
To set the field error validation severity:
- Go to Administration > Screen Management > Field Severity Level Update.
- At the Field Severity Level Update summary screen:
- select Form from the Look in dropdown list
- paste the frame name you copied from the System Information screen into the For field, and then click Find Now
- The results are displayed.
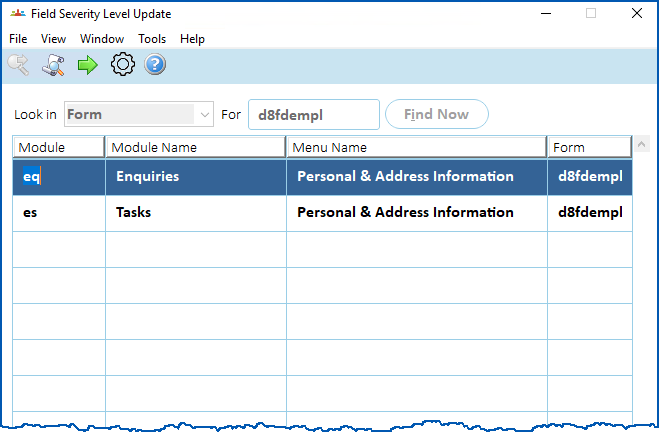
- Select the relevant module, and then click Next Level. We selected the Tasks module.
- A list of fields display.
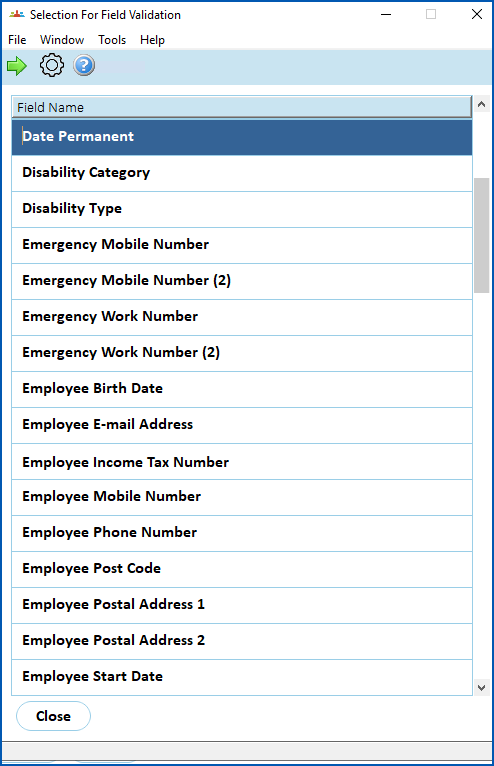
- Find and select the field, and then click Next Level. We selected the Date Permanent field.
- A list of the validation routines for the field displays and lists the available Options for each routine.
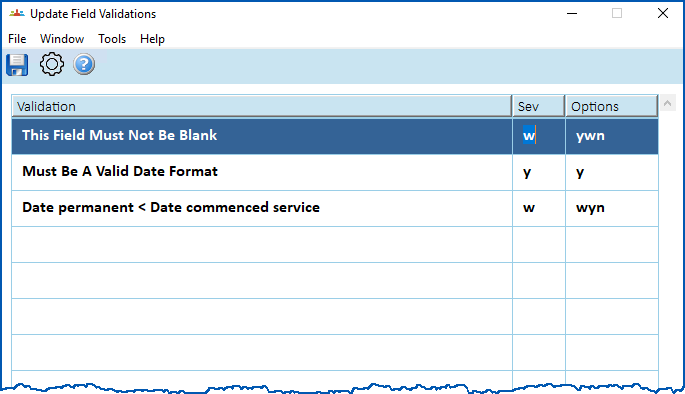
- At the Update Field Validations screen, make your changes in the Sev (severity) column.
|
|
You won't be allowed to change the level on a validation routine if doing so impacts system integrity. The Must Be a Valid Date Format routine (as shown in step 7) is an example - it has the level y (must be completed) and doesn't offer any options. |
- Click Save.
© 2023 Fusion5. All rights reserved.