Can I create an additional weeks payment request?
As a manager, you can create an additional weeks payment request on your employee's behalf. This type of request is only available in MSS.
- The employee must be on the relevant additional weeks register and have Payment of Hours as their pay method.
- You can only create the request if there is an open pay period. See processing cutoff for more information.
- Once the request is finalised, EmpowerHR adds a new entry to batch 9 for the current pay period.
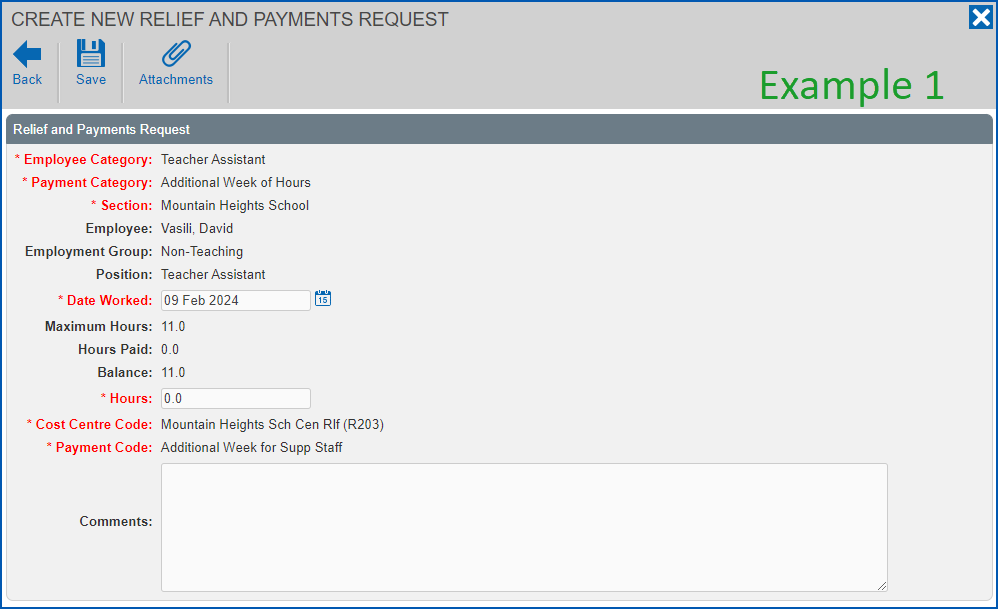
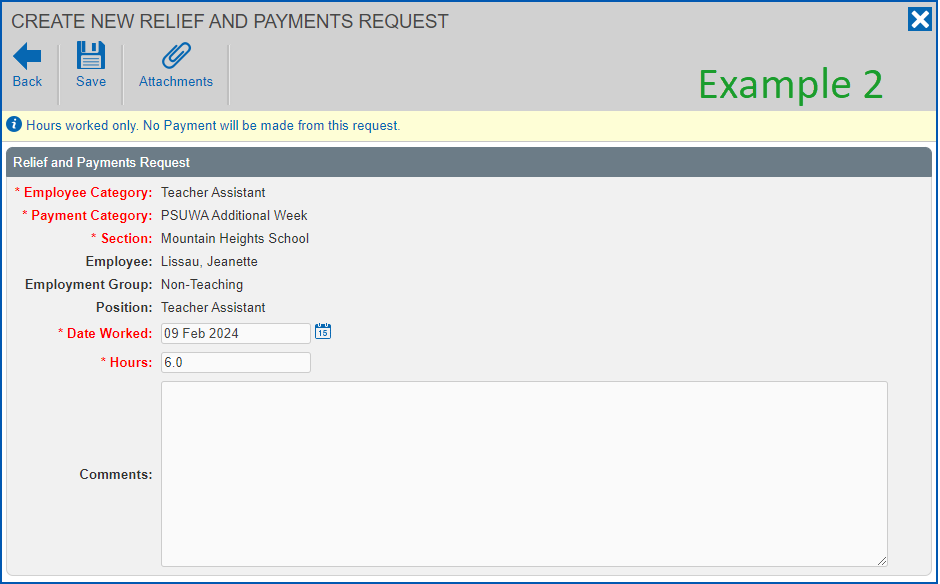
Exception - Annual Payment, Two Half Payments, and Non Payment With additional weeks payments, an employee may have the Annual Payment or Two Half Payments pay method (instead of Payment of Hours), or the Non Payment pay method. You still create an additional weeks request to record the hours worked. The request will have no payment attached, therefore no payment code or cost centre will appear on the request. You'll find an example in the following instructions. |
|---|
Create an additional weeks payment request in MSS
To create an additional weeks payment request in MSS: 
- Go to Requests > Relief and One-off Payments.
- At the Relief and One-off Payments catalogue, click New Request.
- At the initial Create New Relief and Payments Request screen, select the:
- Employee Category, select a category from the dropdown list
- Payment Category, select a payment category from the dropdown list
- Date Worked, click Date Lookup and select the date worked
- Employee, enter the employee's surname and then wait until the system responds with a list of employees with that surname. Select one from the dropdown list.
- Click Next.
- At the Create New Relief and Payments Request detail screen:
- enter the number of Hours for this request
- add a Comment (optional)
Example 1 shows a request for an additional week of hours where David's pay method is Payment of Hours.
Example 2 shows a request for a PSUWA additional week where Jeanette's pay method is Annual Payment.
- Click Save. How the approval workflow is set up in your organisation determines whether the Workflow :: Addressee dialog box displays, or the request is automatically finalised.
- If the Workflow :: Addressee dialog box
- does display, then go to step 8
- does not display, then finalise the request when EmpowerHR prompts you. No further action is required.
- In:
- Send To, select an approver from the dropdown list
- Comments, add a message (optional)
- Click Send To to submit the request for approval.
© 2023 Fusion5. All rights reserved.