---
title: "Set up claims for casual relief workflow"
id: "set-up-approval-workflow-casual-relief"
project: "EHR User Guide"
url: "https://help.cloud5.com.au/articles/ehr-user-guide/set-up-approval-workflow-casual-relief"
updated: 2026-10-19T00:53:02Z
---
# Set up claims for casual relief workflow
## Claims for casual relief workflow
EmpowerHR's workflow automates the approval process for casual relief work claims. (For more information about workflows in general, see [design workflow](/articles/ehr-user-guide/design-workflow).)
To complete the setup of the workflow,****you need to define:
* workflow tasks (approval steps)
* a new workflow element (**clvc**)
* roles in the workflow
## Define workflow tasks
Tasks are the approval steps needed to process a claim for casual relief work.
The first task is Task 1 and EmpowerHR automatically generates this task. While not essential, we recommend you:
* make Task 1 the employee approval step (empl)
* assign the employee approval step to the manager’s role (the role is only used during the timeout routine)
* apply a timeout period to the employee approval step and set the timeout period to one day
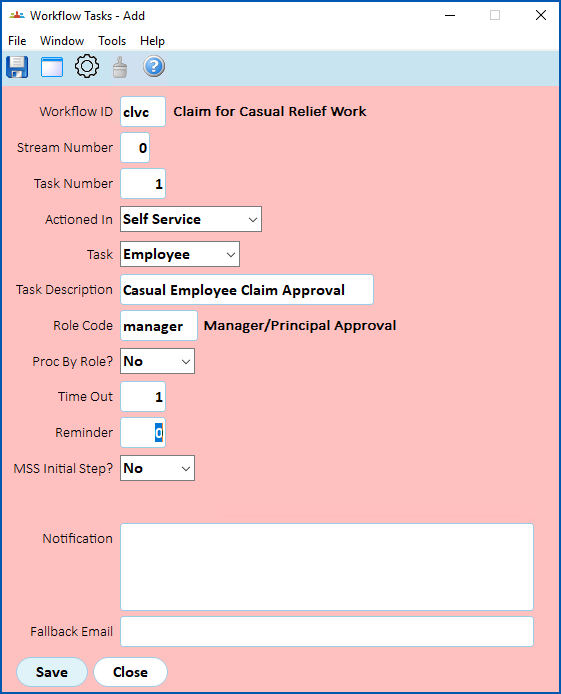
See [define workflow tasks](/articles/ehr-user-guide/define-workflow-tasks) to learn how to set this up.
## Define workflow elements
To define a workflow element:
1. Go to Administration > Workflow > Workflow Elements.
2. At the Workflow Elements summary screen, click **Find Now**to see a list of existing elements.
3. Click **New**.
4. At the Workflow Elements detail screen, in the **Workflow ID** field, enter **clvc**, and then press **Tab.**EmpowerHR displays the ID description, **Claim for Casual Relief Work.**
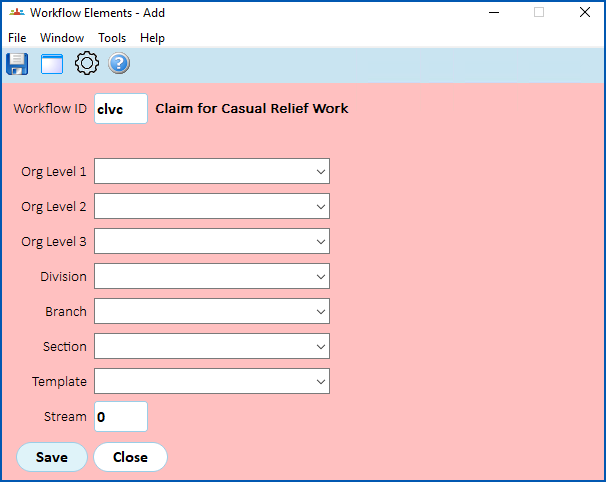
1. Complete the fields using the following table as a guide.
| **At this field...** | **Do this...** |
| --- | --- |
| Org Level 1
Org Level 2
Org Level 3
Division
Branch
Section | Optional:
You can restrict the workflow to organisational levels in your organisation by making selections from the dropdown lists in any of these six fields, or else by making a selection from the **Template** dropdown list. |
| Template |
| Stream | If the workflow has multiple streams, enter the stream number, for example enter **1**.
Otherwise, leave the default of **0**.
|  | We recommend you leave the default of **0** for a single workflow stream. |
| --- | --- | |
1. Click **Save**.
## Define workflow roles
We recommend you:
* refer to roles by position on the **Employee / Position Roles** screen (for the role code)
* make sure the **Auto Emp/Role Creation** (crbsrole) background job is scheduled to run each night
* set up roles to redirect to a central person if you are using the timeout function
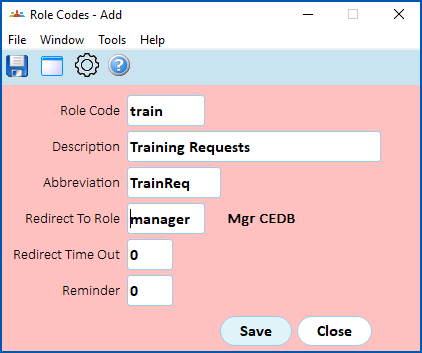
See [define workflow roles](/articles/ehr-user-guide/define-workflow-roles) to learn how to set this up.
| Next topic
[Units for TASC payments](/articles/ehr-user-guide/units-for-tasc-payments) |
| --- |
© 2023 Fusion5. All rights reserved.