---
title: "Function management"
id: "function-management"
project: "EHR User Guide"
url: "https://help.cloud5.com.au/articles/ehr-user-guide/function-management"
updated: 2026-10-19T00:53:42Z
---
# Function management
Use the Function Management feature to:
* configure the use of attachments for work health and safety (WH&S), workflow items, forms, and personal details
* create user menus and sub-menus with external links and parameters
## Configure use of attachments
Use the following procedure to identify where and how to use attachments relating to WH&S screens.
|  | Use of attachments is ultimately controlled by the installation option called **(attc) upload attachments in self service**, which switches on/off all attachments capability for your site. |
| --- | --- |
To switch on the use of attachments for WH&S screens:
1. Go to **Administration** > **Screen Management** > **Function Managemen**t.
2. At **Function Management**, expand **Self Service**, expand **Health and Safety**, and then expand **Health and Safety Incident**.
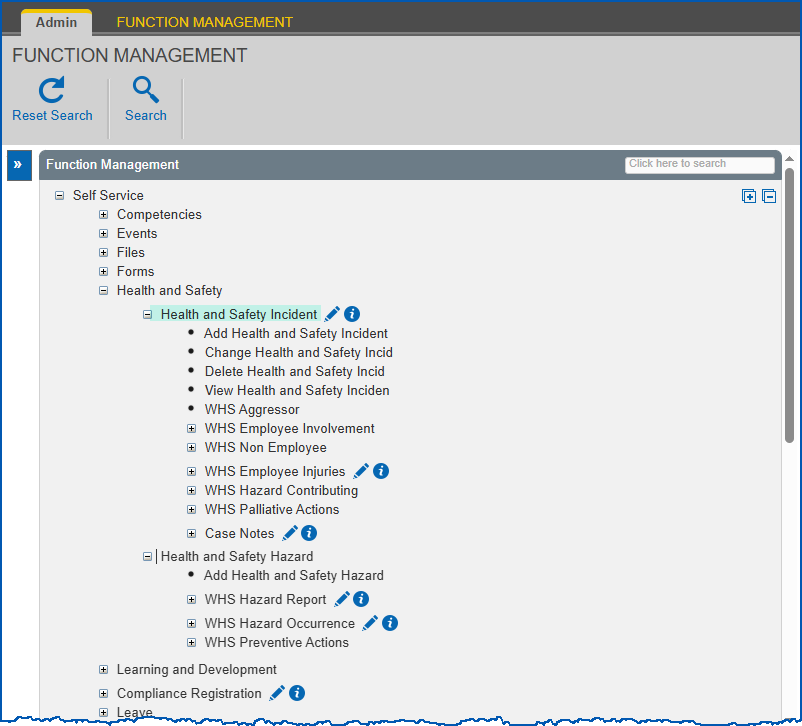
1. For each screen you want to change, click **Change** beside the screen name.
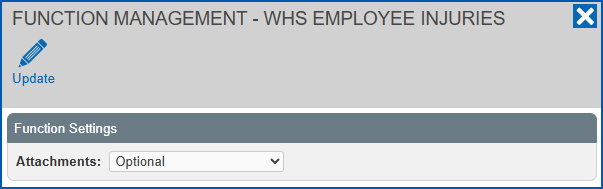
2. At the **Function Management - ...** screen, select a setting from the **Attachments** dropdown list. Here's an example:
1. Click **Update**.
2. At **Function Ma****nagemen** **t**, expand **Self Service**, expand **Health and Safety**, and then expand **Health and Safety Hazard**.
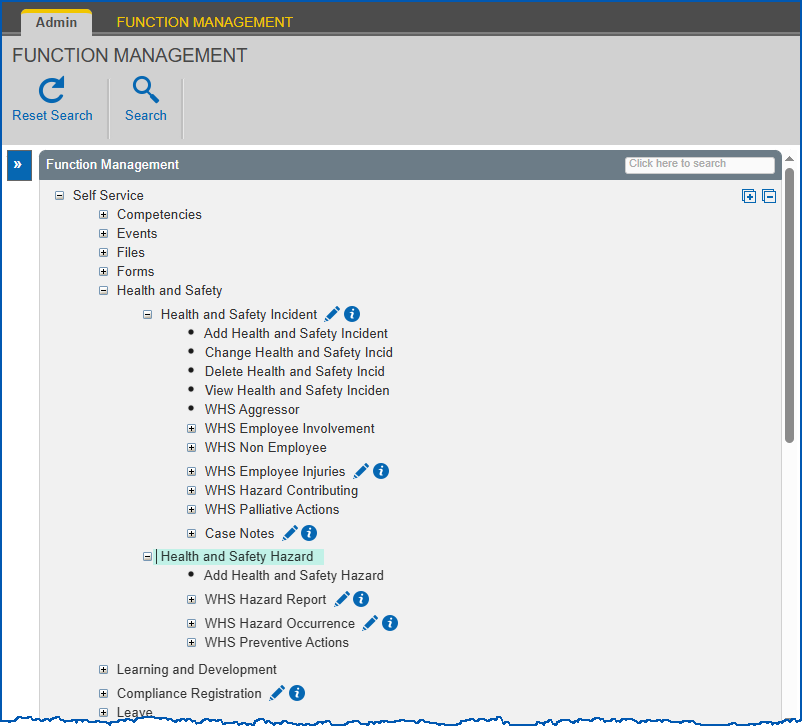
1. Repeat this procedure, starting at step 3, to set attachments for each relevant health and safety hazard screen.
## Create user menus
Here's how to create user menus in self service.
### Create a level 1 menu
To create a level 1 menu:
1. Go to **Administration** > **Screen Management** > **Function Managemen**t.
2. At **Function Management**, expand **Self Service**.
3. Scroll down to the bottom of the list of screens, and then click **Click here to Create Menu**.
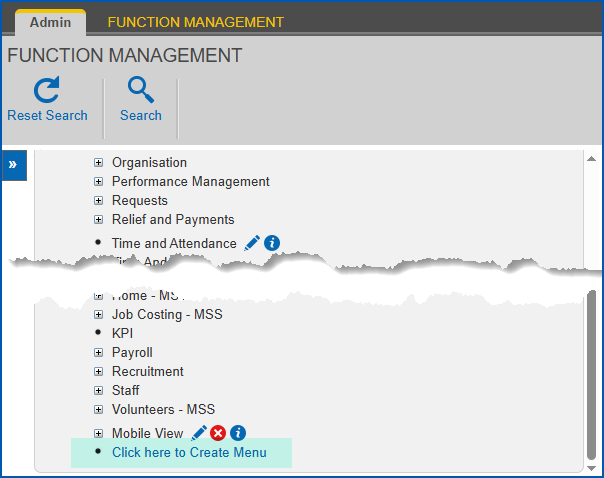
1. EmpowerHR displays the **Function Management - New Menu** screen.
2. At:
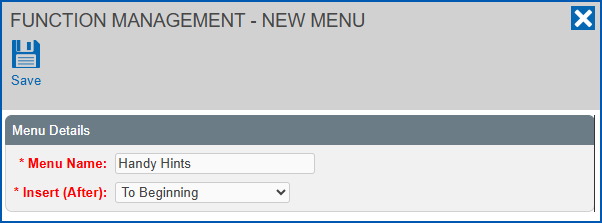
1. **Menu Name**, enter a name for the menu
2. **Insert (After)**, select an option from the dropdown list. This is where the new menu item will appear. We select **To Beginning** for level 1 menu items.
In the following example, we define a level 1 menu item called **Handy Hints**. 
1. Click **Save**. Now, create a sub-menu for the new menu item.
### Create a level 2 menu (sub-menu)
To create a level 2 menu (sub-menu):
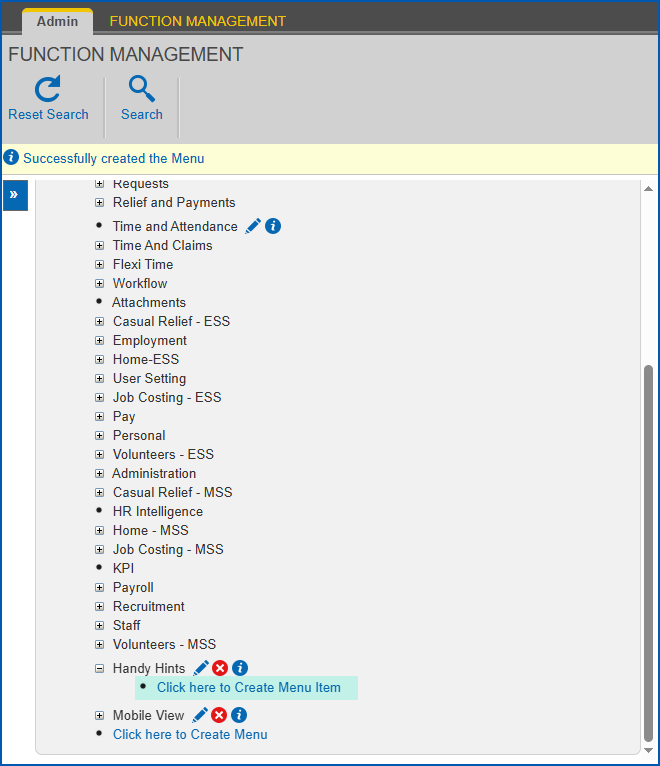
1. At **Function Management**, expand the level 1 menu you created. In our example, we expand **Handy Hints**.
2. Click **Click here to Create Menu Item**.
1. EmpowerHR displays the **Function Management - New Menu** screen. ****
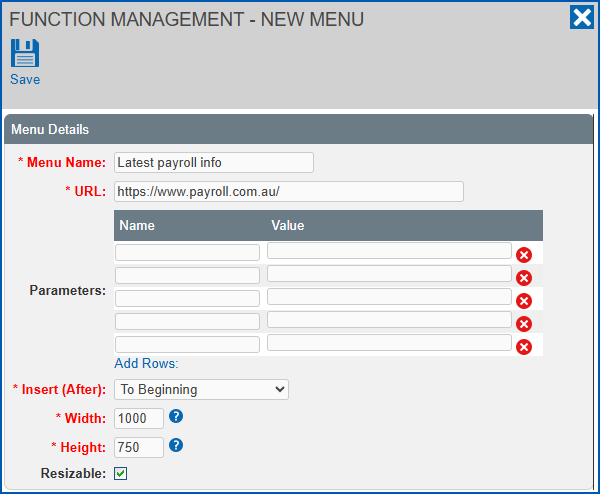
2. Complete the fields using the following table as a guide.
| **At this field...** | **Do this...** |
| --- | --- |
| Menu Name | Enter a name for the sub-menu. |
| URL | Enter a web address. |
| Parameters | Enter additional parameters, if required.
The supported symbolics are:
- $em$ - employee code
- $pn$ - position number
- $me$ - manager employee code
|
| Insert (After) | Select a different option from the default, if required. |
| Width | Change the default width value, if required. |
| Height | Change the default height value, if required. |
### Grant access to the new user defined menu
1. See [create and update self service templates](/articles/ehr-user-guide/create-and-update-self-service-templates)for instructions on how to grant access to the user defined menu.
|  | To locate the menu item you created, in the **Security Access for...** screen for each relevant template, expand **Self Service**, and then scroll down to the end of the list. |
| --- | --- |
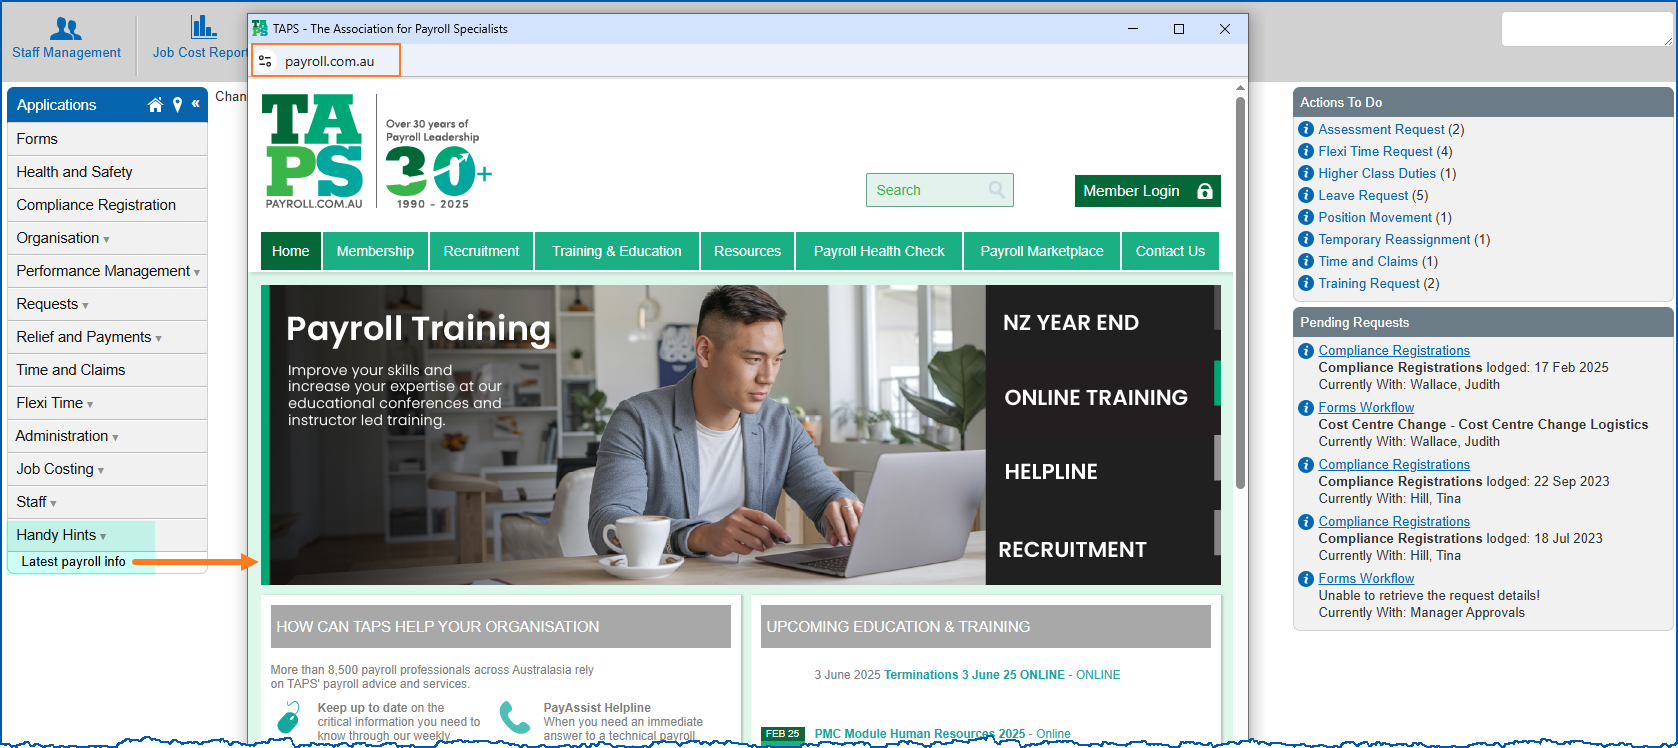
1. Now you've granted access, the menu item is available in self service. When a user clicks the item, the URL opens in a new window. In our example, clicking the **Handy Hints** sub-menu called **Latest payroll info** displays the TAPS website in a separate window.
| Next topic
[Self service forms administration](/articles/ehr-user-guide/self-service-forms-administration) |
| --- |
© 2023 Fusion5. All rights reserved.