---
title: "Employee demographics reporting"
id: "employee-demographics-reporting"
project: "EHR User Guide"
url: "https://help.cloud5.com.au/articles/ehr-user-guide/employee-demographics-reporting"
updated: 2026-10-19T00:52:44Z
---
# Employee demographics reporting
## View demographics history 
Each time an employee's demographics information is updated, the old information is moved to history records. You can view history details, and extract a copy of the data for reporting.
To view an employee's demographics history:
1. Go to **Enquiries** > **Employee** > **Demographics History**.
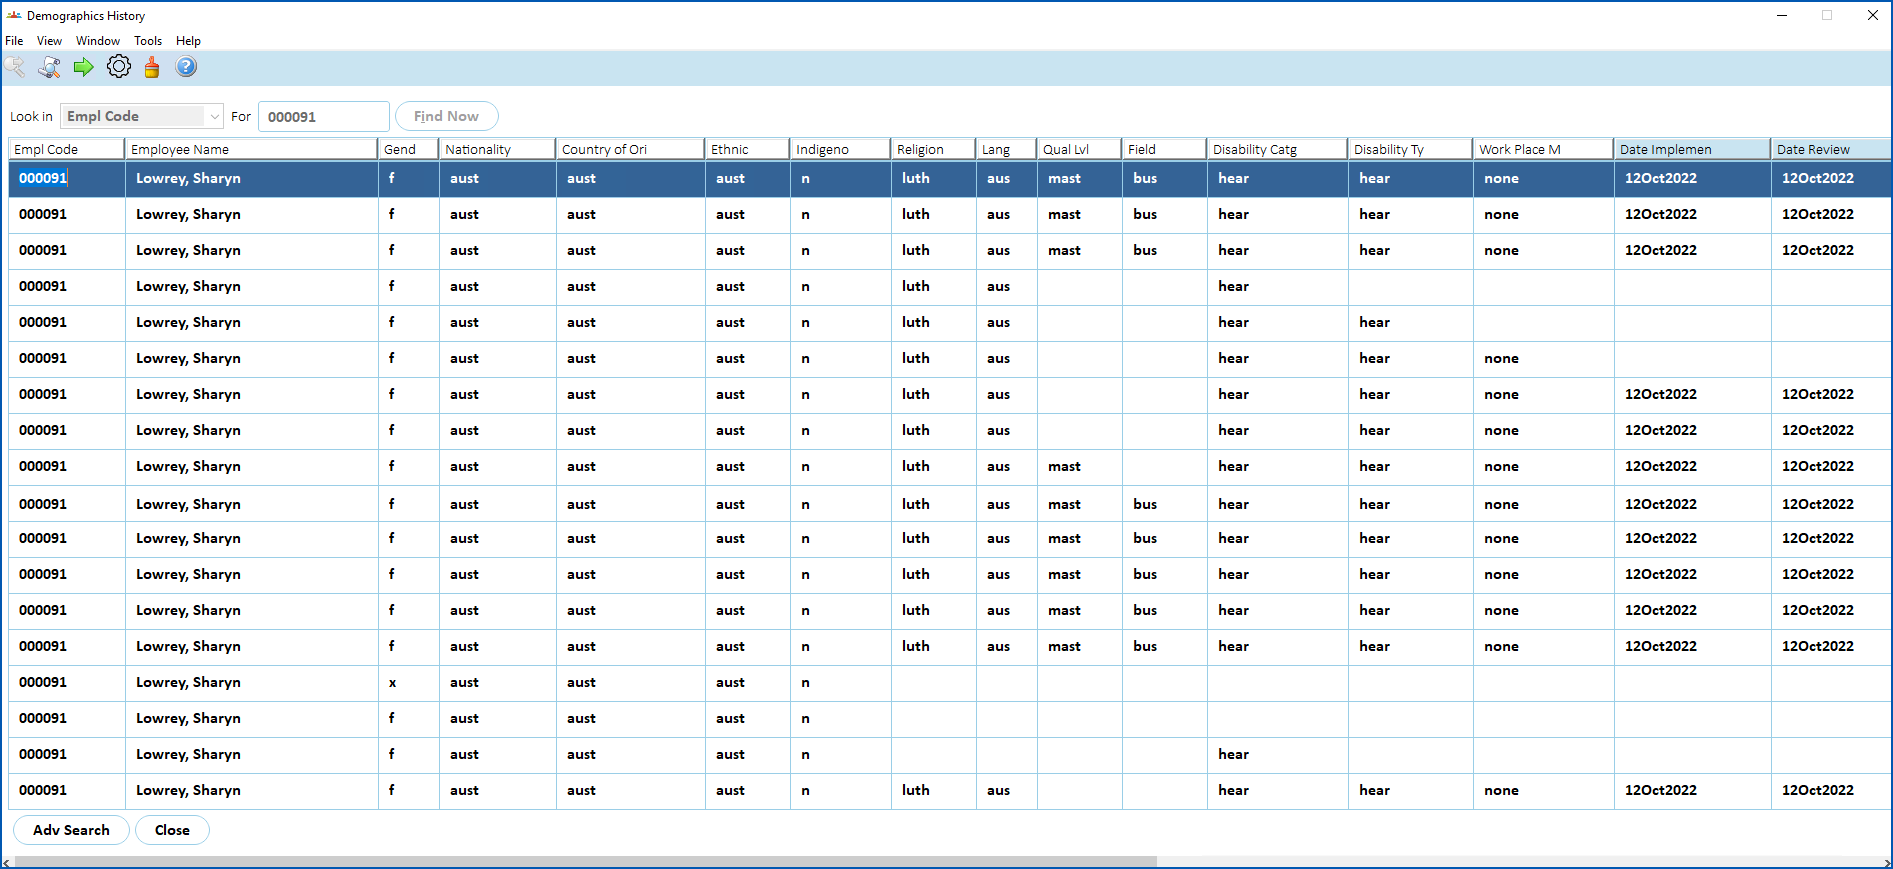
2. At the **Demographics History** summary screen, find an employee record. EmpowerHR lists the history.
1. If you want to:
1. take a copy of all the demographics history for the selected employee, right-click any column. At the **Copy Table** pop-up, make your selections, and then click **Copy to Clip Board**. You can paste the copied data into a spreadsheet to create a report.
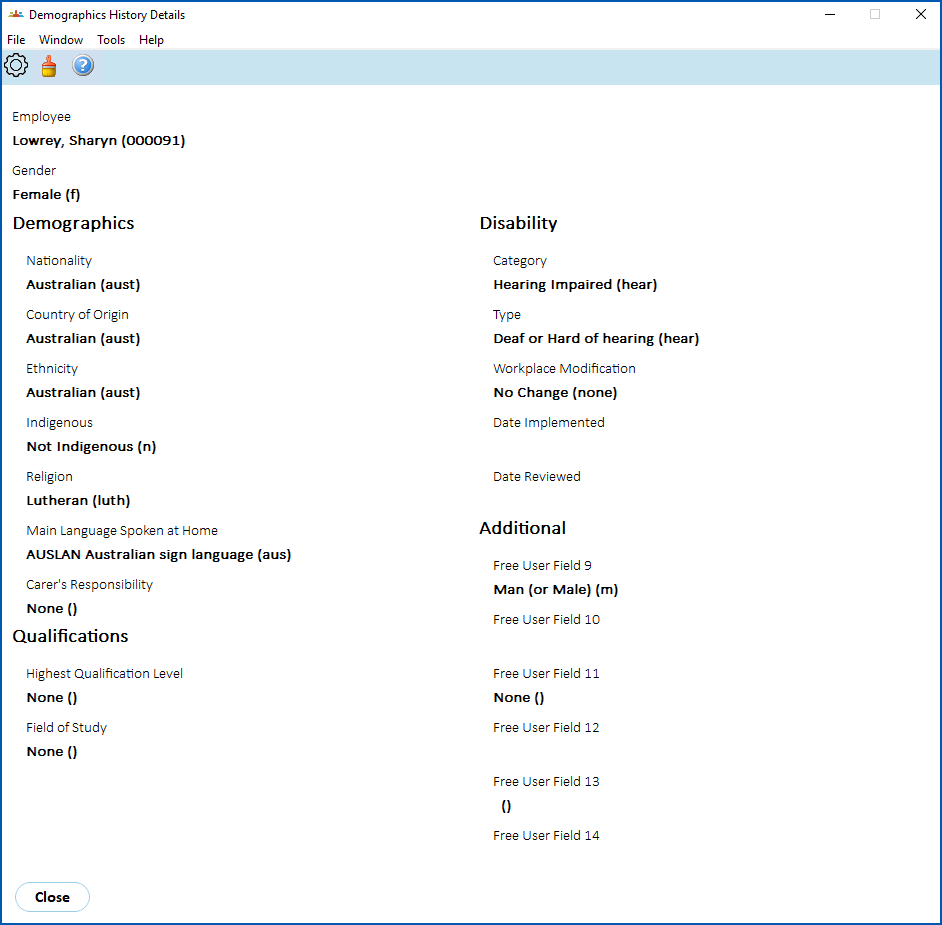
2. view a particular item in the history of the selected employee, then click **N** **ext Level**. EmpowerHR displays the **Demographics History Details** for the item you selected.
## Create ad hoc demographics reports 
All demographics data elements are available in the Query Manager so you can run your own ad hoc reports.
To create an ad hoc demographics report:
1. Go to **Enquiries** > **Query Manager**.
2. At **Query Manager**, in the **Catalogue** list on the **Data** tab, expand **Employees**, **Personal Information**, and then **Demographics** **Information** to see the demographics data elements.
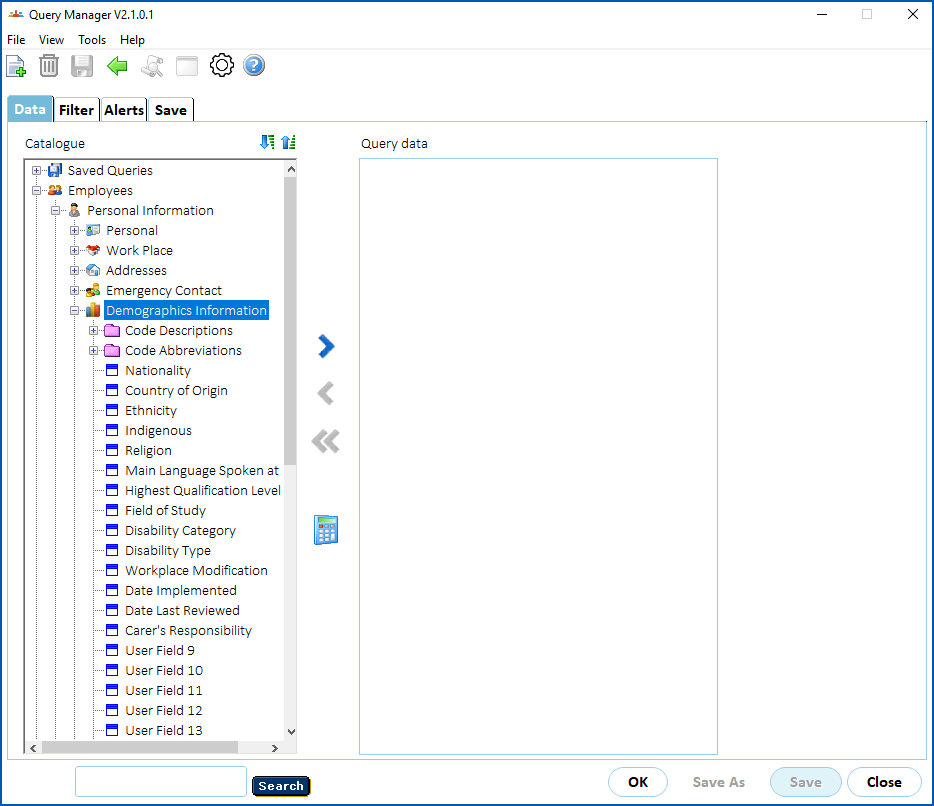
1. Select a data element, and then click **Move Right** to transfer it to the **Query data** panel. Repeat this step until you have transferred all the data elements you want to report on.
2. Apply any sorting or filtering you require.
3. Save the query if you want to use it again.
4. Click **OK** to see the report results.
For more information, see [create reports with query manager](/articles/ehr-user-guide/create-reports-with-query-manager).
## Run WACA interface reporting 
If you are a public sector organisation required to report workforce information through the Workforce Analysis and Collection Application (WACA), EmpowerHR allows you to report on enhanced demographics information via the WACA/MOIR interface in the usual way with:
WACA = Workforce Analysis and Collection Application
MOIR = Minimum Obligatory Information Requirements
* job code **xwacapre** (pre-process), *and*
* job code **xwacarep** (interface)
| Next topic
[Employee gender diversity reporting](/articles/ehr-user-guide/employee-gender-diversity-reporting) |
| --- |
© 2023 Fusion5. All rights reserved.