---
title: "Create and update transaction rules"
id: "create-and-update-transaction-rules"
project: "EHR User Guide"
url: "https://help.cloud5.com.au/articles/ehr-user-guide/create-and-update-transaction-rules"
updated: 2026-10-19T00:54:28Z
---
# Create and update transaction rules
There are three different types of transaction rules:
| default values (type d) | Default values are the values provided as one or more options for the user to choose from in a field. If you set an option as **y** (yes), the other default option should be set as **n** (no). |
| --- | --- |
| validation checks (type v) | Validation checks mostly occur when the user exits a field. They are similar to [field error severity](/articles/ehr-user-guide/field-error-validation) level settings. You can select the messages you want to display when validation fails, and set the error severity. |
| process controls (type p) | Process controls allow you to define how EmpowerHR behaves, for example, you can set a field to Display Only. |
The combination of these transaction rules acts like a checklist to help users complete fields and accurately record a movement.
There are two screens available for managing transaction rules:
* **Rules By Field** - where you can change the transaction rules associated with a specific field, for all movement reasons
* **Rules By Frame/Function** - where you can change the transaction rules for all fields for a specific movement reason. This is the preferred screen for creating a new set of transaction rules.
Create a transaction rule
In examples shown in the following instructions, we use the **Rules By Frame/Function** screen to add a new set of transaction rules to the Employee Conditions Change screen for the movement reason called **cntr** (new contract).
To create a transaction rule:
1. Go to **Administration** > **Screen Management** > **Transaction Rules** > **Rules By Frame/Function**.
2. At the **Rules By Frame/Function**summary screen:
* select **Move** (movement code) from the**Look in** dropdown list
* enter the movement code in the **For** field (for example, **cond**), and then click **Find Now**
1. The results are displayed.
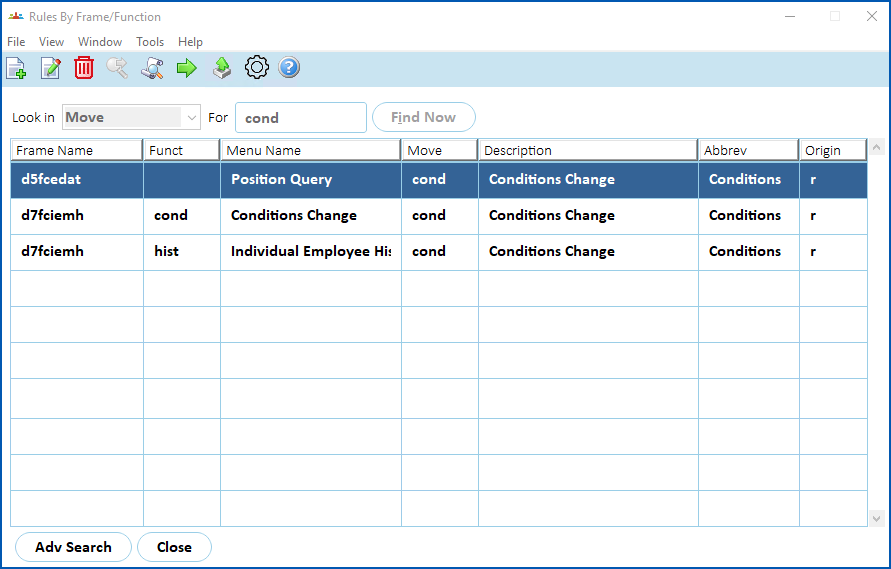
|  | **What do the codes in the Origin column mean?**
The codes are:
- r = the rule is installed with EmpowerHR (these are default rules that can be changed but not removed)
- u = the rule is created and controlled by a user
|
| --- | --- |
1. Click **New**.
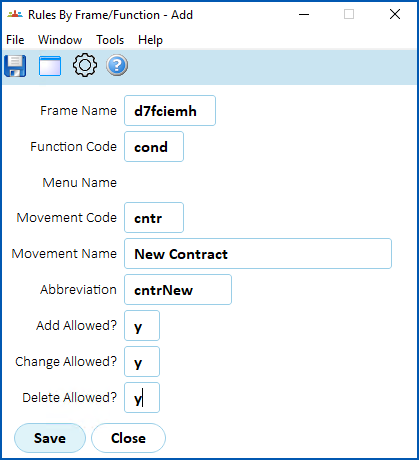
2. At the **Rules By Frame/Function** detail screen, complete the fields using the following table as a guide.
| **At this field...** | **Do this...** |
| --- | --- |
| Frame Name
Function Code | Click **Window**, select and double-click the frame to add the frame name and function code to the fields. For example, **Conditions Change** (d7fciemh). |
| Movement Code | Click **Window**, select and double-click the movement code to add it to the field. For example, **cntr**(the movement reason code you created earlier). |
| Movement Name | Enter a movement name (up to 30 characters). For example, **New Contract**. |
| Abbreviation | Nothing. The **Abbreviation** field is automatically populated when you select a code at the **Movement Code** field. |
| Add Allowed? | Enter **y** (yes) to allow users to add or change the movement in different screens.
Otherwise, leave the default value of **n** (no).
The **Add Allowed?** option allows users different functional access for a movement code. For example:
- one user might be able to add a movement (as they have access to the screen allowing add), while another user may not.
- both users could be able to change the movement where it is allowed against another screen.
|
| Change Allowed? | Enter **y (**yes) to allow changes to the movement in this screen
Otherwise, leave the default value of **n** (no). |
| Delete Allowed? | Enter **y** (yes) to allow the movement to be deleted in this screen
Otherwise, leave the default value of **n** (no). |
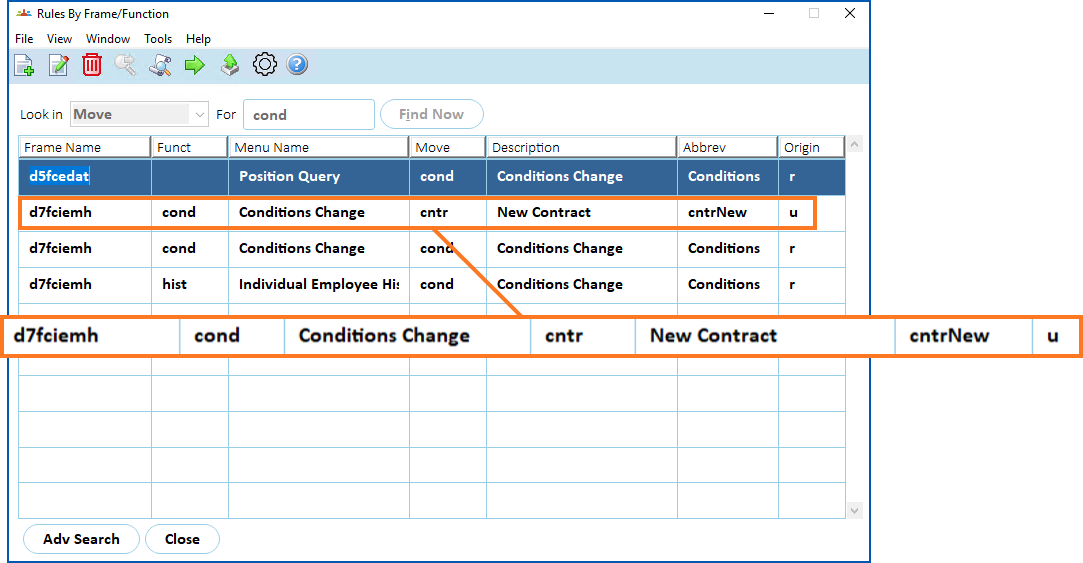
1. Click **Save**. The **Rules By Frame/Function**summary screen displays the new movement reason with **u** (user-added) in the **Origin** column.
## Update a transaction rule
Typically, you use the:
* **Rules By Field** screen****to update a particular field and change the transaction rules for that field across a number of movement reasons
* **Rules By Frame/Function** screen to update the transaction rules for a number of fields on a particular movement reason
### Use the rules by field screen
To use the **Rules By Field** screen to update a transaction rule:
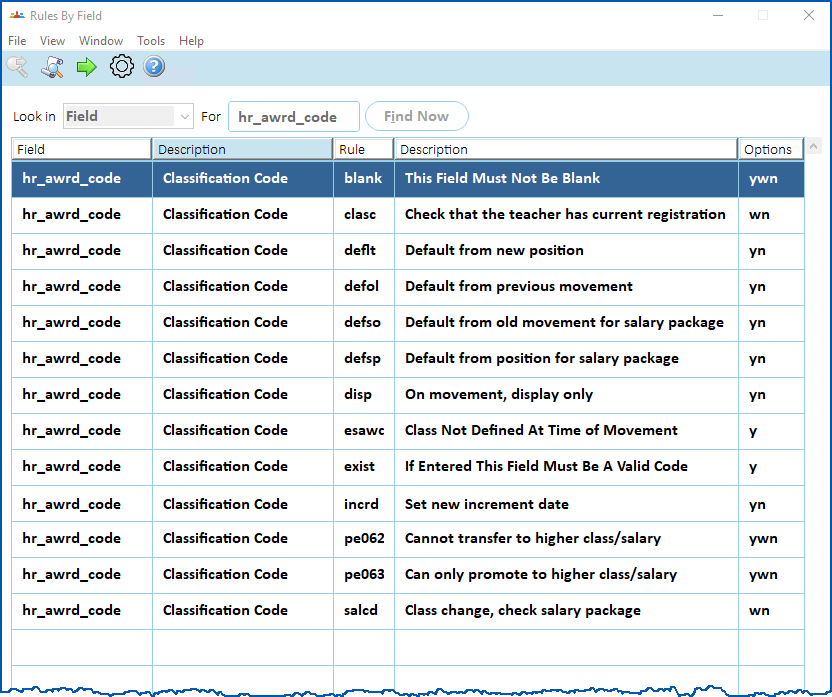
1. Go to **Administration**> **Screen Management** > **Transaction Rules** > **Rules By Field**.
2. At the **Rules By Field**summary screen:
* select **Field** from the**Look in** dropdown list
* enter the field name in the **For** field (for example, **hr\_awrd\_code**), and then click **Find Now**
1. The results are displayed.
1. Select the rule you want to work on, and then click **Next Level**.
2. The **Field Options** screen displays the settings for each movement reason for the rule.
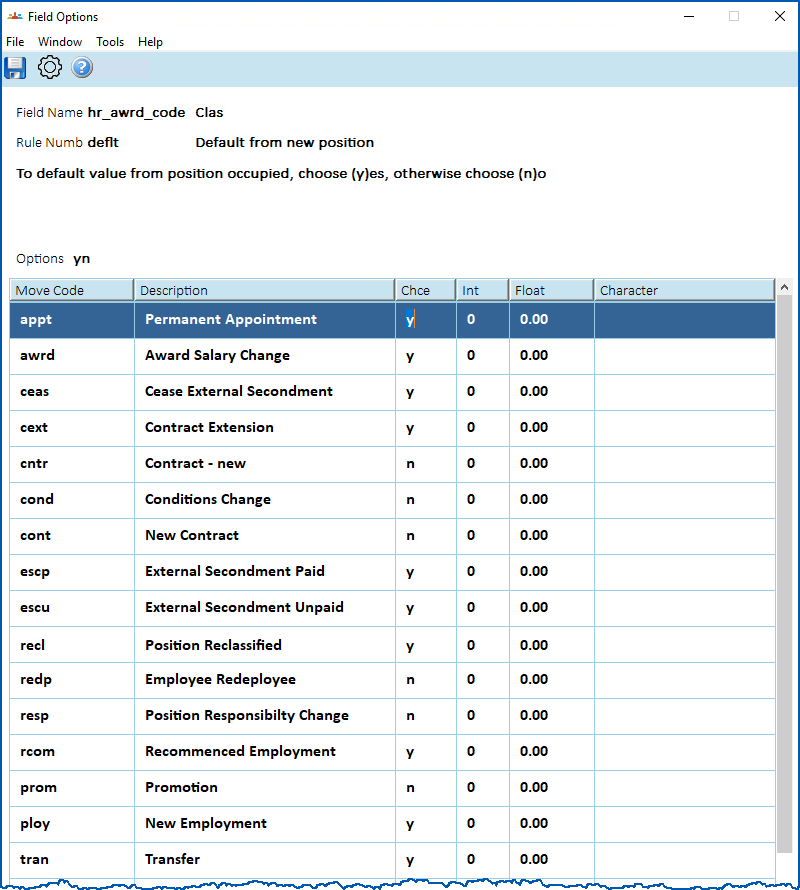
1. Select a field, and then make your changes using the following table as a guide.
| **At this field...** | **Do this...** |
| --- | --- |
| Move Code | Nothing. This column shows the movement code. |
| Description | Nothing. This column shows the movement code description. |
| Chce (choice) | Enter a choice. (You can find the available **Options** on the **Rules By Field** screen). |
| Int (integer) | Enter a default value or checking value, if required. |
| Float (floating point) | Enter a default value or checking value, if required. For example, **100.00**. |
| Character | Enter text, for example, the default characters or checking values for the rule. |
1. Click **Save**.
### Use the rules by frame/function screen
To use the **Rules By Frame/Function** screen to update a transaction rule:
1. Go to **Administration**> **Screen Management** > **Transaction Rules** > **Rules By Frame/Function**.
2. At the **Rules By Frame/Function**summary screen:
* select an option from the **Look in** dropdown list (for example, **Frame Name)**
* enter the search criteria in the **For** field (for example, **d7fciemh**), and then click **Find Now**
1. The results are displayed.
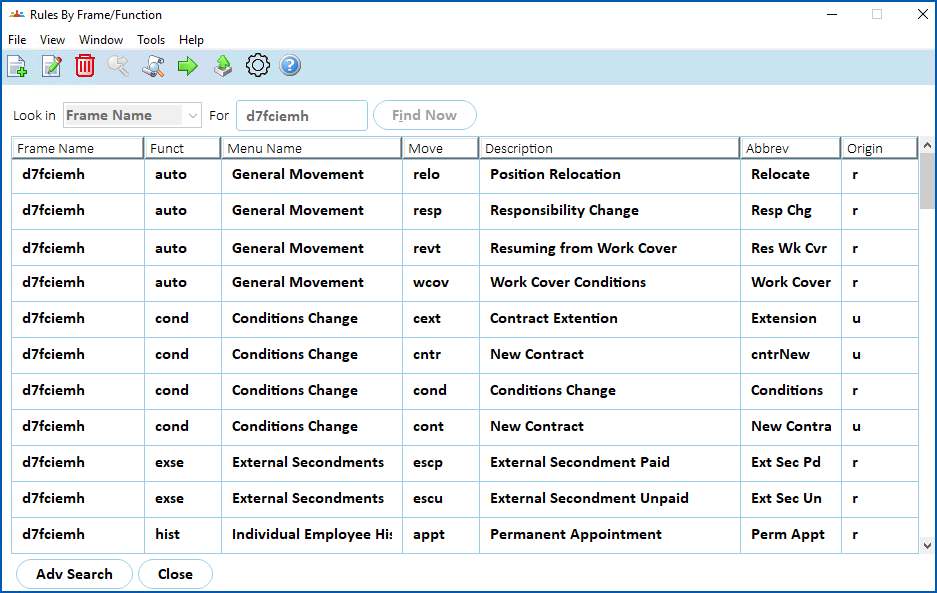
1. Select the rule you want to work on, and then click **Next Level**.
2. The **Field Display** screen displays. Click **Find Now** to display a list of all fields.
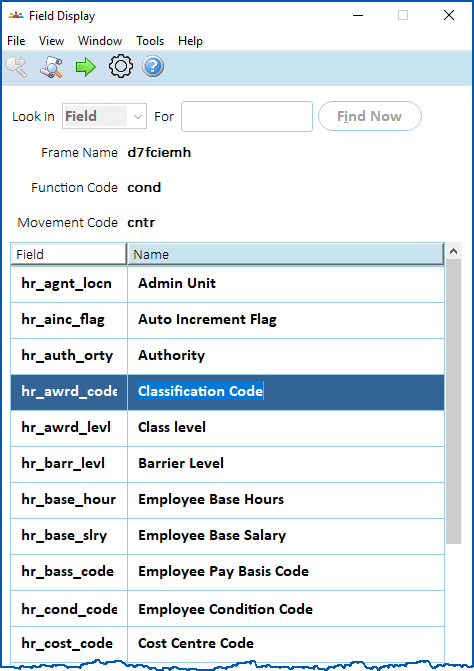
1. Select the field you want to work on, and then click **Next Level**.
2. The **Field Options** screen displays. Make your changes using the following table as a guide.
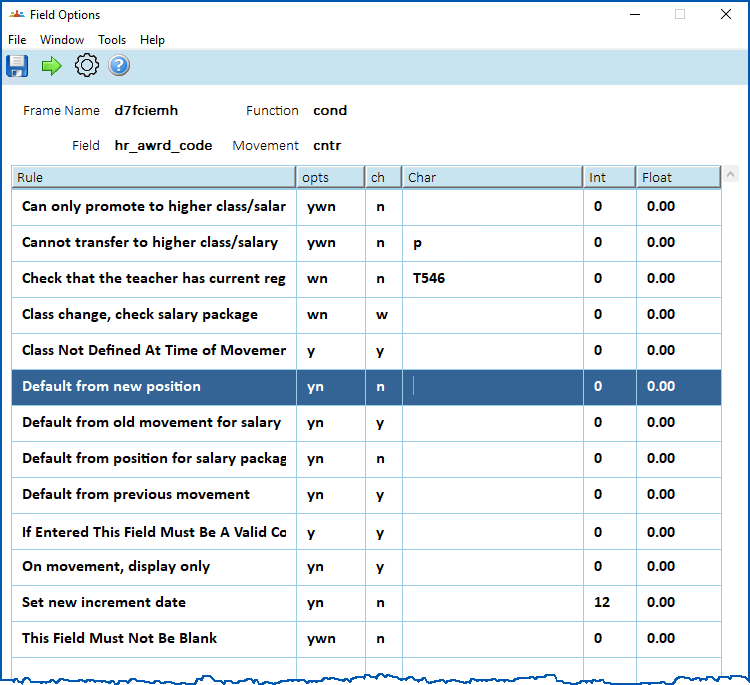
| **At this field...** | **Do this...** |
| --- | --- |
| Rule | Nothing. This column shows the rule description. |
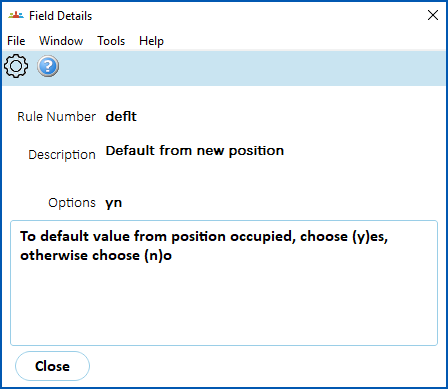
| Opts (options) | Nothing. This column shows the available options.
Select a rule, and then click **Next Level** to see an explanation of the available options. For example:
 |
| Ch (choice) | Change the choice (option), if required. |
| Character | Enter text, for example, the default characters or checking values for the rule. |
| Int (integer) | Enter a default value or checking value, if required. |
| Float (floating point) | Enter a default value or checking value, if required. For example, **100.00**. |
1. Click **Save**.
| Next topic
[Additional reference screens](/articles/ehr-user-guide/additional-reference-screens) |
| --- |
© 2023 Fusion5. All rights reserved.