---
title: "Create and update account templates"
id: "create-and-update-account-templates"
project: "EHR User Guide"
url: "https://help.cloud5.com.au/articles/ehr-user-guide/create-and-update-account-templates"
updated: 2026-10-19T00:53:10Z
---
# Create and update account templates
## Create an account template
To create an account template:
1. Go to **Administration** > **System Security** > **Account Templates.**
2. At the **Account Templates** summary screen, click **Find Now** to display a list of existing templates.
3. Click **New**.
4. At the **Account Templates** detail screen:
1. enter a code for the template in the **Operator Code** field (between 4 and 10 alphanumeric characters)
2. enter a name for the template in the **Operator Name** field
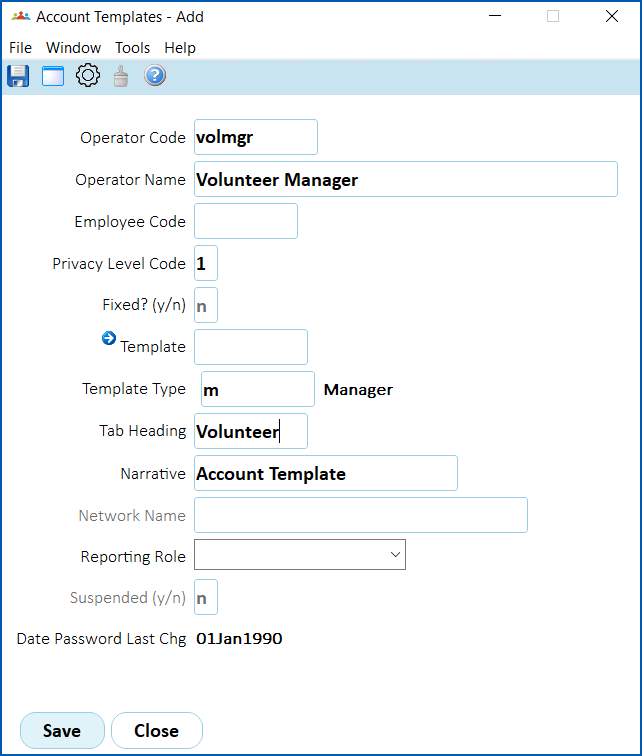
1. Click **Save**.
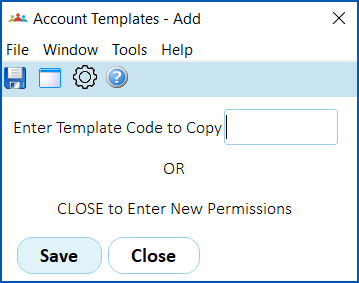
2. At the **Account Templates** summary screen, select the template you created, and then click **Next Level**. The **Account Templates** add pop-up window displays.
1. To:
1. copy an existing template which you can alter as required, click **Window**, find and double-click the template code to add it to the **Enter Template Code to Copy** field. Click **Save** to copy the access permissions. Go to step 8.
2. create a new template from scratch, leave the **Enter Template Code to Copy** field blank and click **Close**. Go to step 9.
2. At the **Account Templates**summary screen, select the template, and then click **Next Level**. The **Account Templates** add pop-up window displays again. Click **Close** (to enter new permissions).
3. The **Account Templates** (available modules) screen displays.
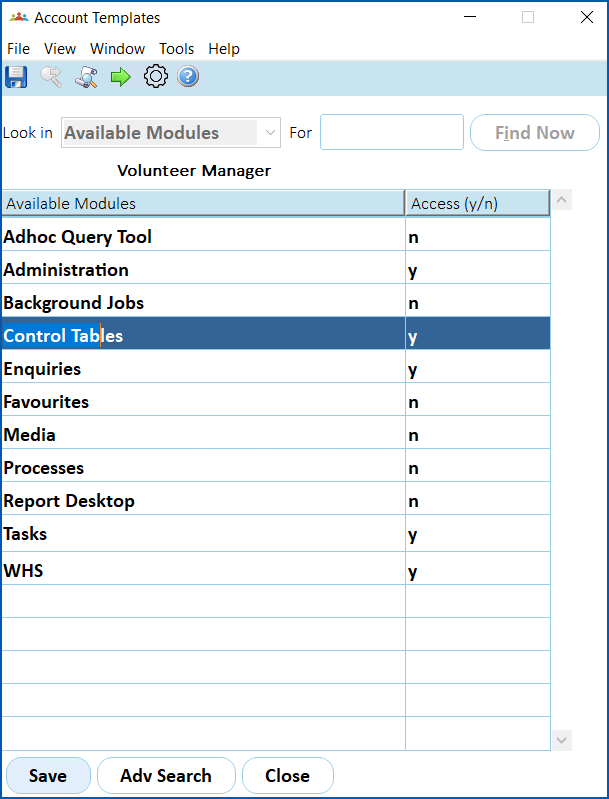
1. Select a module (main menu item) and, if the **Access (y/n)** column shows:
1. **n** (no), change **n** to **y** (yes), and then click **Save**. Go to step 11.
2. **y** (yes), then go to step 11.
2. Click **Next Level** to see a list of lower level menu items The **Account Templates** (menu items) screen displays.
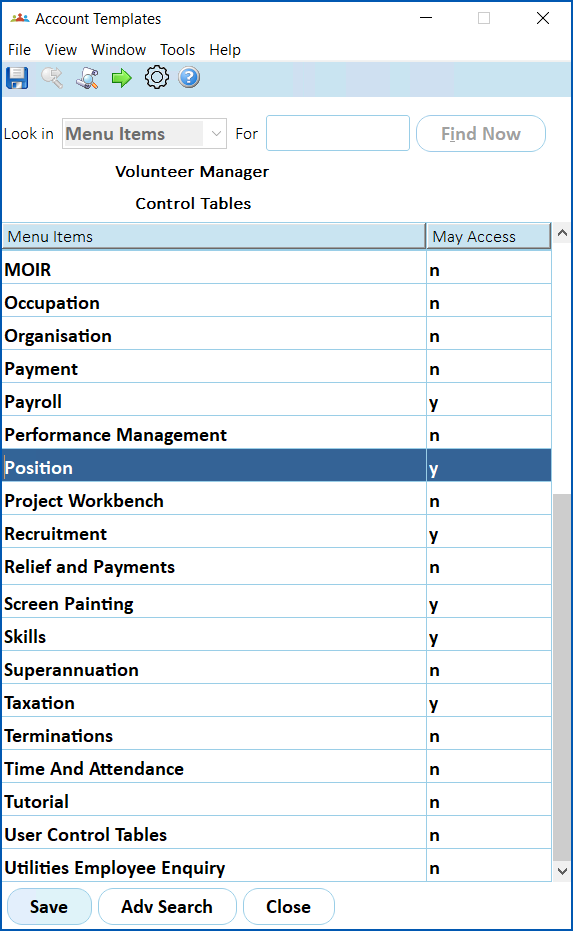
1. Select a menu item, and, if the **May** **Access** column shows:
1. **n**(no), change **n** to **y** (yes), and then click **Save**. Go to step 13.
2. **y**(yes), then go to step 13.
2. Click **Next Level** to see a list of task-related screens.
|  | Next level won't display any information if the menu item doesn't have any task-related screens, for example, the **Processes** menu. |
| --- | --- |
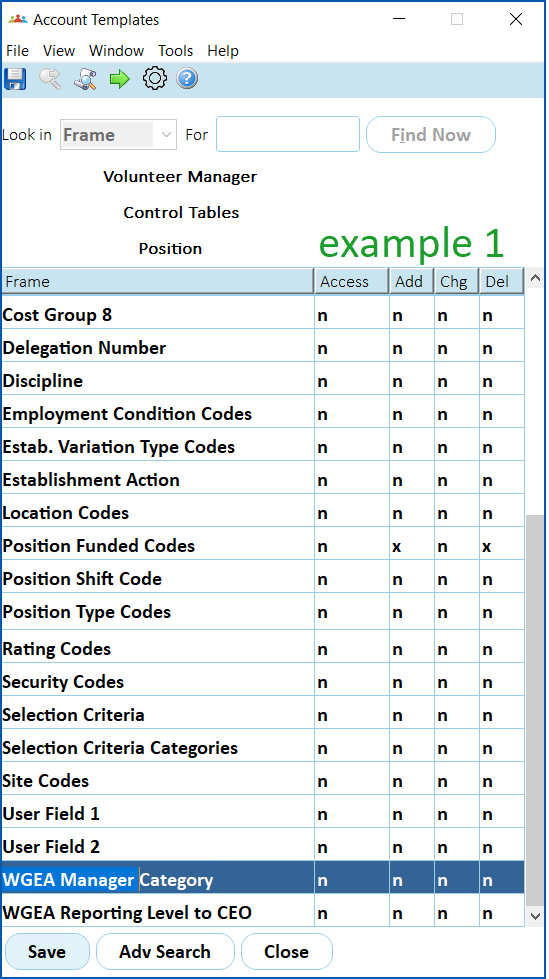
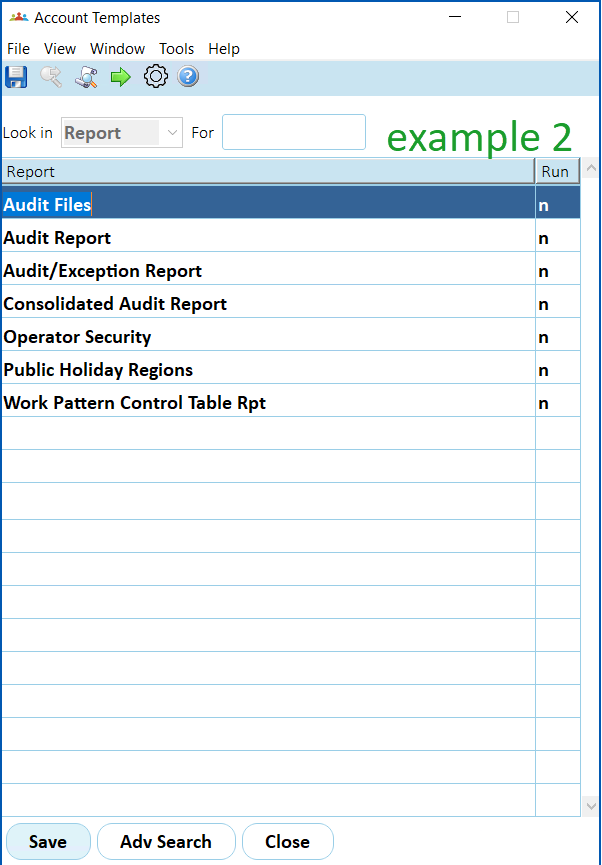
1. The access options listed against each task-related screen depends on the screen you selected. Here are two examples. The first shows four access options (**Access**, **Add**, **Chg**, **Del**) for the **Positions** control table screens, while the second example shows only one access option (**Run**) for the **Audit** background job screens as these screens are used just for running reports.
1. Select a screen, and then enter **y** (yes) to allow, or **n** (no) to not allow, users to use the screen. For example:
* view the screen (**Access**)
* add a record (**Add**)
* change a record (**Chg**)
* delete a record (**Del**)
* run a report (**Run**)
1. Click **Save**.
2. Repeat this procedure, starting from step 6, until you've provided all the screen access required for the template.
3. Close all the **Account Templates** screens.
## Update an account template
The most common reasons for updating an account template are:
* users' duties have changed and they require a change in access
* screen functionality has been added or changed in a system release
Whenever a template is changed, you need to process the changes so they are passed onto the users assigned to that template. The following shows how to make and process changes to a template.
To update an account template:
1. Go to **Administration**> **System Security**> **Account Templates.**
2. At the **Account Templates**summary screen, find and select the template you want to update.
3. Click **Next Level**. The **Account Templates**add pop-up window displays.

1. Click **Close**(to enter new permissions). The **Account Templates** (available modules) screen displays.

1. Select a module (main menu item), and make sure the **Access (y/n)** column is set to **y** (yes).
2. Select a menu item, make changes to the option in the **May** **Access** column, and then click **Save**.
3. If you want to change any task-related screens, click **Next Level** to see a list of options.
|  | Next level won't display any information if the menu item doesn't have any task-related screens, for example, the **Processes** menu. |
| --- | --- |
1. The access options listed against each task-related screen depend on the screen you selected. Here are two examples. The first shows four access options (**Access**, **Add**, **Chg**, **Del**) for the **Positions**control table screens, while the second example shows only one access option (**Run**) for the **Audit**background job screens as these screens are used just for running reports.
 
1. Select a screen, and then enter **y** (yes) to allow, or**n** (no) to not allow, users to:
* view the screen (**Access**)
* add a record (**Add**)
* change a record (**Chg**)
* delete a record (**Del**)
* run a report (**Run**)
1. Click **Save**.
2. Close each of the **Account Templates** screens until EmpowerHR displays the list of operators.
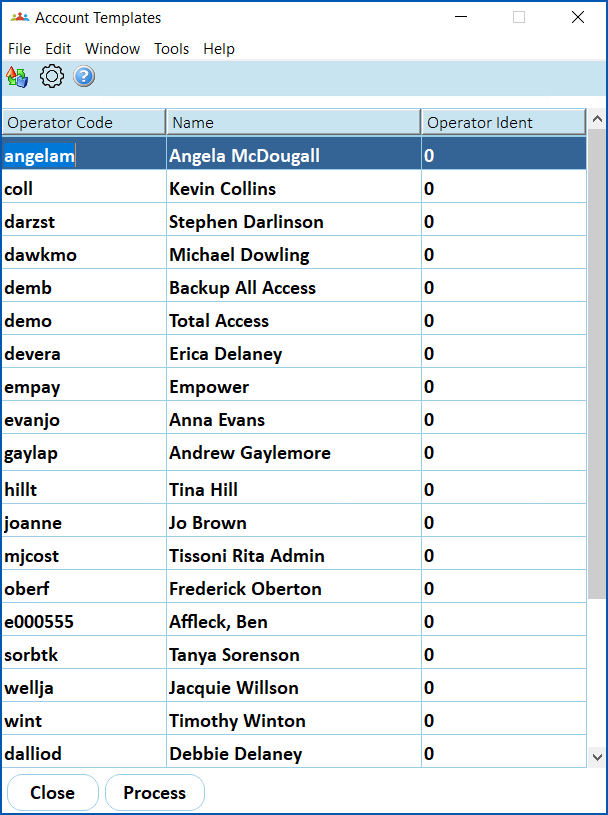
1. Click **Process** to copy the changes to operators whose access is based on the template. The system displays Copying Operator Permissions.
|  | Processing changes is necessary. If not processed, users remain assigned to the template but their access is no longer aligned to the template. If you mistakenly skip the processing step:
- Select the template and click Next Level.
- At the Account Templates add pop-up window, click Close.
- At the Account Templates (available modules) screen, click Close.
- When EmpowerHR displays the list of operators, complete the rest of the procedure starting at step 13.
|
| --- | --- |
1. At the Copying Operator Permissions message, click OK.
2. When the process is complete, at the Operator Permissions Copied message, click OK.
3. Click Close.
4. Log out of EmpowerHR and then log back in to see the changes take effect, for example, a new or changed menu item.
| Next topic
[Assign users to account templates](/articles/ehr-user-guide/assign-users-to-account-templates) |
| --- |
© 2023 Fusion5. All rights reserved.