---
title: "Add a new employment"
id: "add-a-new-employment"
project: "EHR User Guide"
url: "https://help.cloud5.com.au/articles/ehr-user-guide/add-a-new-employment"
updated: 2026-10-19T00:53:13Z
---
# Add a new employment
To add a new employment, the employee must have at least one existing employment. Typically, the existing employment is part-time to accommodate the additional hours of new employment.
To add a new employment: 
1. Go to **Tasks** > **Employees** > **Position Movement** > **New Employment**.
2. At the **New Employment**summary screen, in **Employee Code**:
1. enter the code if you know it, *or*
2. click **Window**, find and double-click the code to add it to the field
3. Press **Tab**. EmpowerHR displays all the employee's current records.
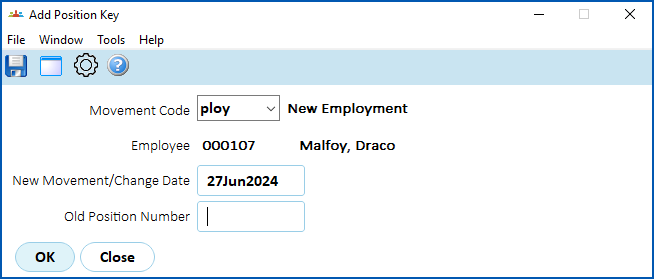
4. Click **New**. The **Add Position Key** screen displays. At:
1. **Movement Code**, the **ploy** code displays by default. Press **Tab**.
2. **New Movement/Change Date**, enter the date the new employment is to occur, and then press **Tab**.****
3. **Old Position Number**, you must leave this field blank. (If EmpowerHR does display a number, delete it).
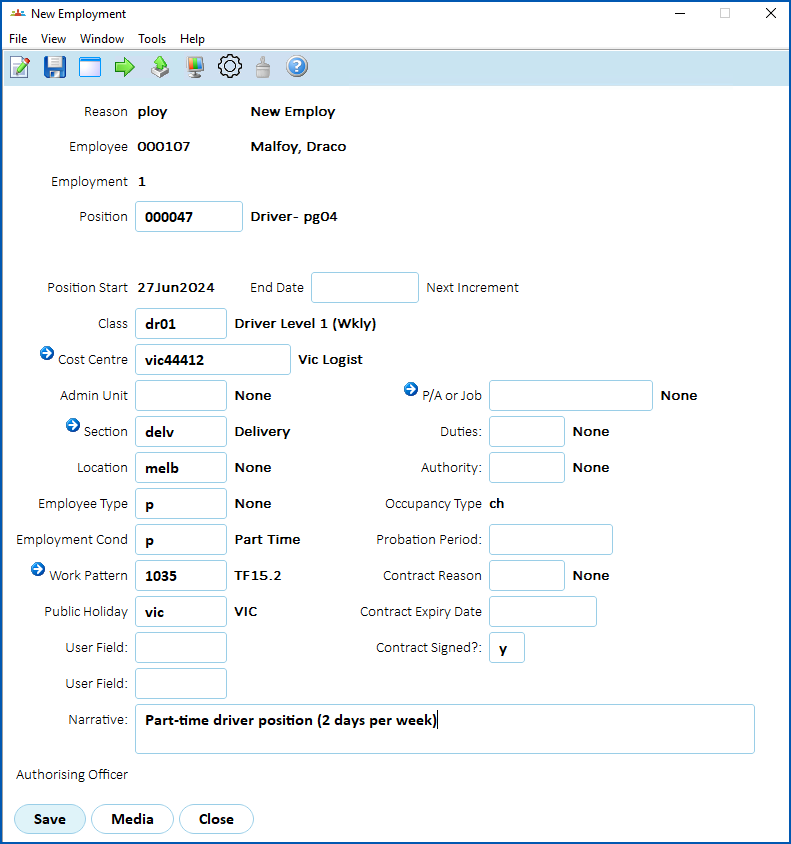
1. Press **Tab**. The **New Employee**detail screen displays.
2. At the **Position** field, enter the new position number, and then press **Tab**. EmpowerHR uses this movement's transaction rules to populate some fields with default values from the position, which you can change.
3. Make any changes as required. For example, you would make sure the **Employment Condition** was set to **p** (**Part Time**).
4. Enter explanatory notes in the **Narrative** field so anyone accessing the record can see at a glance why it was created.
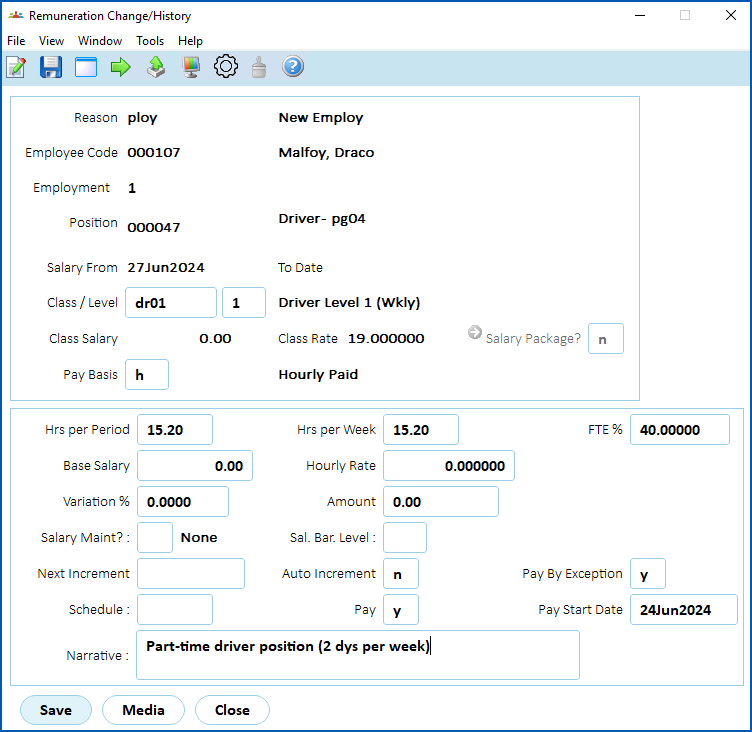
1. Click **Save**. The **Remuneration Change/History**screen displays. Again, the transaction rules apply, determining which fields show default information and which fields you can or must change.
2. Enter all the required data.
3. Enter explanatory notes in the **Narrative** field so anyone accessing the record can see at a glance what happened.
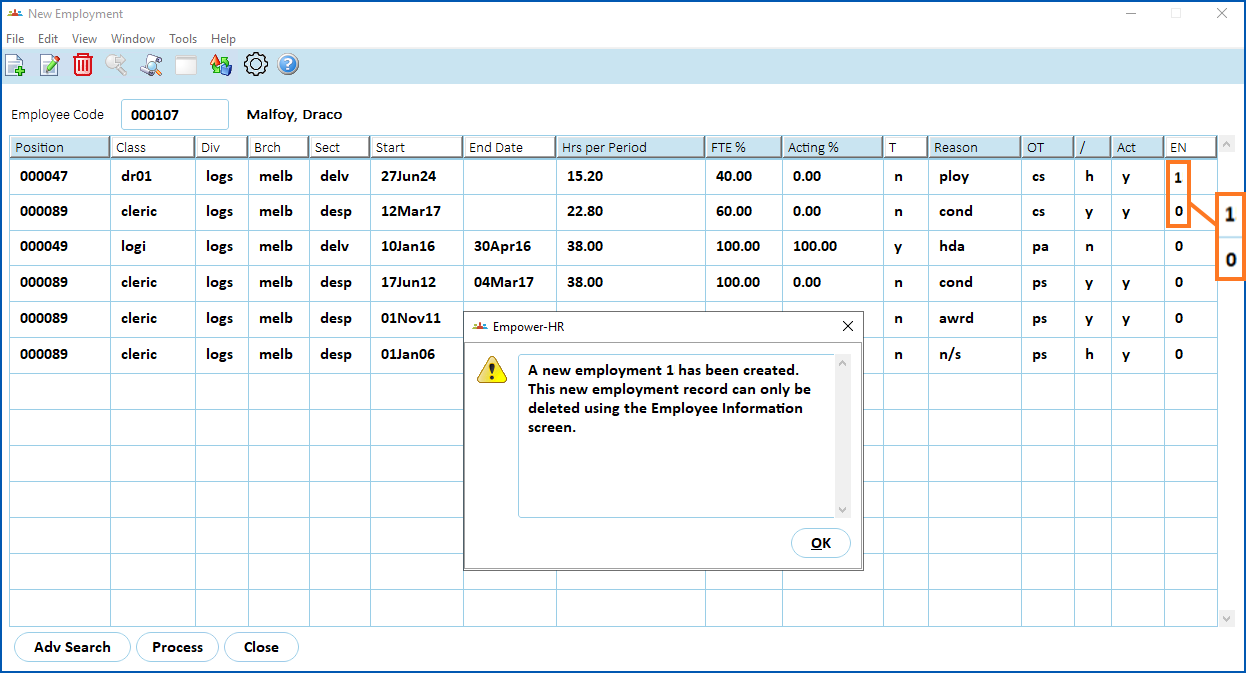
1. Click **Save**. EmpowerHR displays the **New Employment**summary screen, showing the new employment record, and a message confirming the new employment record is created.
|  | In our example, there are now two open-ended substantive records. One is the existing employment**(EN 0)**, and the other is the new employment **(EN 1)**. The new employment record is flagged as a **h** (history) record, not requiring a gather . Also, EmpowerHR does not generate any backpay for a history record.Gathering is an EmpowerHR process used to gather generated pay data; it's where the system flags the appropriate records to be processed/paid in a pay run. |
| --- | --- |
| Next topic
[Add new employment regular allowances and transactions](/articles/ehr-user-guide/add-new-employment-regular-allowances-and-transactions) |
| --- |
© 2023 Fusion5. All rights reserved.