---
title: "Action a time & claims request"
id: "action-a-time-claims-request"
project: "EHR User Guide"
url: "https://help.cloud5.com.au/articles/ehr-user-guide/action-a-time-claims-request"
updated: 2026-10-19T00:53:42Z
---
# Action a time & claims request
## Action a time and claims payment request
You can action a time and claims payment request via your:
* Time and Claims action to do list (as shown in the following instructions), *or*
* [Time and Claims catalogue](/articles/ehr-user-guide/create-and-submit-a-time-claims-request/a/tcmss) (the actions available to you are the same - accept, redirect, reject, return)
To action a time and claims (payment) request:
1. When you have requests to action, a **Time and Claims**alert appears in your **Actions To Do** box.
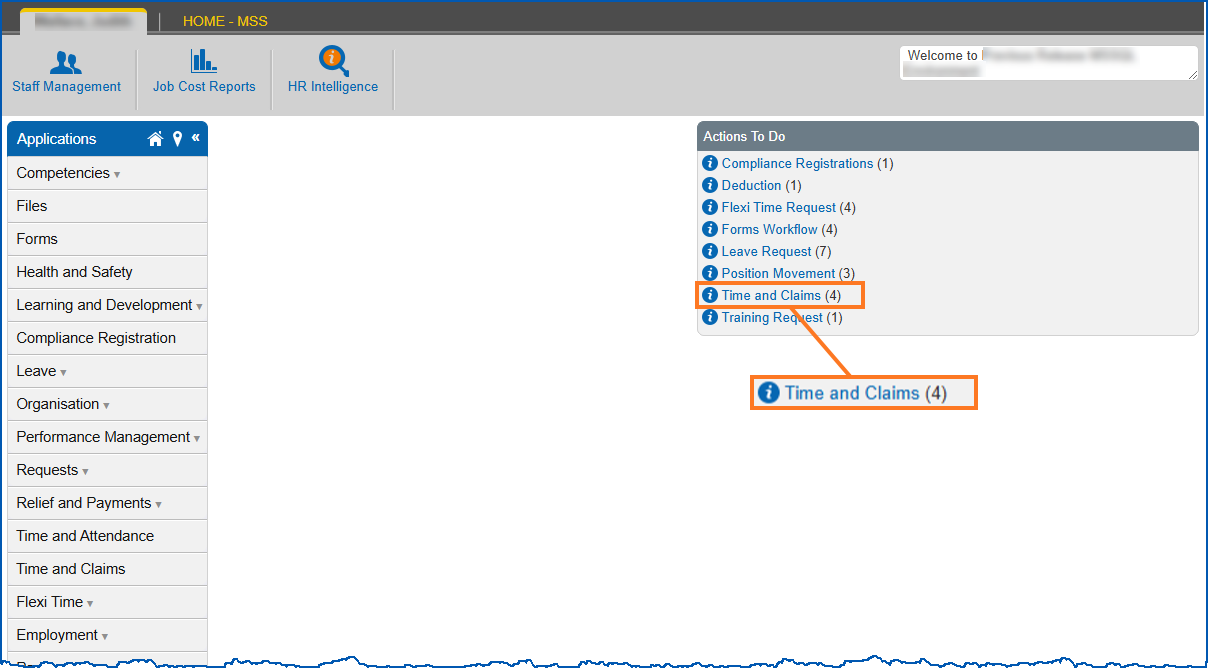
1. Click the **Time and Claims**alert. The **Actions To Do** list displays.
1. At a request row, click **Actions** and then select **Edit** from the menu.
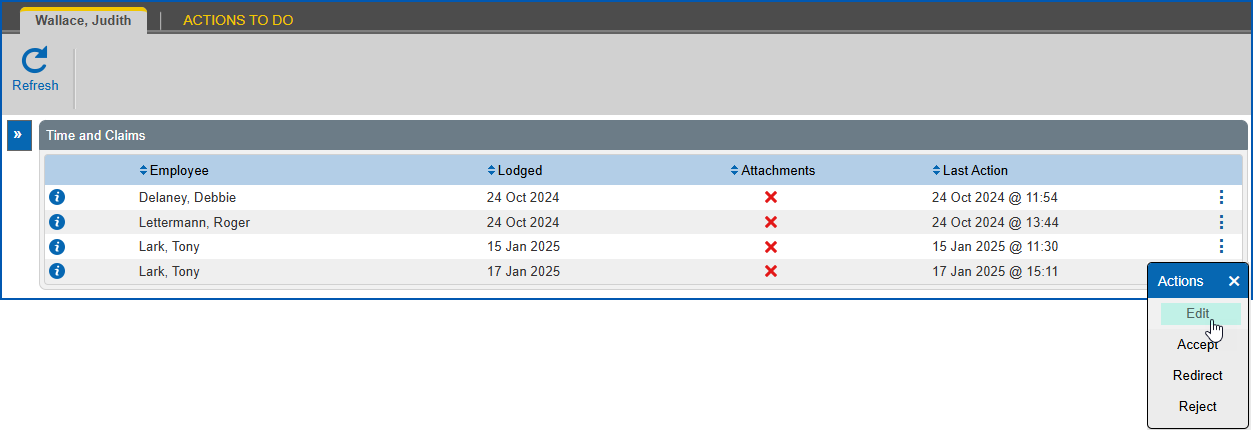
1. The **Process Claims Request** **For...** screen displays.
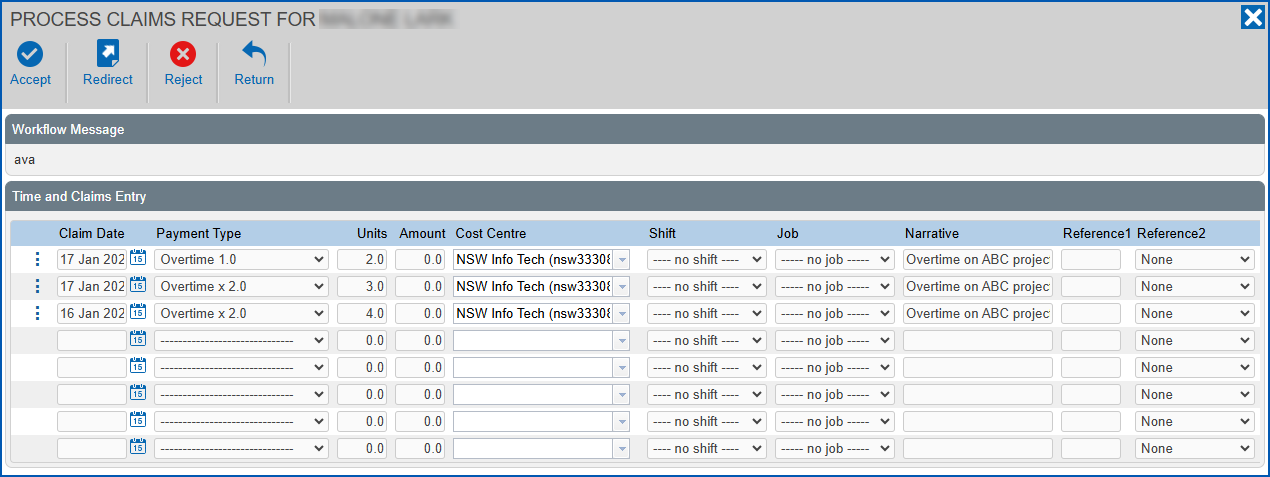
1. Review the data and then complete or update it, if required.
2. If there are attachments, you can click **Attachments** and review the attached documents.
3. Determine whether to accept, redirect, reject, or return the request, and then use the following (relevant) instructions to complete the action.
### Accept the time and claims payment request
To accept (approve) the request:
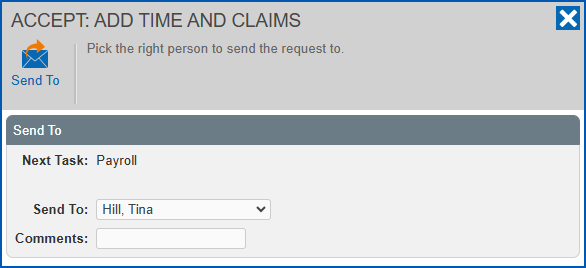
1. Click **Accept**. How the approval workflow is set up in your organisation determines whether the **Accept...**dialog box displays (for example, to send the approved request to your payroll department, etc), or the request is automatically finalised.
2. If the **Accept...** dialog box:
1. *does* display, then go to step 3.
2. does *not* display, then finalise the request when EmpowerHR prompts you. No further action is required.
3. At the **Accept...** dialogue box:
1. select the person to send the approved request to from the **Send To** dropdown list
2. enter **Comments**, if you wish
3. click **Send To**
1. The:
1. request is removed from your**Actions To Do** list
2. alert for the request is removed from your Actions To Do box
[+] [Show more about what happens next](javascript:void%280%29)
[-] [Hide what happens next](javascript:void%280%29)
The finalisation process creates a pay data entry record (if the [installation option](/articles/ehr-user-guide/set-installation-preferences-time-claims)**[lvrq](/articles/ehr-user-guide/set-installation-preferences-time-claims)** is set to **n**).
Payroll/system administrator users may change, delete/add rows in the request via the pay data entry screen in the desktop, and the most recent record is only available from there.
While the changes don't get reflected in the original claim in the employee’s **Time and Claims** catalogue in self service, the time and claims dashboard in MSS does reflect the latest data.
### Redirect the time and claims payment request
To redirect the request to another manager for their action:
1. Click **Redirect**.
2. At the **Redirect...**dialogue box:
1. select the manager you want to redirect the request to from the **Send To** dropdown list
2. enter **Comments**, if you wish (for example, the reason why you are redirecting the request)
3. click **Send To**

1. The:
1. request is removed from your **Actions To Do** list
2. alert for the request is removed from your Actions To Do box and appears in the redirected manager's **Actions To Do** box
### Reject the time and claims payment request
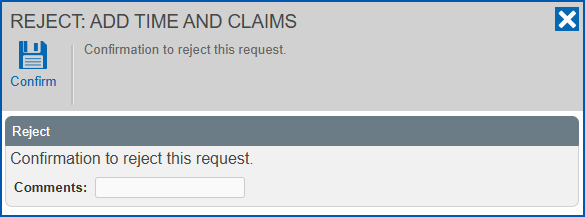
To reject the request:
1. Click **Reject**.
2. At the **Reject...**dialogue box:
1. enter **Comments**, if you wish (for example, the reason why you are rejecting the request)
2. click **Confirm**
1. The:
1. request is removed from your **Actions To Do** list
2. alert for the request is removed from your Actions To Do box
3. employee is notified
### Return the time and claims payment request
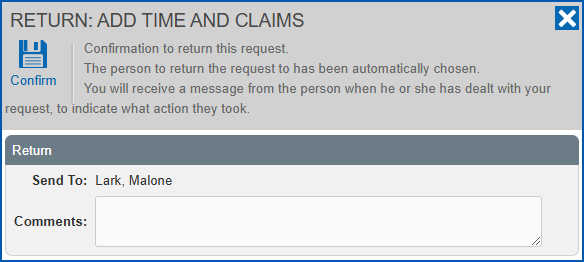
To return the request (when, for example, you require more details in the request):
1. Click **Return**.
2. At the **Return...**dialogue box:
1. enter **Comments**, if you wish (for example, the reason why you are returning the request)****
2. click **Confirm**
1. The:
1. request is removed from your **Actions To Do** list
2. alert for the request is removed from your Actions To Do box
3. request is returned to the last person who handled it to add or change details and re-submit the request for approval
| Next topic
[Your time & claims dashboard](/articles/ehr-user-guide/your-time-claims-dashboard) |
| --- |
© 2023 Fusion5. All rights reserved.